Extra Credit 2 - Virtualization
What You Will Learn
Students who complete this extra credit assignment will learn:
- How virtualization works in practice
- How to create and manage Virtual Machines
- How to install Debian without a desktop environment
- How to install desktop environments manually using
tasksel - Practical differences between Linux desktop environments such as GNOME, KDE, XFCE, Cinnamon, MATE, LXDE, and LXQt
- How snapshots work in virtualization software
- How to revert a Virtual Machine to a previous state
Windows Host - Option 1
- Using Distrowatch, find a Linux Distribution based on Debian. Use the following filters:
| Filter | Value |
|---|---|
| OS TYPE | Linux |
| Distribution Category | All |
| Country of Origin | All |
| Based on | Debian (any branch) |
| Desktop interface | All |
| Architecture | x86_64 |
| Package format | All |
| Release model | All |
| Install media size | All |
| Install method | All |
| Multi-language support | All |
| Init software | All |
| Status | Active |
- Pick one of the distributions and download its ISO file from the distribution’s home page.
- Create a Virtual Machine and install the distribution. You may need to troubleshoot or find a tutorial online.
- After installing the distribution, take a screenshot of the Virtual Machine showing at least one terminal window with the output of the command:
uname -a
Windows Host or macOS Host - Option 2 Trying out different desktop environments
Option 2 is more advanced and may require troubleshooting. If you are a macOS user, you may create another Debian Virtual Machine using a different desktop environment.
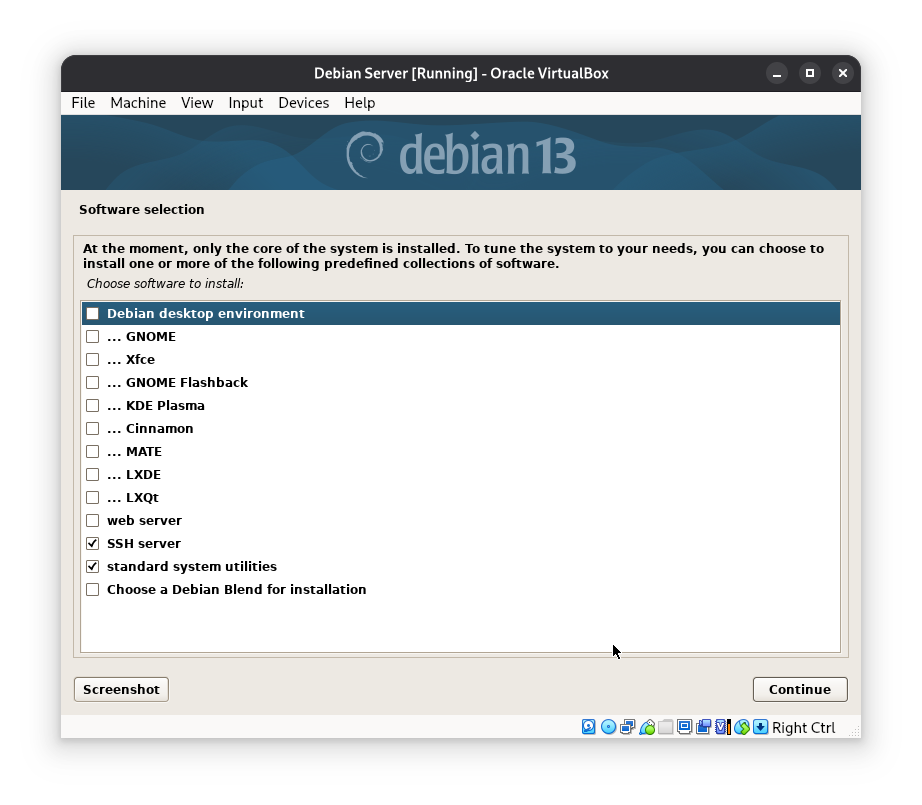
- Create a new Virtual Machine using the same configuration as the Lab 2 virtual machine and install Debian WITHOUT a desktop environment. That means that when you reach the step in the screenshot below, you need to make sure the only options selected are (options here)
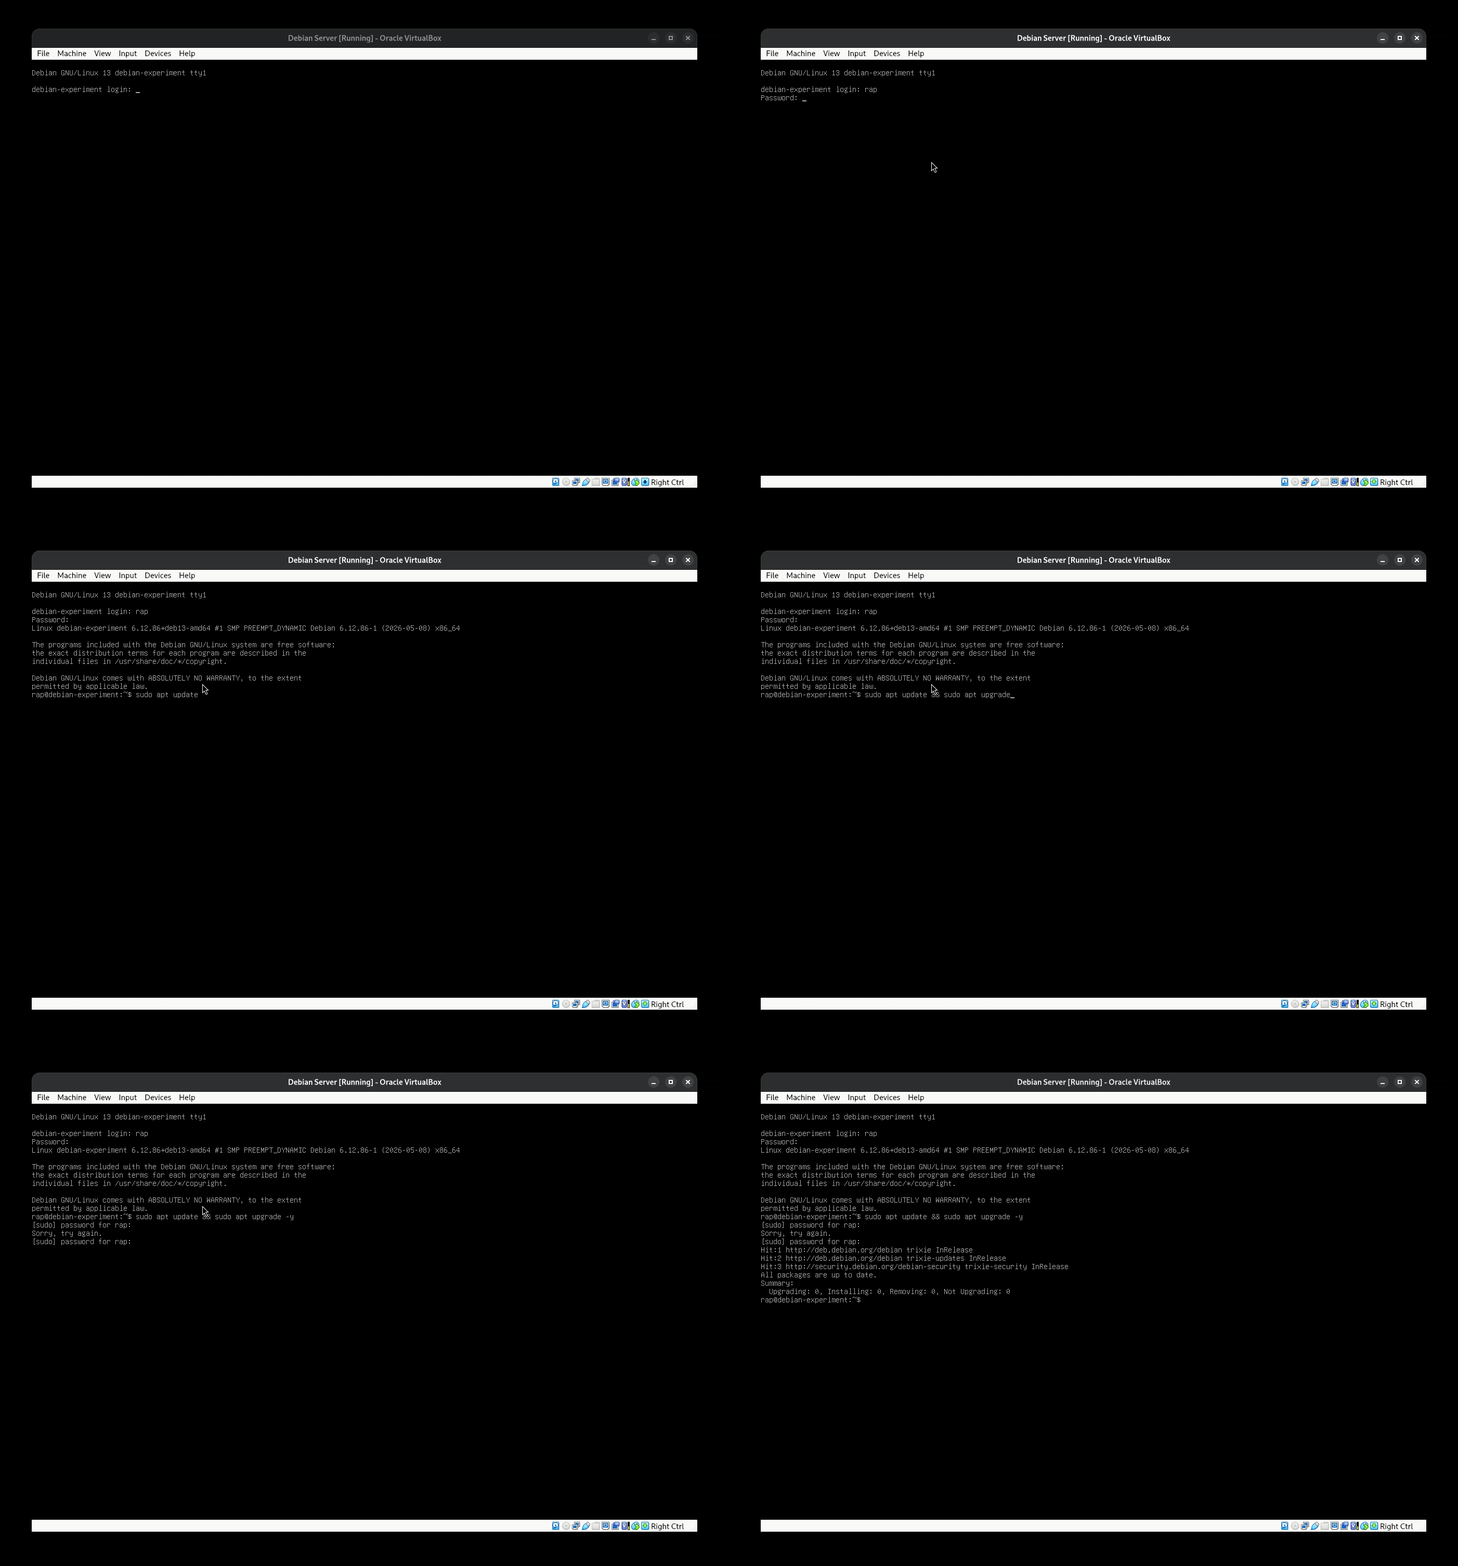
- Once the installation is complete, sign in and update the system:
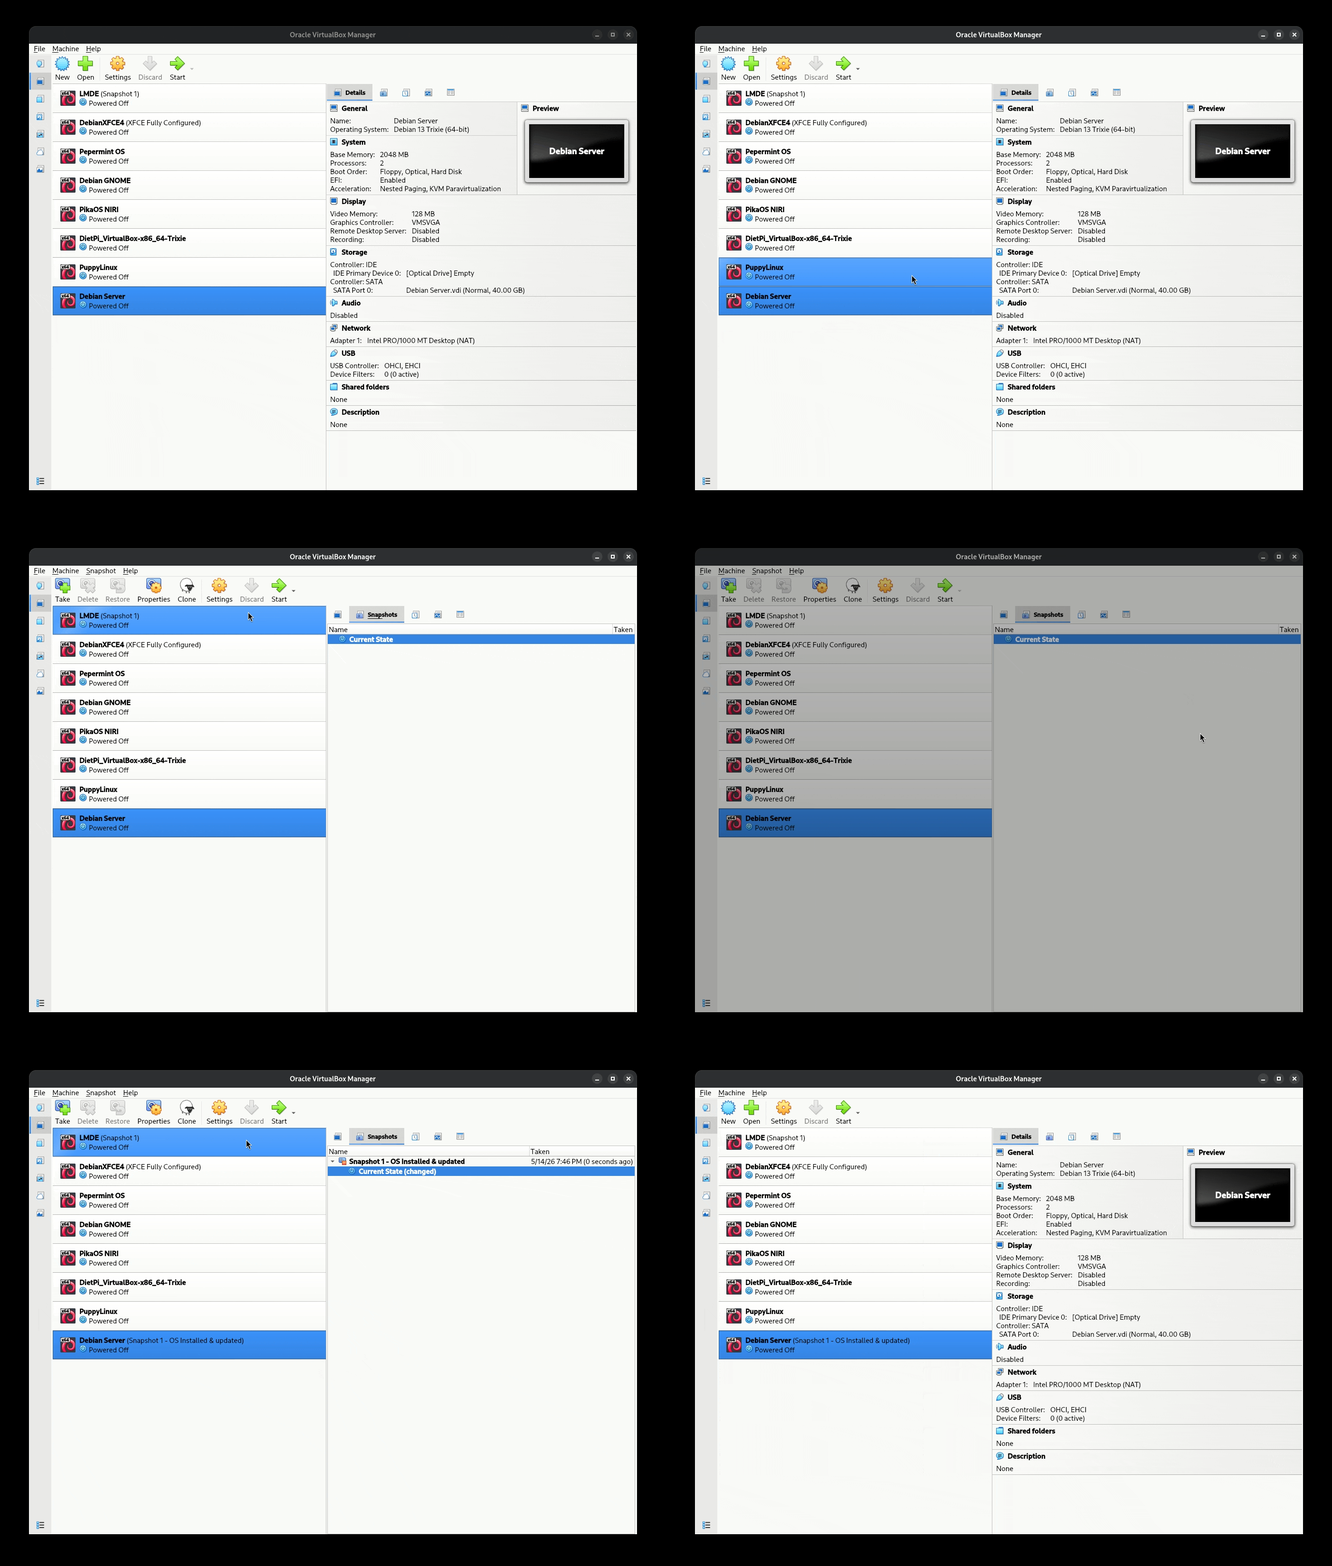
- Turn off the Virtual Machine (use the
sudo shutdown nowcommand) and take a snapshot:
At this point, you have a base installation of Debian without a desktop environment. For this exercise you will install a desktop environment, try it out and then revert to the previous snapshot to repeat the process with a different desktop environment. Here is a list of desktop environments available for Debian via the tasksel application:
- GNOME
- KDE
- XFCE
- Cinnamon
- MATE
- LXDE
- LXQT
To install any of the above desktop environments, first install tasksel using the command: sudo apt install tasksel -y, then run tasksel with sudo tasksel: 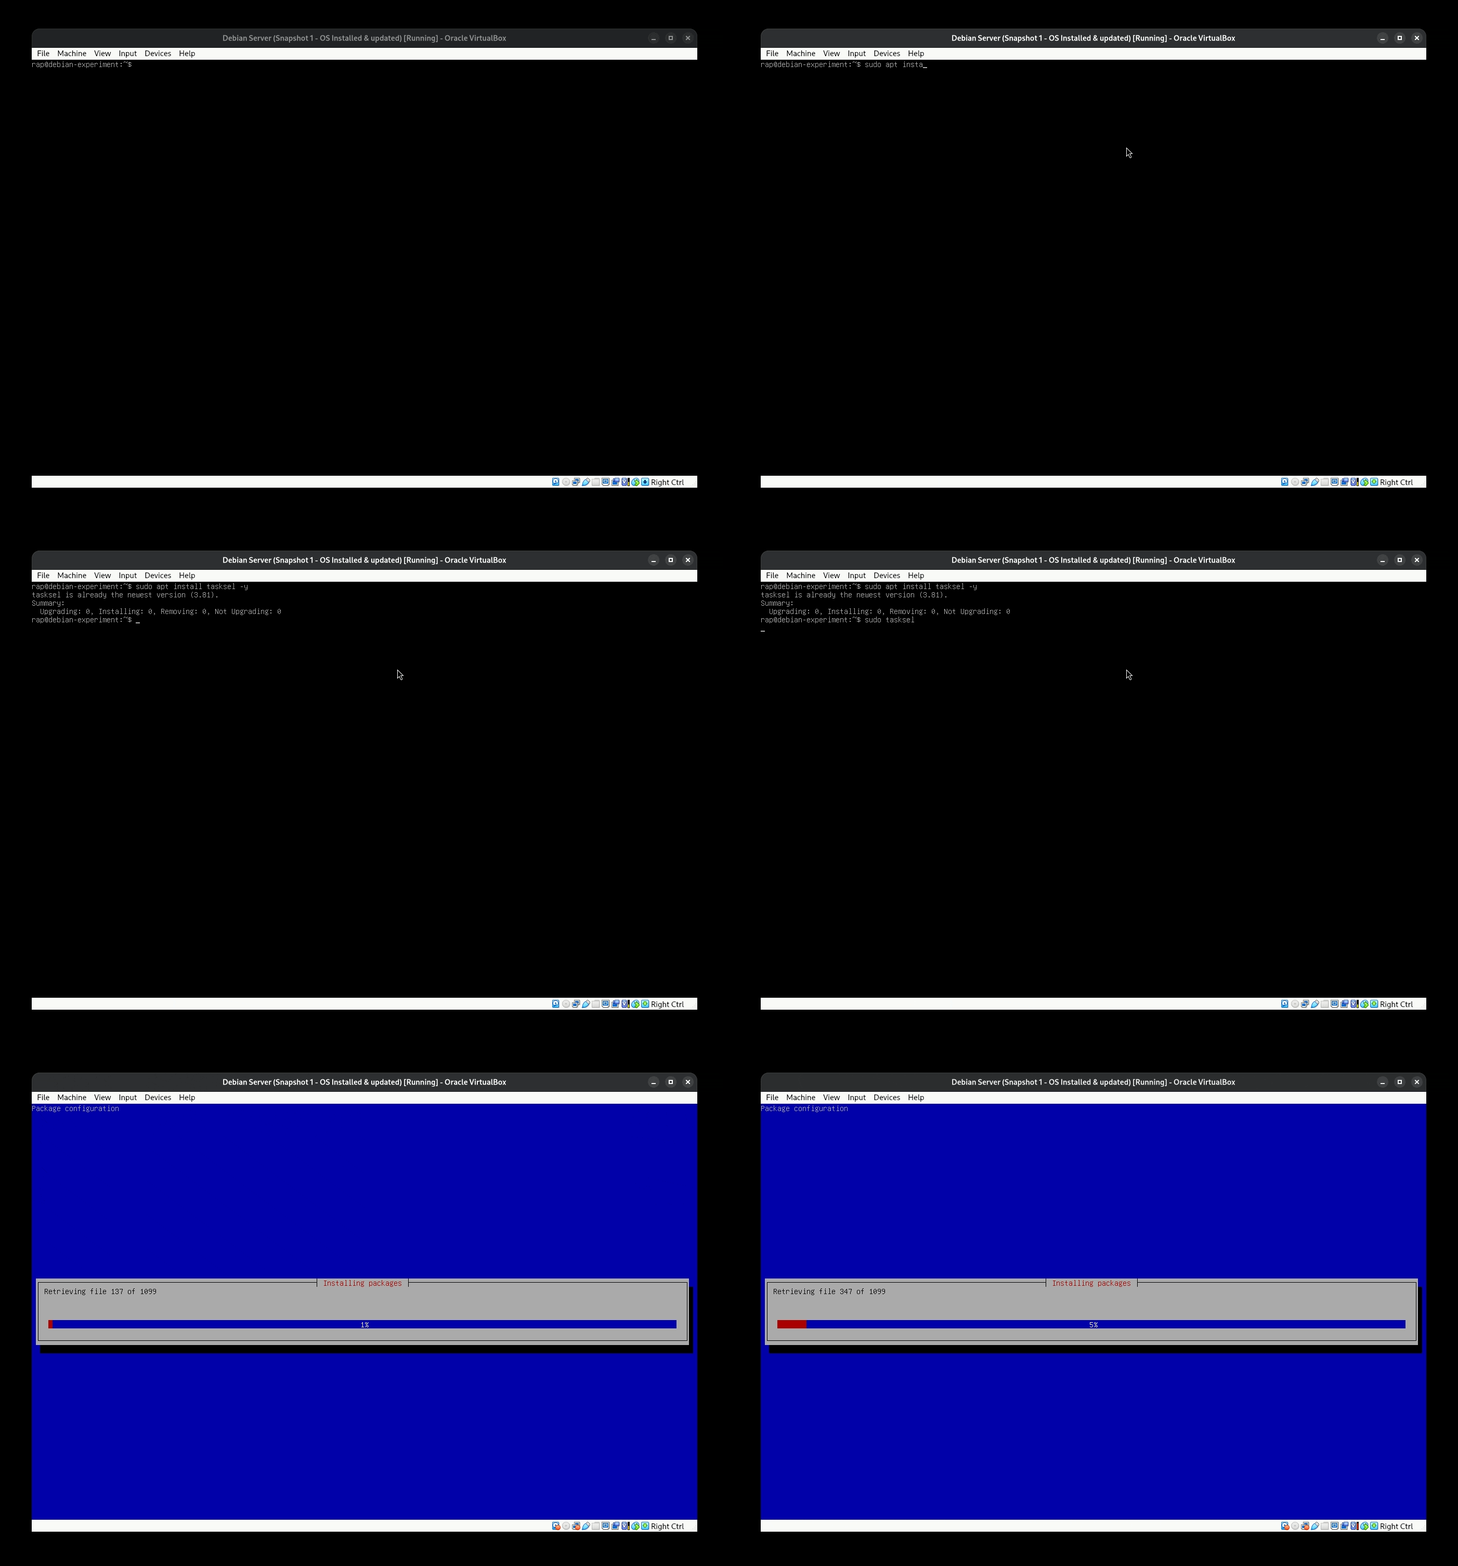
Note: while using
tasksel, use the arrow keys and space bar to make a selection and then the tab key to move to the OK or Cancel option.
Once the desktop environment finishes installing, reboot the Virtual Machine using the command: sudo reboot now. Once the Virtual Machine reboots, sign in and explore the desktop environment. When you finish, open a terminal window and run the command: uname -a. Take a screenshot of the entire Virtual Machine making sure that the terminal is visible.
Turn off the Virtual Machine and revert the Snapshot you took earlier. Then install tasksel again and install a different desktop environment. Once the desktop environment finishes installing, reboot the Virtual Machine with sudo reboot now and sign in to the desktop. Explore the desktop environment. When finished, open a terminal window and run the command: uname -a. Take a screenshot of the entire Virtual Machine window making sure that the terminal is visible.
What will you submit for extra credit
If this is your first extra credit assignment, you will need to create the necessary parent directory. In your
cis106directory (local repository), create a new directory calledExtraCredit(Use one word with no spaces in the directory name.)
- Inside
ExtraCredit, create a directory called:extra2 - Open your
cis106directory (local repository) in VS Code - Inside
extra2create a Markdown file calledextra2.md - Add all the screenshots you took earlier to
extra2.mdusing proper Markdown syntax and labeling each screenshot using Heading 2 Markdown formatting. Save the Markdown file. - Your Markdown document should start with the following Heading 1:
# Extra Credit 2: Virtualization - Convert your file to PDF
- Run the GitHub commands, in VS Code terminal, to push all your changes to GitHub:
git pullgit add .git commit -m "Completed Extra 2"git push
- In Blackboard, submit the following:
- The URL of
extra2.md - The PDF file
extra2.pdf
- The URL of