Extra Credit 6 - Managing Files
- Extra Credit 6 - Managing Files
What will you learn
- Learn how to create, remove, move, rename, and copy files and directories using common Linux commands
- Develop a stronger understanding of Linux filesystem organization, including working with absolute and relative paths
- Practice managing complex directory structures and organizing project files from the command line
- Reinforce command-line problem-solving skills by completing realistic file management tasks and troubleshooting filesystem operations
Commands reference table
These are some of the most common commands used to manage files and directories in Linux.
| Command | Definition | Formula | Example |
|---|---|---|---|
| mkdir | creates directories | mkdir + option + new directory(ies) name | mkdir ~/Downloads/games |
| touch | creates files | touch + option + new file(s) name | touch ~/Downloads/games/list.txt |
| rm | removes files | rm + option + files to delete | rm ~/Downloads/games/list.txt |
| mv | moves files & directories | mv + option + source path + destination path | mv ~/Downloads/games ~/Documents/ |
| mv | rename files & directories | mv + option + old name + new name | mv ~/Documents/games/old.txt ~/Documents/games/mylist.txt |
| cp | copies files & directories | cp + option + sources path + destination | cp -r ~/Downloads/oldGames/ ~/Games/ |
MKDIR
Description
Used to create directories. Mkdir can make one or multiple directories by separating each directory name with a space.
Formula/usage
mkdir + option + directory names
Where directory names can be:
- Just the name of the directory(ies) if you want to create them in the current working directory
Absoluteorrelativepath if you want to create the directory(ies) in a different location
Examples
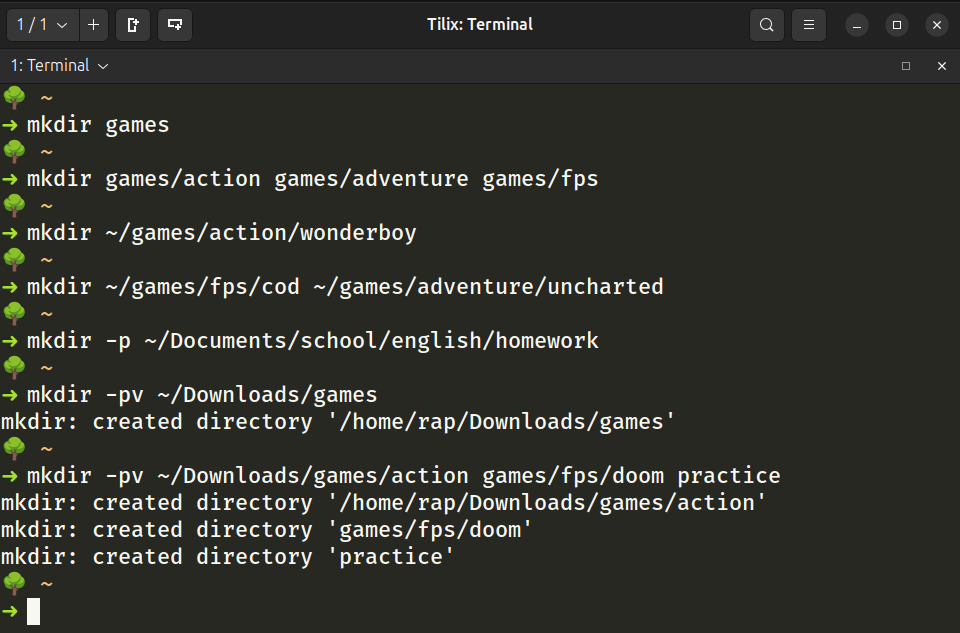
- Using relative path: Create a directory in your current working directory called
gamesmkdir games
- Using relative path: Create three directories inside the
gamesdirectory called:action,adventure,fpsmkdir games/action games/adventure games/fps
- Using absolute path: Create a directory in the
actiondirectory calledwonderboymkdir ~/games/action/wonderboy
- Using absolute path: Create two directories, one in
fpsand another inadventure. Call themcodandunchartedmkdir ~/games/fps/cod ~/games/adventure/uncharted
- Create a parent and subdirectory at the same time
mkdir -p ~/Documents/school/english/homework
- Create a directory and display a message confirming the directory creation (verbose output)
mkdir -pv ~/Downloads/gamesmkdir -pv ~/Downloads/games/action games/fps/doom practice
Practice
Description
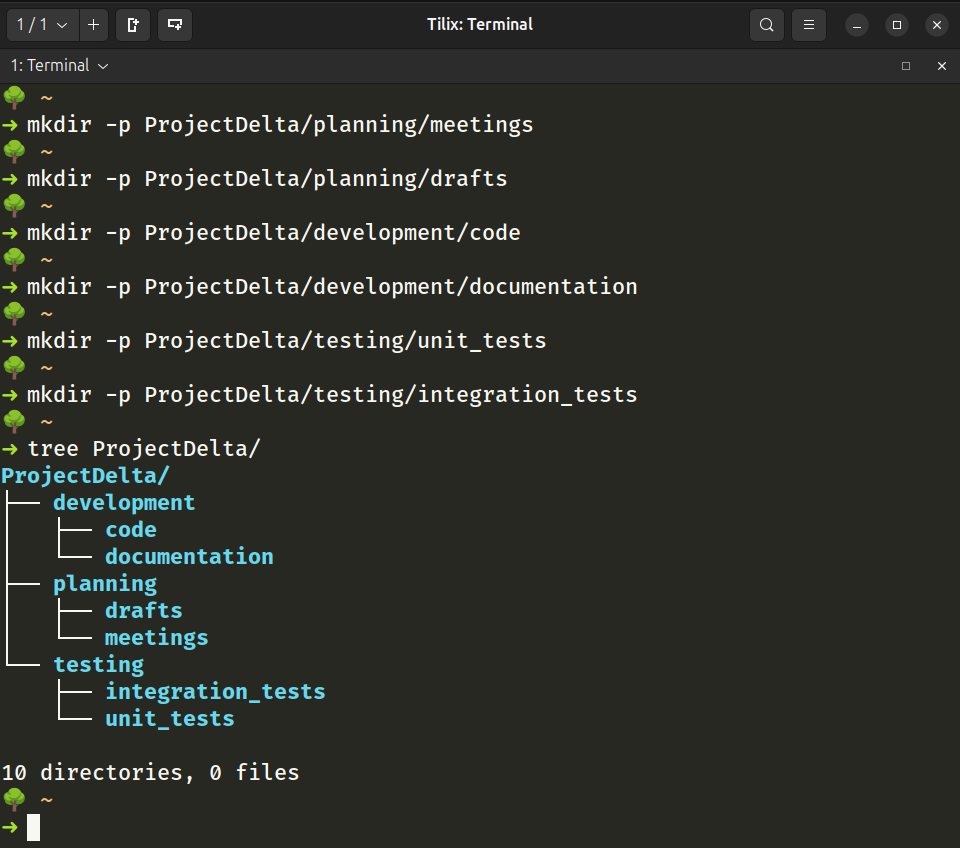
You have just been assigned the task of organizing a new project called “ProjectPhoenix” on your company’s server. For this project, you need to set up a directory structure that will hold various types of documents. The structure should look like this:
ProjectPhoenix/
├── planning/
│   ├── meetings/
│   └── drafts/
├── development/
│   ├── code/
│   └── documentation/
└── testing/
    ├── unit_tests/
    └── integration_tests/
TOUCH
Description
touch is used to create an empty file or to update the timestamp of an existing file. If the specified file does not exist, touch will create it. If the file exists, touch will update its access and modification times to the current time.
Formula/usage
touch + option + file(s) name
Where file names can be:
- Just the name of the files if you want to create them in the current working directory
Absoluteorrelativepath if you want to create the directory in a different location
Examples
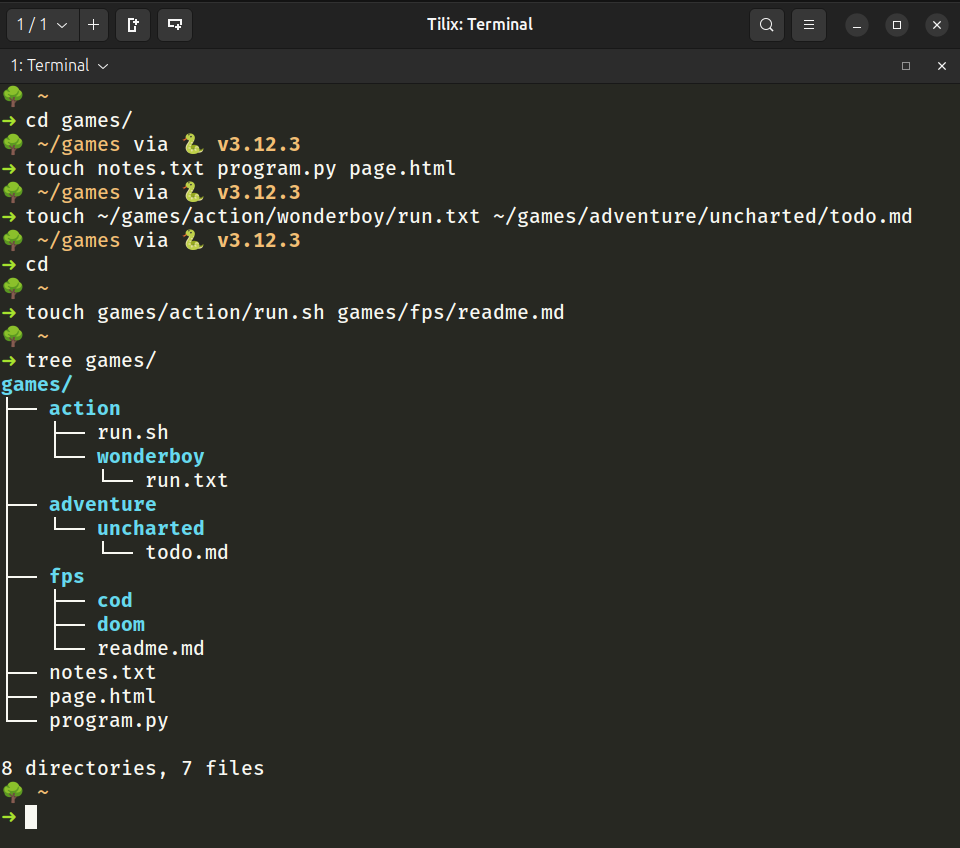
- Create multiple files in the current working directory
touch notes.txt program.py page.html
- Create multiple files in different directories using absolute path
touch ~/games/action/wonderboy/run.txt ~/games/adventure/uncharted/todo.md
- Create multiple files in different directories using relative path
touch games/action/run.sh games/fps/readme.md
Practice
Description
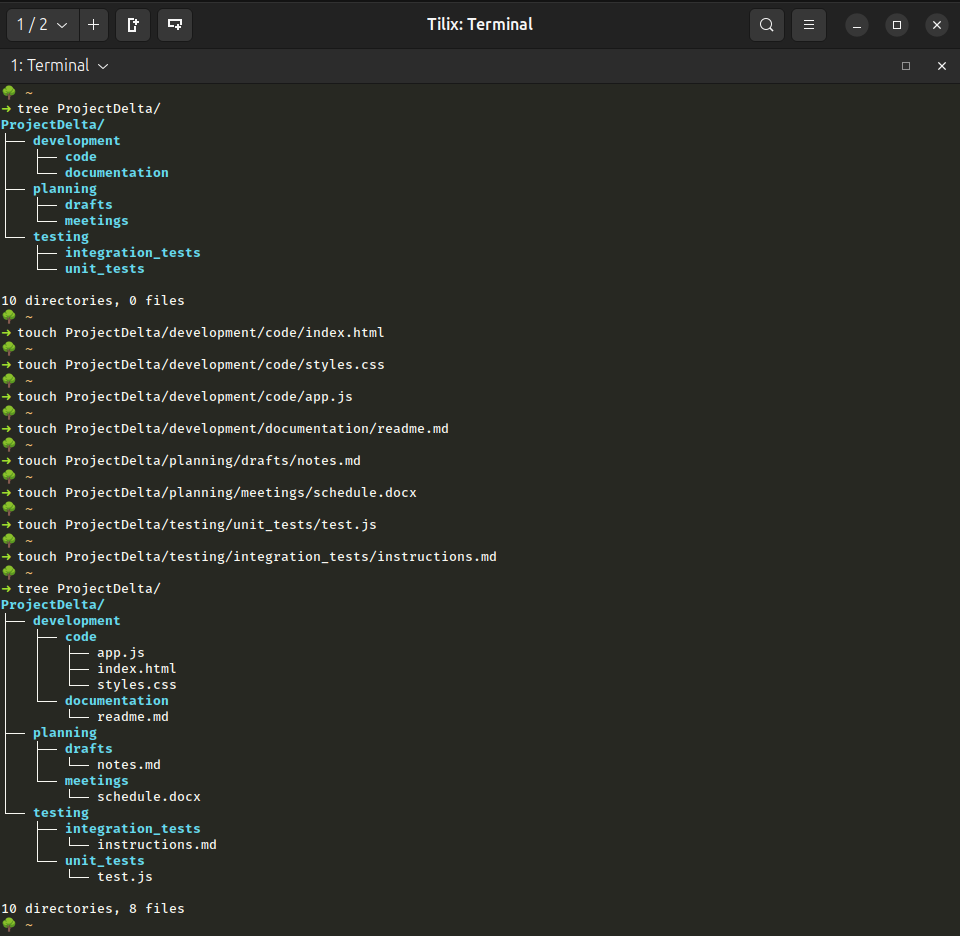
In the previous practice, you created a directory structure. Add the following files to each directory:
ProjectPhoenix/
├── development
│   ├── code
│   │   ├── app.js
│   │   ├── index.html
│   │   └── styles.css
│   └── documentation
│       └── readme.md
├── planning
│   ├── drafts
│   │   └── notes.md
│   └── meetings
│       └── schedule.docx
└── testing
    ├── integration_tests
    │   └── instructions.md
    └── unit_tests
        └── test.js

10 directories, 8 files
RM
Description
The rm command is used to remove files and directories. It is a powerful command that can permanently delete files, so it should be used with caution. By default, rm removes files, but with certain options, it can also delete directories and their contents. In Linux, empty directories can be removed with rmdir, while non-empty directories require rm -r.
When you try to remove non-empty directories, the following error is shown:
“rm: cannot remove 'directory_name/': Is a directory”.
Even when using the rmdir command, trying to remove a non-empty directory results in the following error: “rmdir: failed to remove 'directory_name/': Directory not empty”. To remove non-empty directories, use the -r option. See examples.
Formula/usage
rm + option + directories or files to remove
Where file/directory name can be:
- Just the name of the files/directories if they are located in the current working directory
Absoluteorrelativepath if they are located in a different location
Common Options:
-f: Force removal without prompting for confirmation.-ror-R: Recursively remove directories and their contents.-i: Prompt before each removal.-v: Verbose mode, showing the files as they are removed.
Examples
- Remove files using absolute path
rm ~/games/action/run.sh ~/games/adventure/uncharted/todo.md
- Remove files using relative path
rm games/fps/readme.md games/notes.txt games/page.html
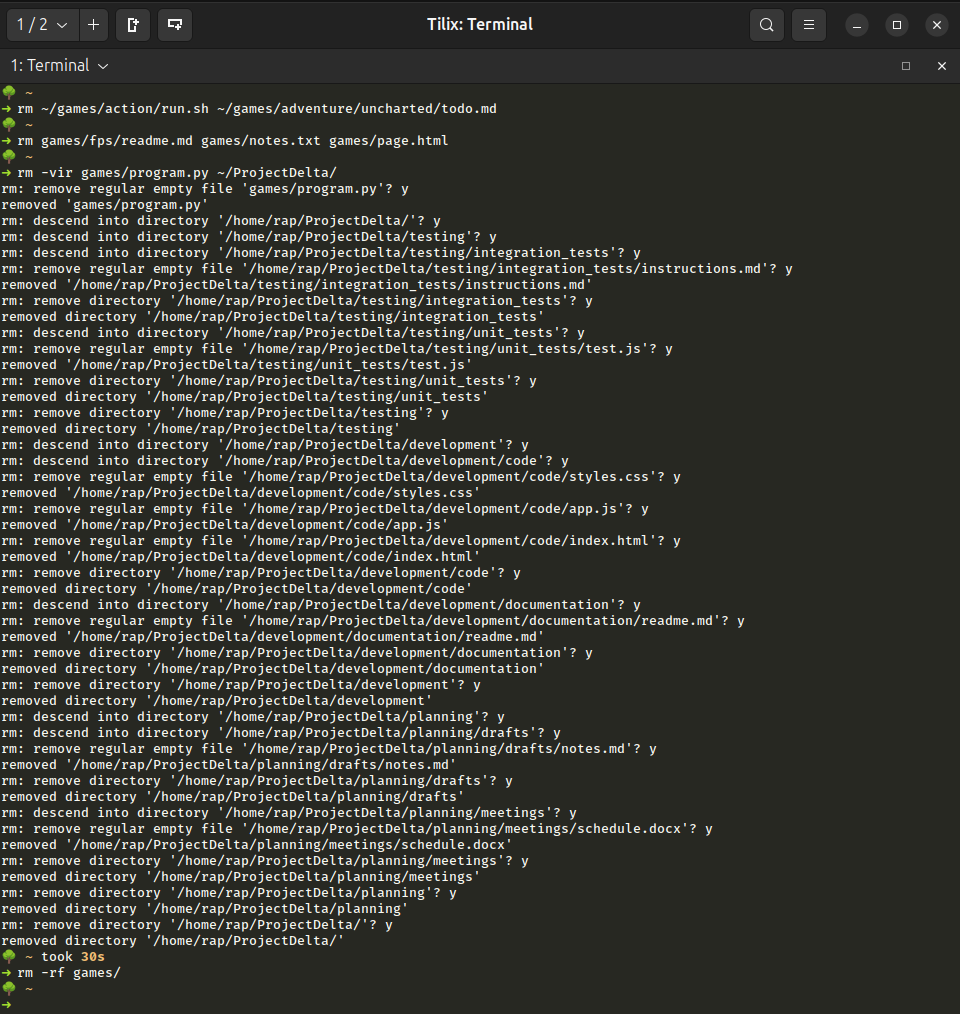
- Remove files and directories but prompt for confirmation before removing and display removal message when done
rm -vir games/program.py ~/ProjectDelta
- Remove a non-empty directory without confirmation (
-fforces removal without prompts)rm -rf games/
Practice
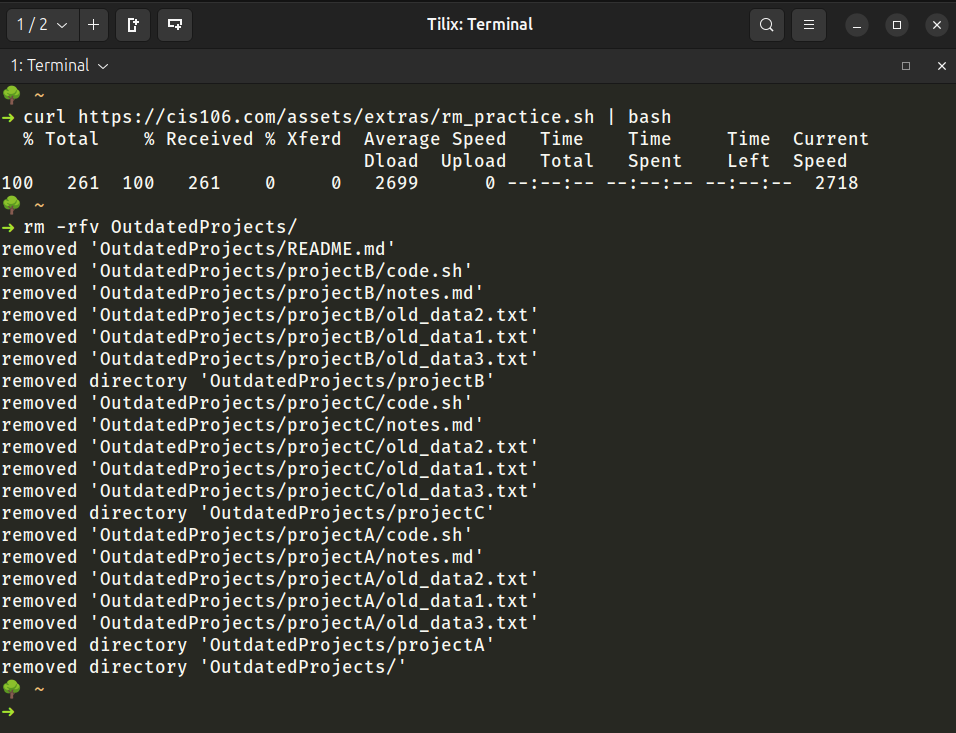
You have a folder named “OutdatedProjects” in your home directory. This folder contains old project files that you no longer need, including subdirectories with their own files. You want to clean up your home directory by completely removing the “OutdatedProjects” folder and all of its contents.
The directory structure looks like this:
/home/user/OutdatedProjects/
    ├── projectA/
    │   └── old_data.txt
    ├── projectB/
    │   └── old_report.txt
    ├── projectC/
    │   └── notes.txt
    └── archived_files.txt
Use the rm command to delete the entire “OutdatedProjects” directory, including all of its subdirectories and files, using an absolute path.
Before you can run the rm command, you will need to create the directories. Run this command that will run a script to generate the directories and files for you.
curl https://cis106.com/assets/extras/rm_practice.sh | bash
MV
Description
The mv command is used for moving and renaming files and directories. Keep the following points in mind about the mv command:
mvcannot rename more than one file at the timemvcan move and rename a file at the same timemvwill set the last argument as the destination or new file name- Common options of the mv command:
-i: Prompt before overwriting an existing file.-u: Move only when the source file is newer than the destination file or when the destination file is missing.-v: Verbose mode, showing the files as they are moved or renamed.
Formula/usage
Moving
mv + option + files/directories to move + destination directory
Renaming
mv + option + old name + new name
Examples
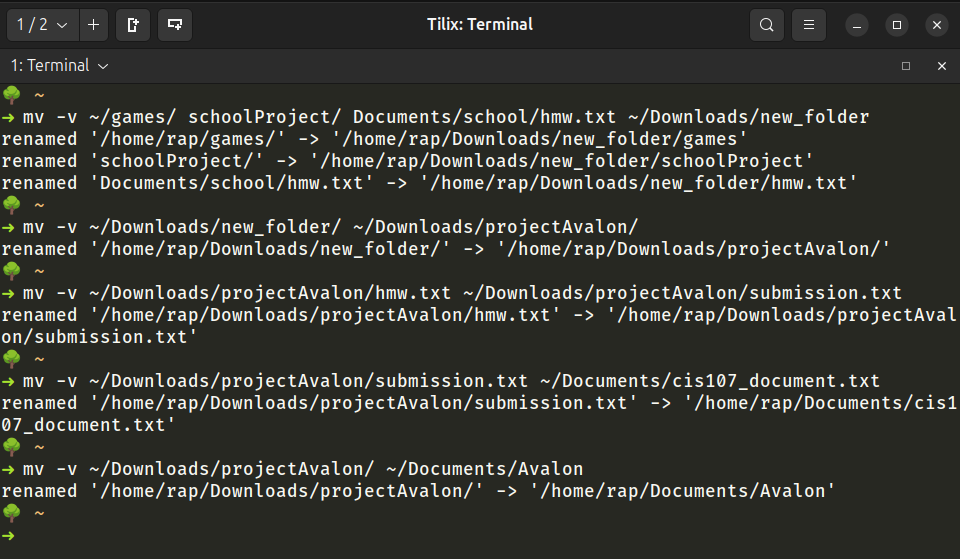
- Move multiple files using a combination of absolute path and relative path
mv -v ~/games/ schoolProject/ Documents/school/hmw.txt ~/Downloads/new_folder/- In this example:
~/games,schoolProject/, and,Documents/school/hmw.txtare moved to~/Downloads/new_folder/-venables verbose output.
- In this example:
- Rename a directory
mv -v ~/Downloads/new_folder ~/Downloads/projectAvalon/
- Rename a file
mv -v ~/Downloads/projectAvalon/hmw.txt ~/Downloads/projectAvalon/submission.txt
- Move and rename a file in a single command
mv -v ~/Downloads/projectAvalon/submission.txt ~/Documents/cis107_document.txt
- Move and rename a directory in a single command
mv -v ~/Downloads/projectAvalon/ ~/Documents/Avalon
Practice
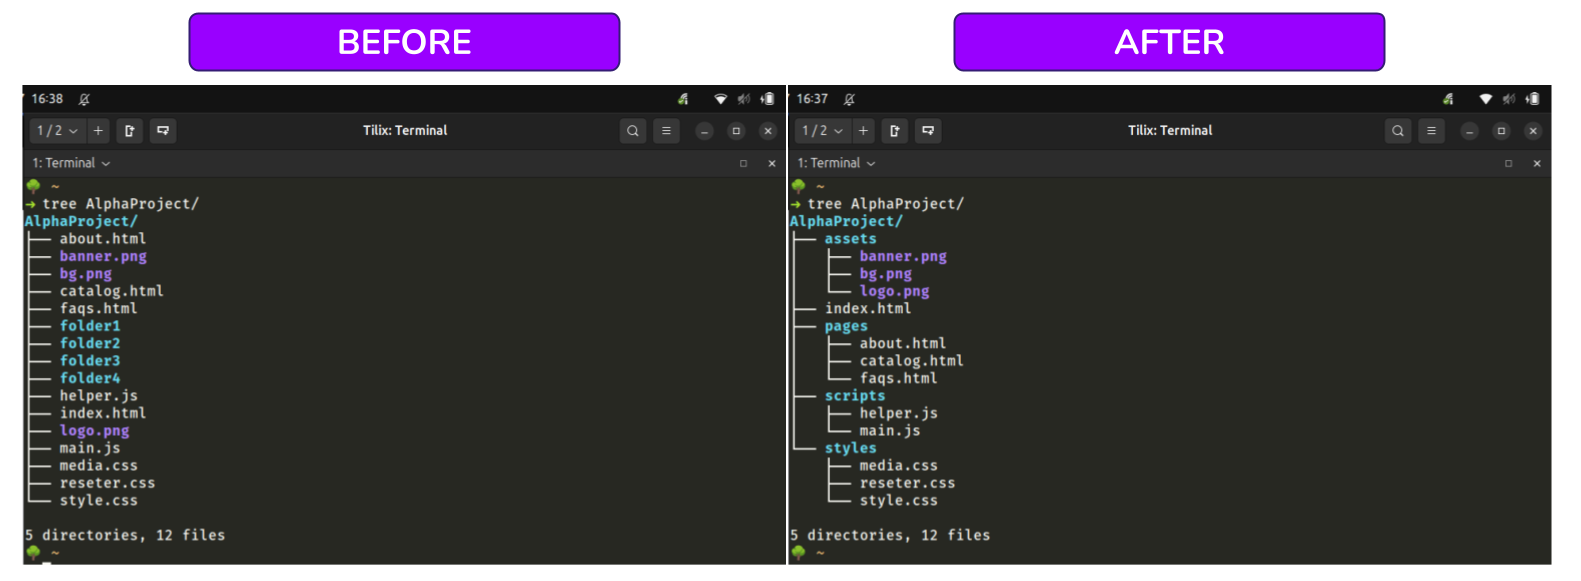
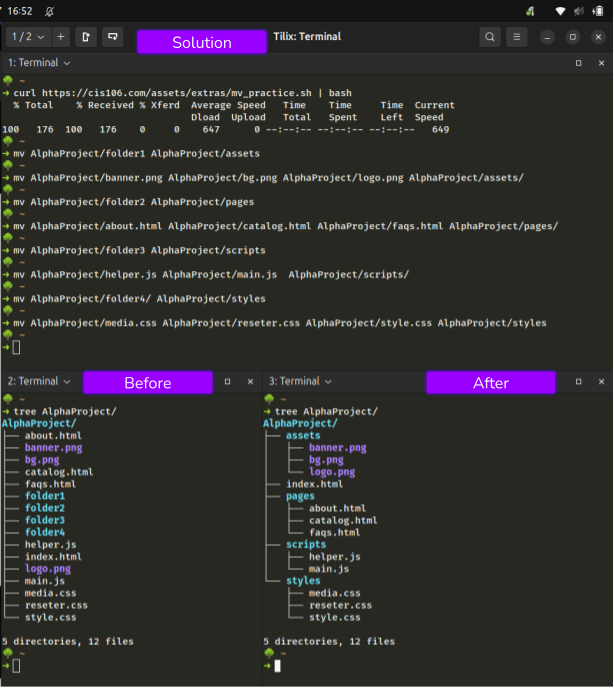
You are working on a web development project named “AlphaProject”. You have been given all the files for this project. Your task is to organize the folder. You have to use the mv command for renaming and moving. You are not allowed to create new directories. To get all the necessary files, run this command, which will run a script to generate the directory “AlphaProject” including all the necessary files.
curl https://cis106.com/assets/extras/mv_practice.sh | bash
CP
Description
The cp command is used to copy files and directories. Cp requires -r option to copy directories. You can copy and rename a directory or file in a single command too. Renaming while copying only works when copying a single file or directory. This is similar to creating a backup.
Common Options:
-ror-R: Recursively copy directories and their contents.-i: Prompt before overwriting an existing file.-u: Copy only when the source file is newer than the destination file or when the destination file is missing.-v: Verbose mode, showing the files as they are copied.-a: Copy files and directories, preserving attributes like timestamps and permissions.
Formula/usage
cp + option + source files/directories + destination directory
Examples
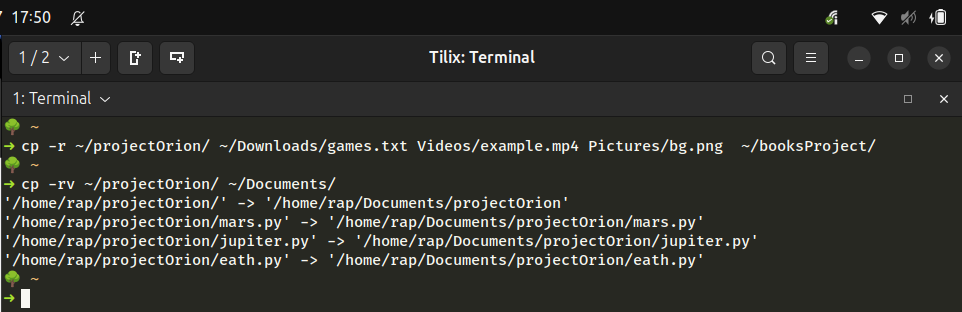
- Copy several files using a combination of absolute and relative path.
cp -r ~/projectOrion/ ~/Downloads/games.txt Videos/example.mp4 Pictures/bg.png ~/bookProject/- Note: Here we have to use
-rbecause there is a directory in the sources to copy (~/projectOrion)
- Note: Here we have to use
- Copy a directory with verbose output
cp -rv ~/projectOrion/ ~/Documents/
Practice
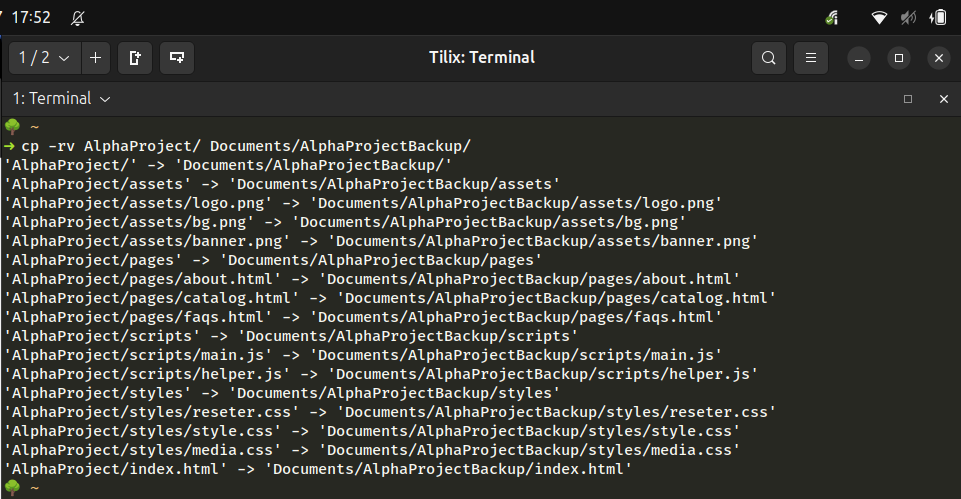
- Copy the directory created in the previous practice.
- Copy the directory to the
Documentsdirectory. The name of the copy is:AlphaProjectBackup
What will you submit for extra credit
If this is your first extra credit assignment, you will need to create the necessary parent directory structure. In your
cis106directory (local repository), create a new directory calledExtraCredit(Use one word with no spaces in directory names.)
- Inside
ExtraCredit, create another directory calledextra6 - Open your
cis106local repository in VS Code - Inside
extra6, create a Markdown file calledextra6.md - Add all the screenshots you took earlier to
extra6.mdusing proper Markdown syntax and label each screenshot using Heading 2 Markdown headings. Save the Markdown file. - Your Markdown document should start with the following Heading 1:
# Extra Credit 6: Managing Files - Convert your file to PDF
- Run the following GitHub commands in the VS Code terminal, to push all your changes to GitHub:
git add .git commit -m "Completed Extra 6"git push
- In Blackboard, submit the following:
- The URL of
extra6.md - The PDF file
extra6.pdf
- The URL of