Extra Credit 3 - GNOME
What You Will Learn
The goal of this extra credit is to help you become familiar with using Debian and the GNOME Desktop Environment. The screenshots in this document were taken in Ubuntu 24.04. However, the GNOME interface is very similar in Debian, so you should still be able to follow along. If you notice any major differences or inconsistencies, please let me know.
Warning: This extra credit assignment is significantly longer than previous assignments and may take several sessions to complete. Pace yourself and complete one section at a time. This assignment remains open until the end of the semester, so there is no need to rush.
Question 1: Working With Files
- 1- Open the Files application (file manager) and explore its interface.
- 2- Practice the following shortcuts:
| Key Combination | Description |
|---|---|
Alt + ⬅ & Alt + ➡ | Navigate backward or forward |
Alt + ↑ | Open the parent directory |
←, →, ↑, ↓ | Select an item |
Alt + ↓ or Enter | Open an item |
Alt + Enter | Open an item’s Properties dialog |
Shift + Alt + ↓ | Open an item and close the current directory |
Ctrl + L | Toggle the location bar between button mode and path mode |
Alt + Home | Opens the home directory |
| Any number or letter | Start searching within the current directory |
Ctrl + T | Search within the current directory and its subdirectories |
Del | Moves the selected file or directory to the trash, from which it can be restored with Undo |
- 3- In your home directory, create a new directory called Games.
- 4- Inside the Games directory, create 3 more directories called:
fps,action, andrpg - 5- Delete the Games directory
- 6- Open the Trash and restore the Games directory
- 7- Delete the Games directory again
- 8- Empty the Trash
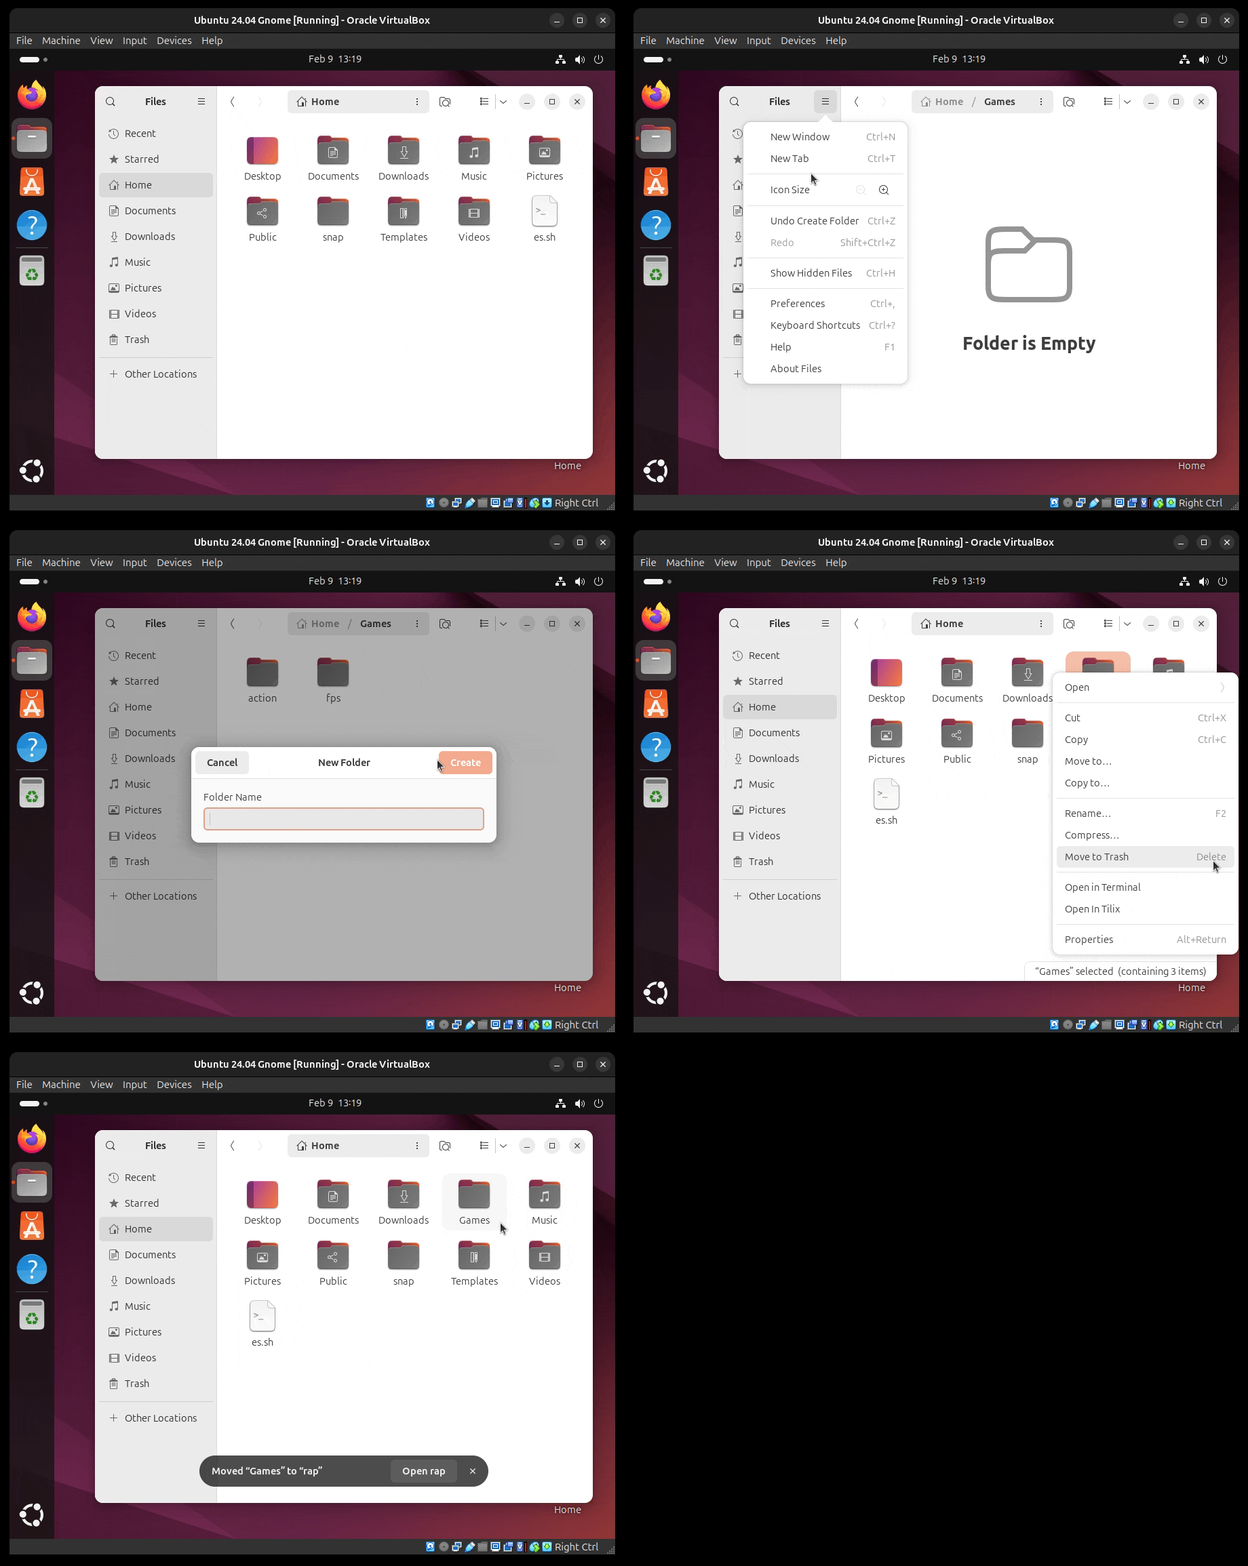
If you are doing this activity for the extra credit. Take a screenshot of your file manager with your trash empty. This screenshot will serve as proof of completion for Question 1.
Part 2 - Working with files
- 1- Open the file manager if it is not open
- 2- Use Firefox or another web browser to download the following ZIP file: https://cis106.com/assets/extras/gcu/site.zip
- 3- Decompress/unzip the file in your Downloads directory.
- 4- Inside the Downloads directory you should now have a new directory called
site - 5- Inside the
sitedirectory, you should see the following three files:site.htmlSCRIPT.jsSTYLE.css
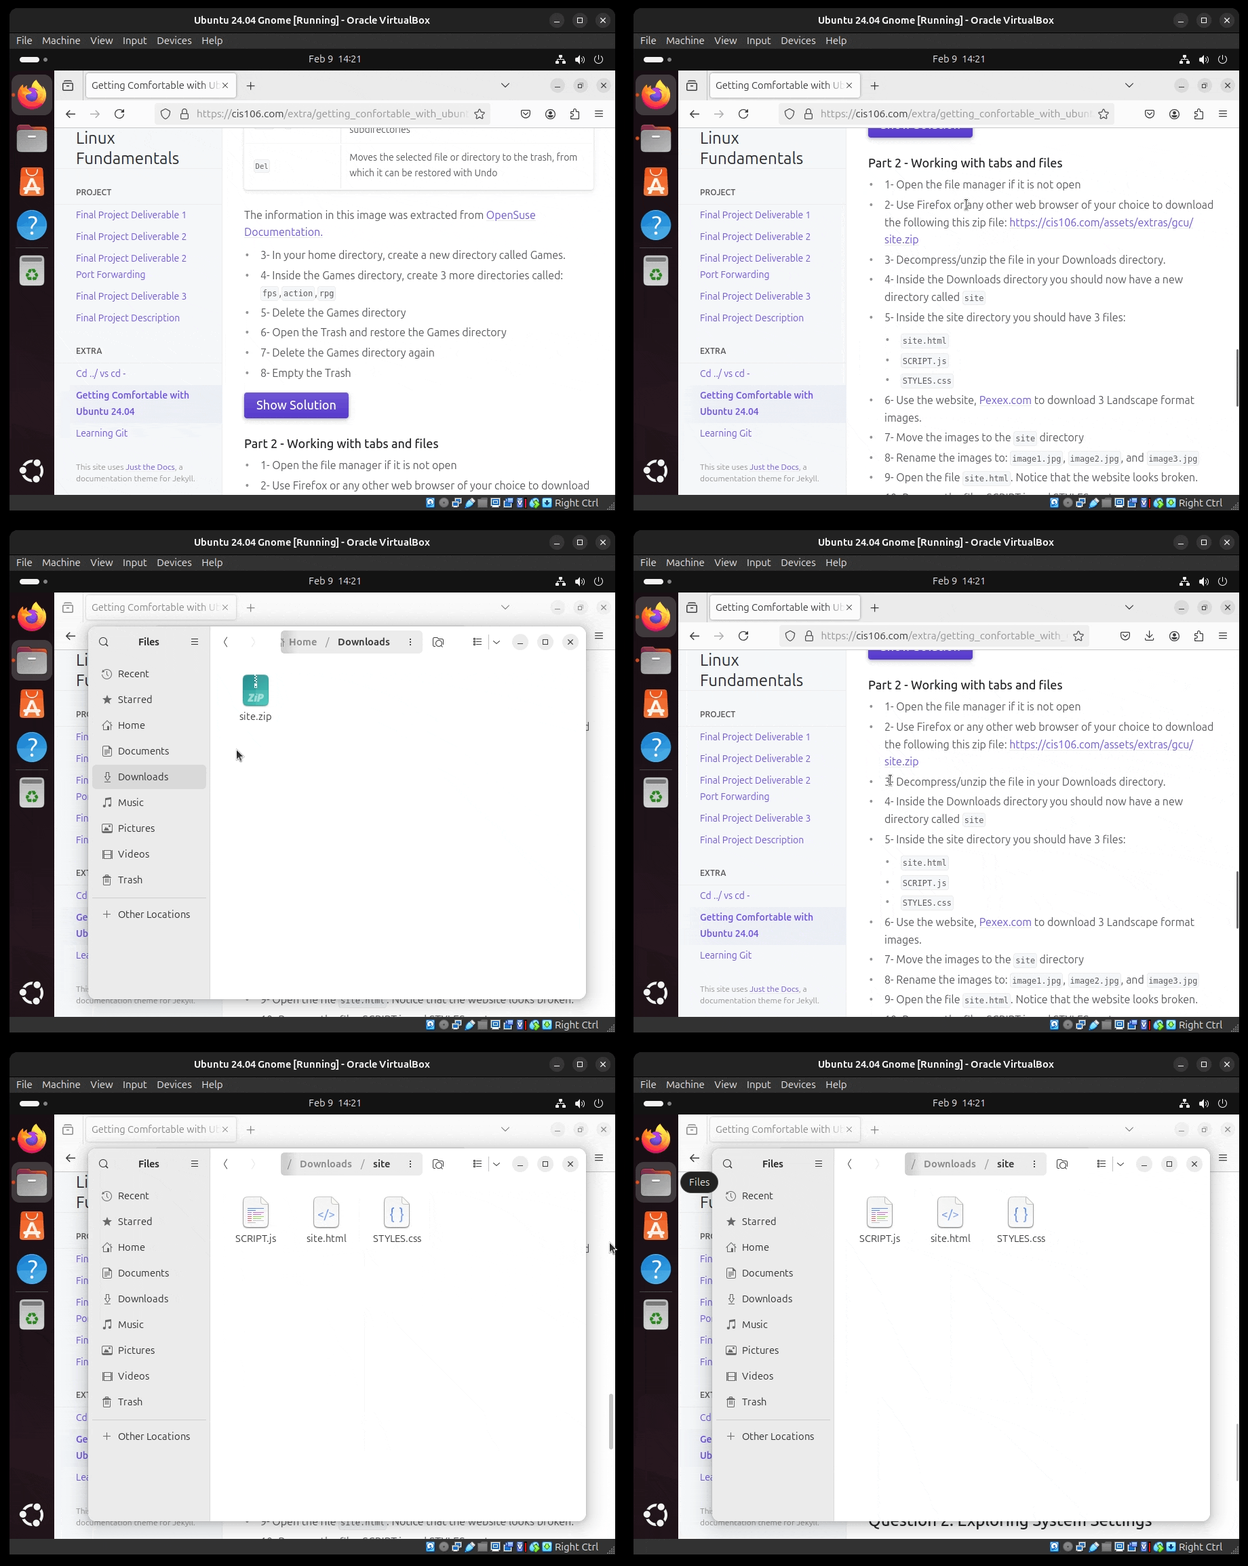
- 6- Use the website Pexels.com to download 3 Landscape format images.
- 7- Move the images to the
sitedirectory - 8- Rename the images to:
image1.jpg,image2.jpg, andimage3.jpg - 9- Open the file
site.html. Notice that the website does not display correctly. - 10- Rename the files SCRIPT.js and STYLE.css to:
STYLE.css=>style.cssSCRIPT.js=>script.js
- 11- Refresh the website
site.htmland you will notice that now it looks as expected. This happens because Linux filenames are case-sensitive. So STYLES.css is not the same as styles.css

If you are doing this activity for the extra credit. Take a screenshot of your file manager with the
sitedirectory open. Take another screenshot of Firefox displaying the website. Those 2 will be the proof of submission for question 1 part 2
Question 2: Exploring System Settings
There are two ways to open the Settings application:
- Via the system menu:
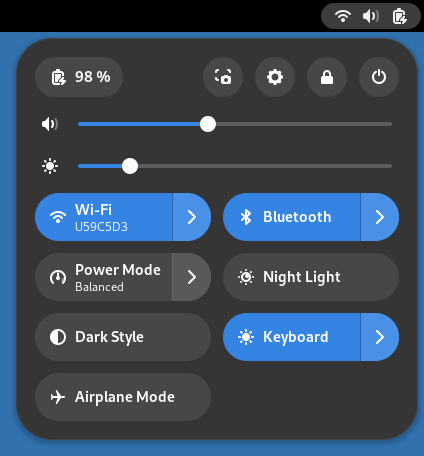
- Searching for Settings using the applications launcher:
- Use the Settings application to perform the following tasks:
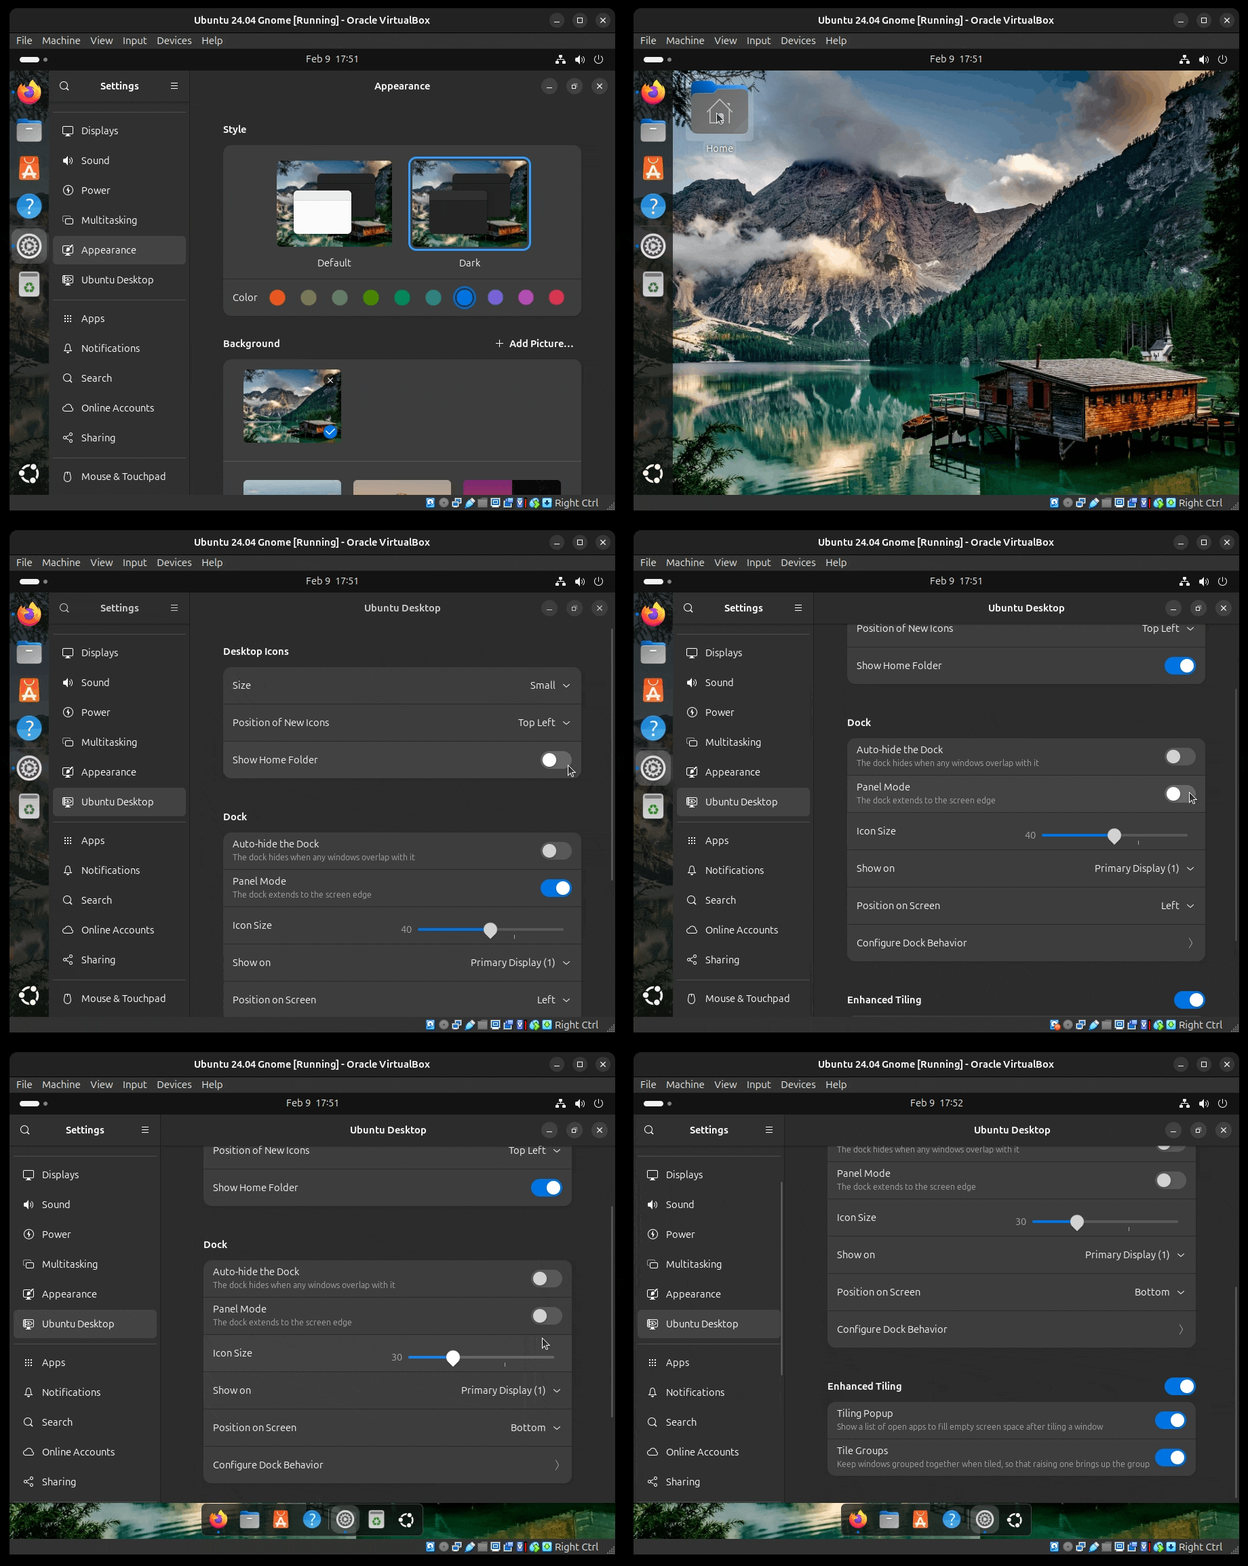
- 1- Appearance:
- Choose light or dark mode
- Choose an accent color you like
- Change the wallpaper
- You can download a wallpaper from the internet if you want or use a predefined one.
- 1- Appearance:
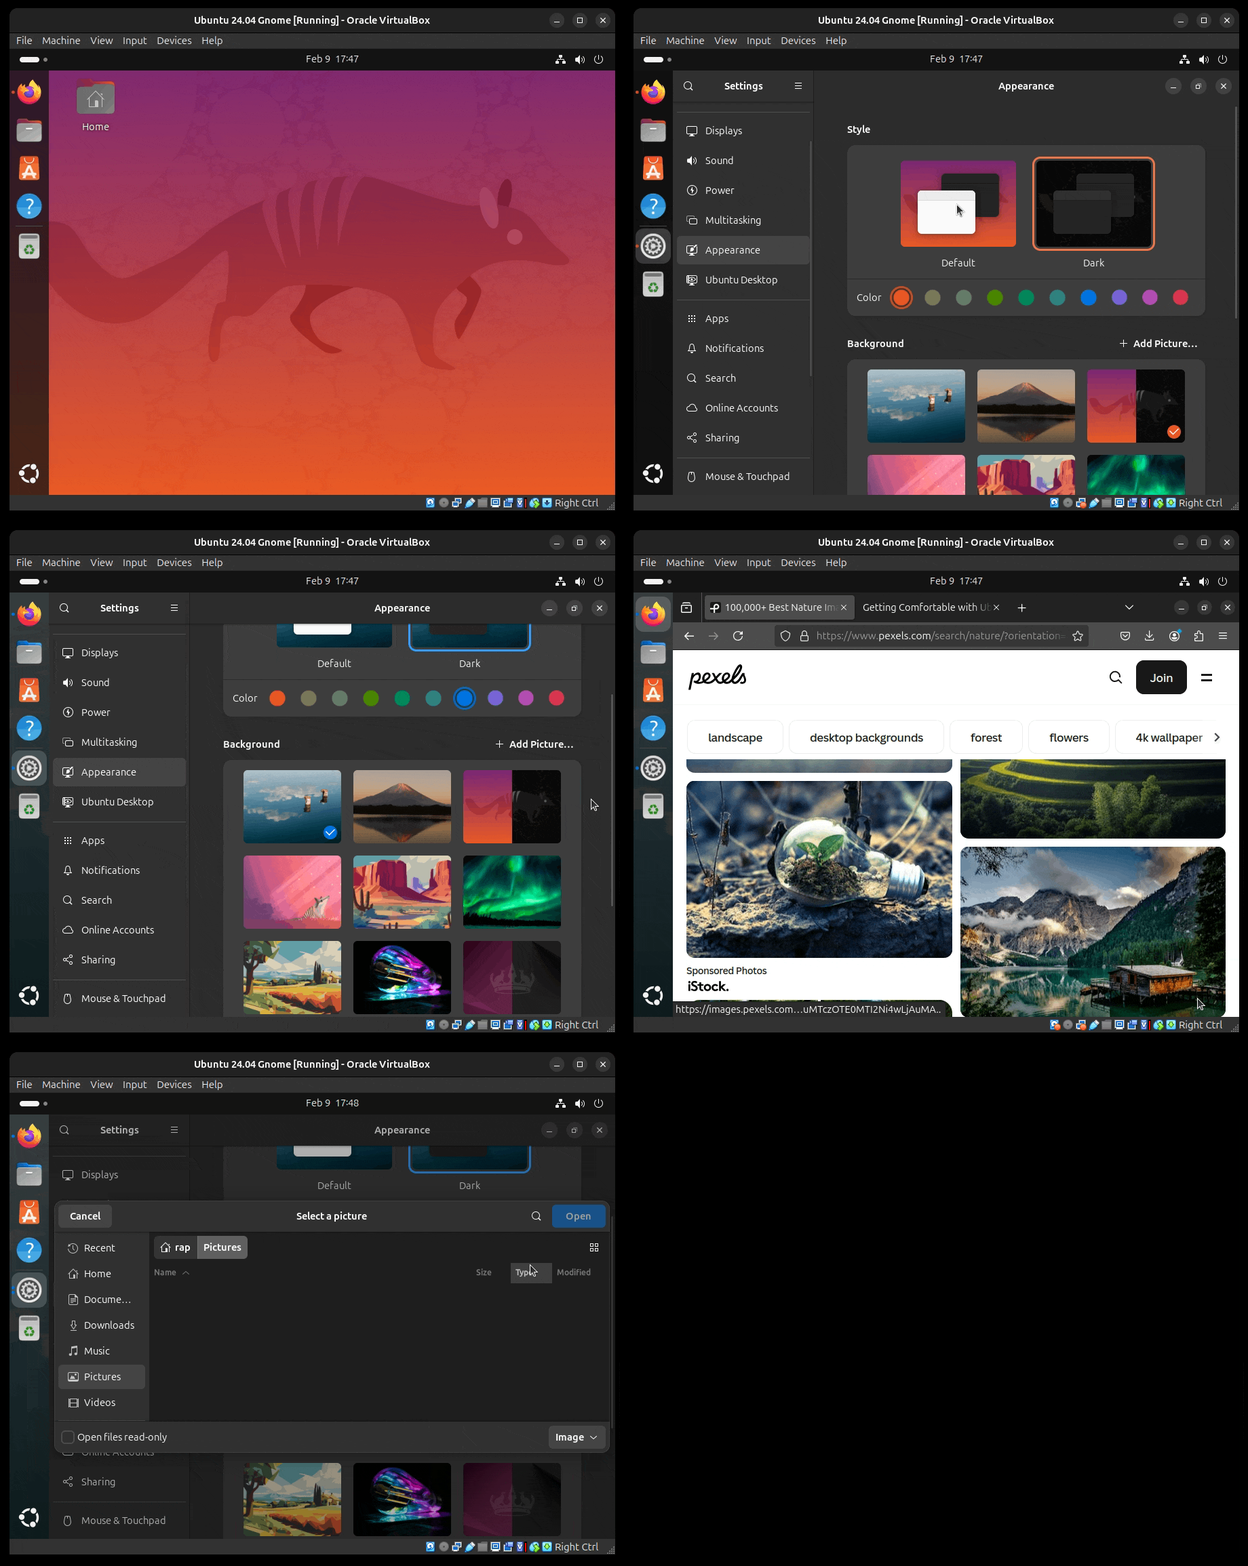
- 2- Ubuntu Desktop:
- Explore the Desktop Icons and Dock settings.
- Keyboard:
- Add a custom shortcut for the following applications:
- Firefox
- name: Web Browser
- command: firefox
- shortcut: Super key (Windows key) + W (or any other key combination you want)
- Tilix
- name: terminal
- command: tilix
- shortcut: Super key (windows key) + Enter (or any other key combination you want)
- Files
- name: File manager
- command: nautilus
- shortcut: Super key (windows key) + F (or any other key combination you want)
- VS Code
- name: VS Code
- command: code
- shortcut: Super + C (or any other key combination you want)
- Geany
- name: Text Editor
- command: geany
- shortcut: Super + t (or any other key combination you want)
- Firefox
- To add a custom shortcut, follow these steps:
- 1- Click on Keyboard and then scroll down to “View and Customize Shortcuts”
- 2- In the dialog that pops up, scroll down to “Custom Shortcut”
- 3- Click on “Add Shortcut…”
- Add a custom shortcut for the following applications:
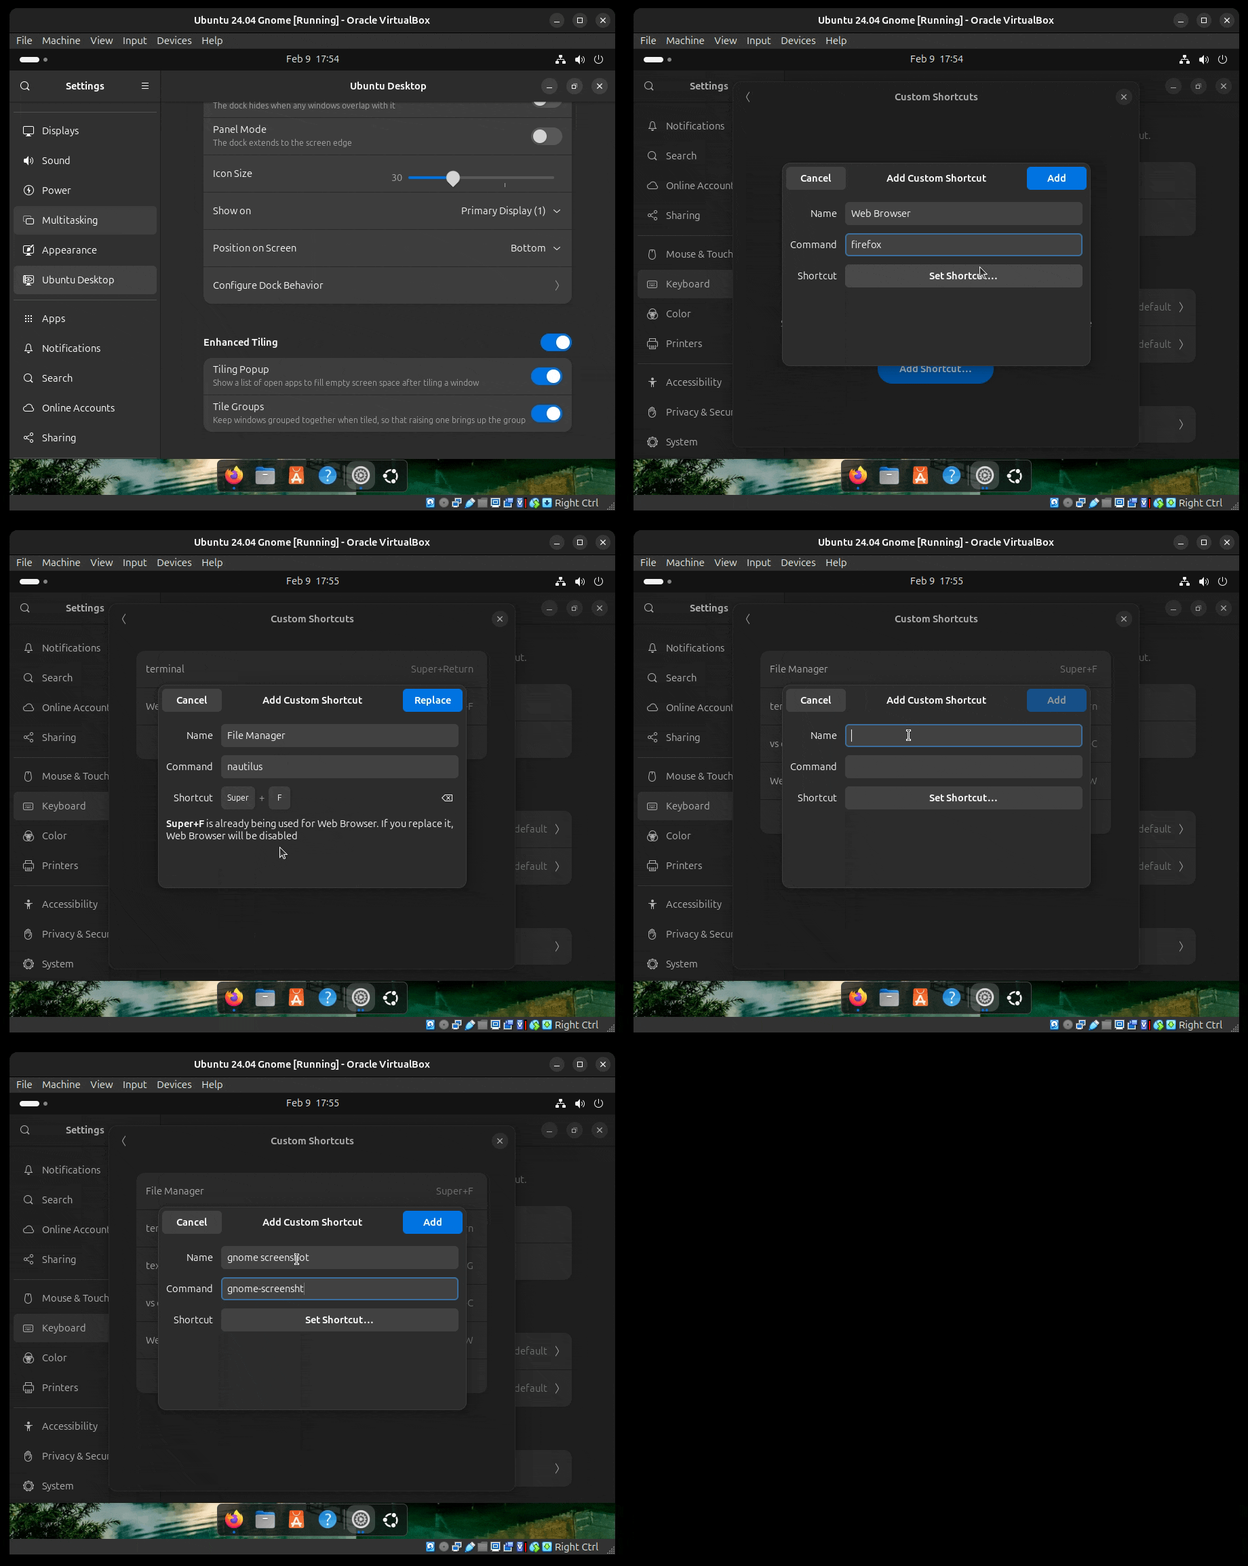
If you are doing this activity for the extra credit. Take a screenshot of your desktop showing that you changed the wallpaper or modified the position of the dock. Take another screenshot showing your custom shortcuts. That will be the proof of submission for question 2
Question 3: Installing Applications Graphically
To install applications graphically, we use the Software Center also known as the App Center. Let’s install a couple of applications:
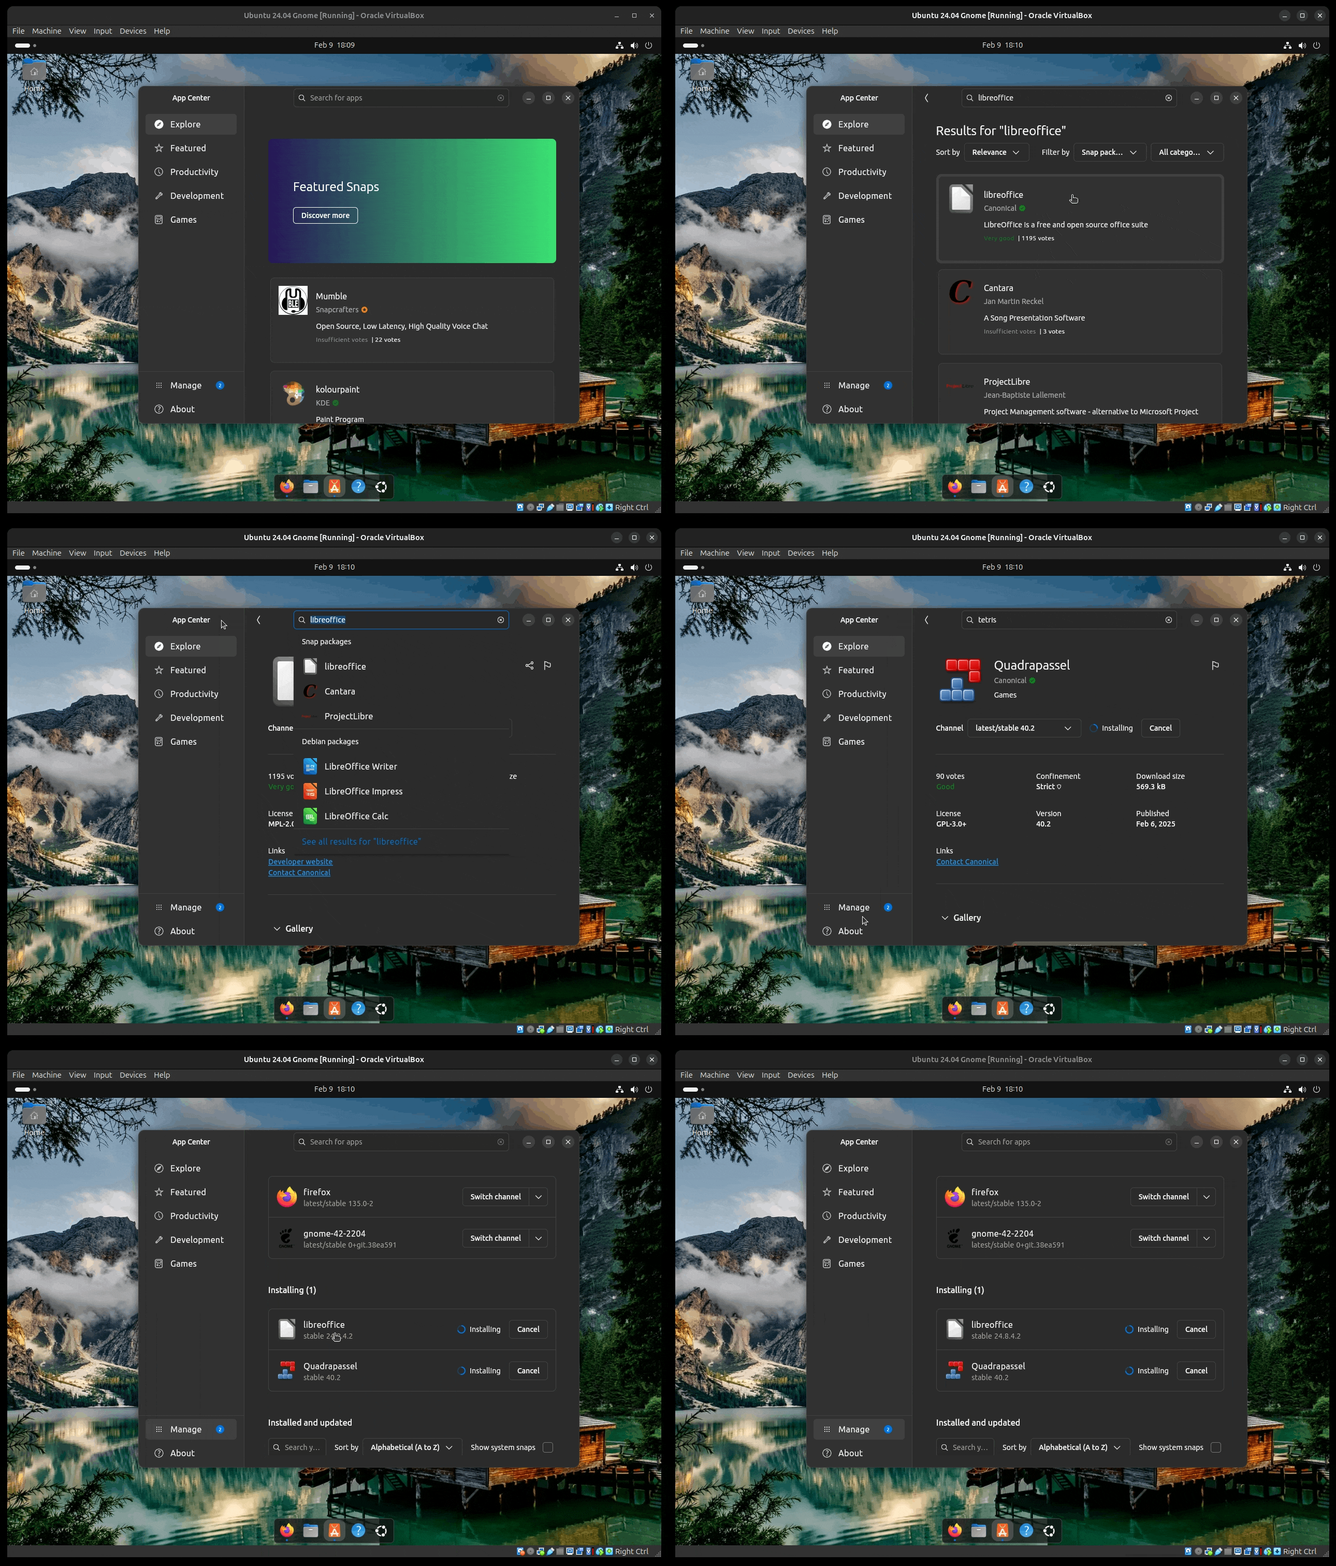
- Open the App Center
- Search for LibreOffice and install it - LibreOffice is a productivity suite similar to Microsoft Office.
- Search for a Tetris game. Install one of the options.
- Wait until the apps finish installing
- Open LibreOffice Writer, then close it.
- Open the Tetris game and close it
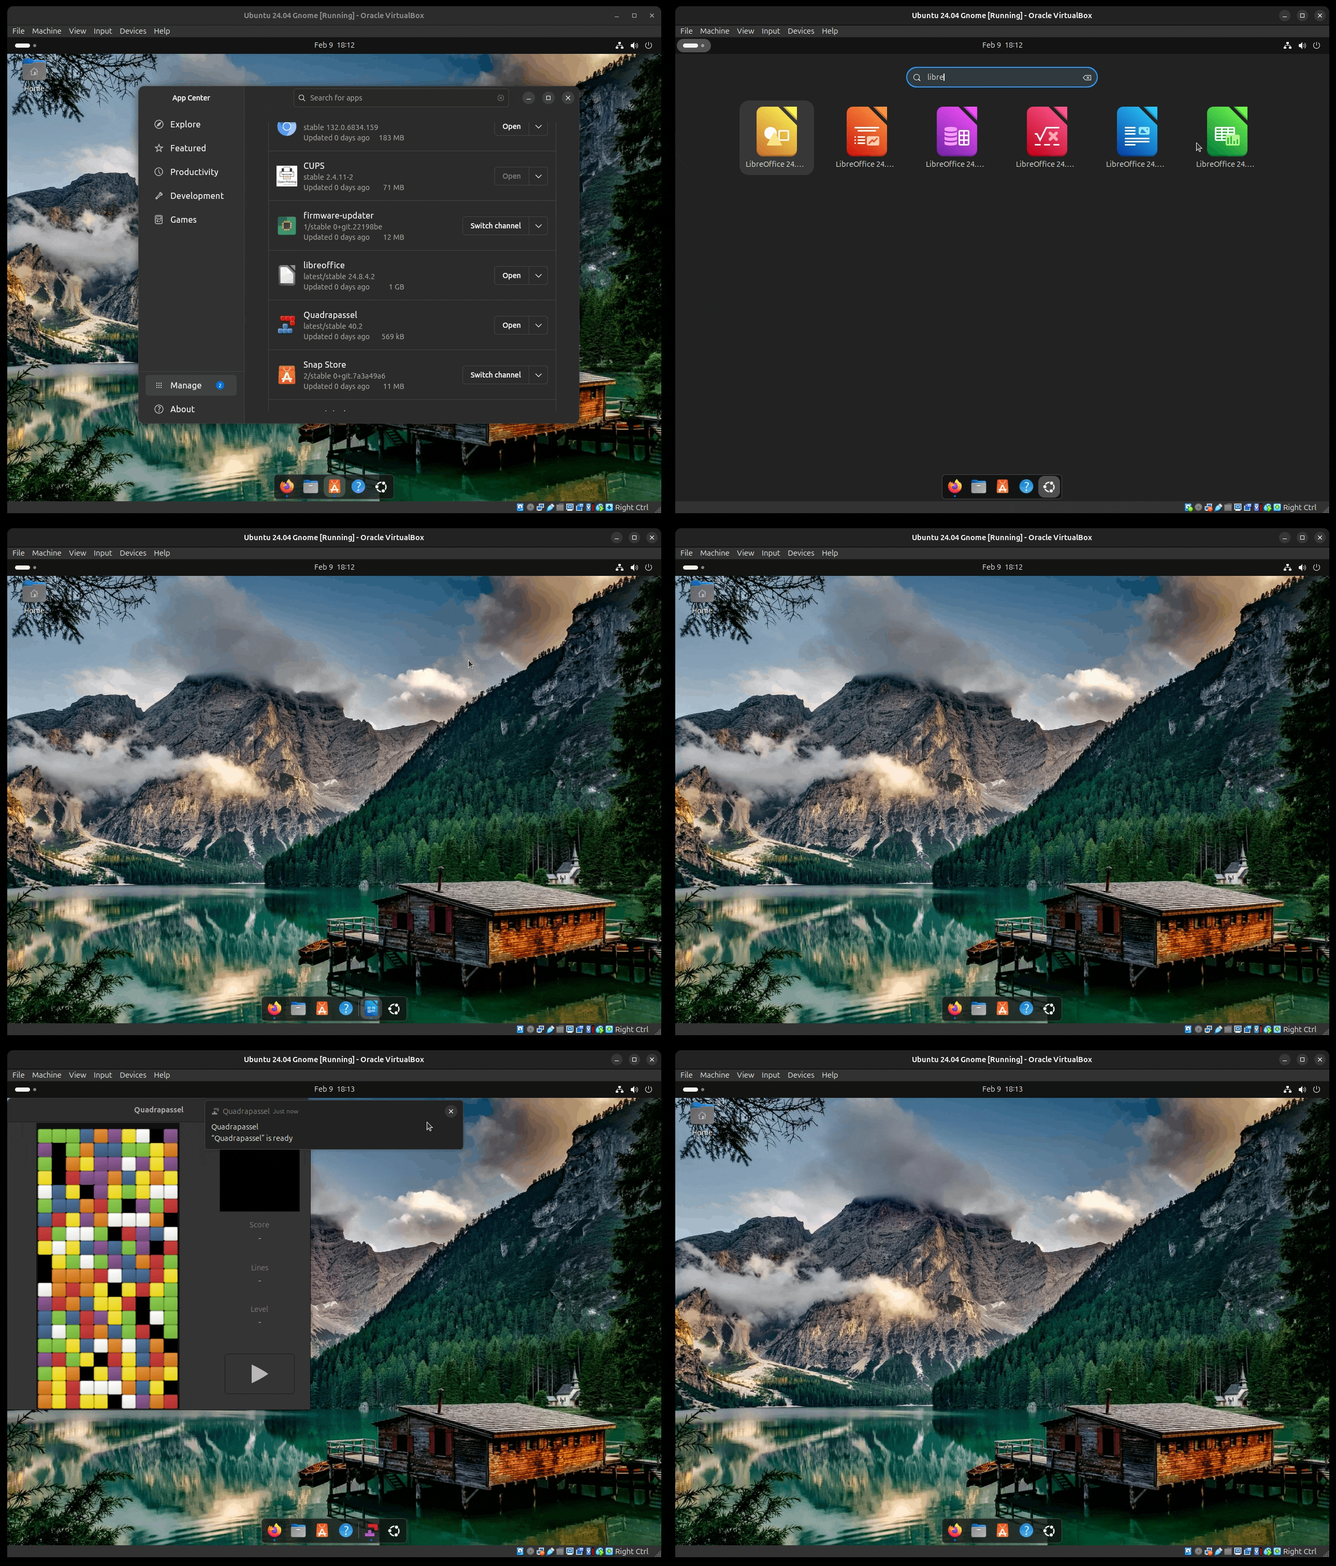
If you are doing this activity for the extra credit. Take a screenshot of the tetris game you installed. That will be the proof of submission for question 3
Question 4: Editing a document
In this section, you will edit Word documents and PDF files.
- Download this Word document
- Open the Word document in LibreOffice.
- Edit the document and export it to PDF
- Open the PDF file in LibreOffice Draw.
- Edit the PDf and export it again
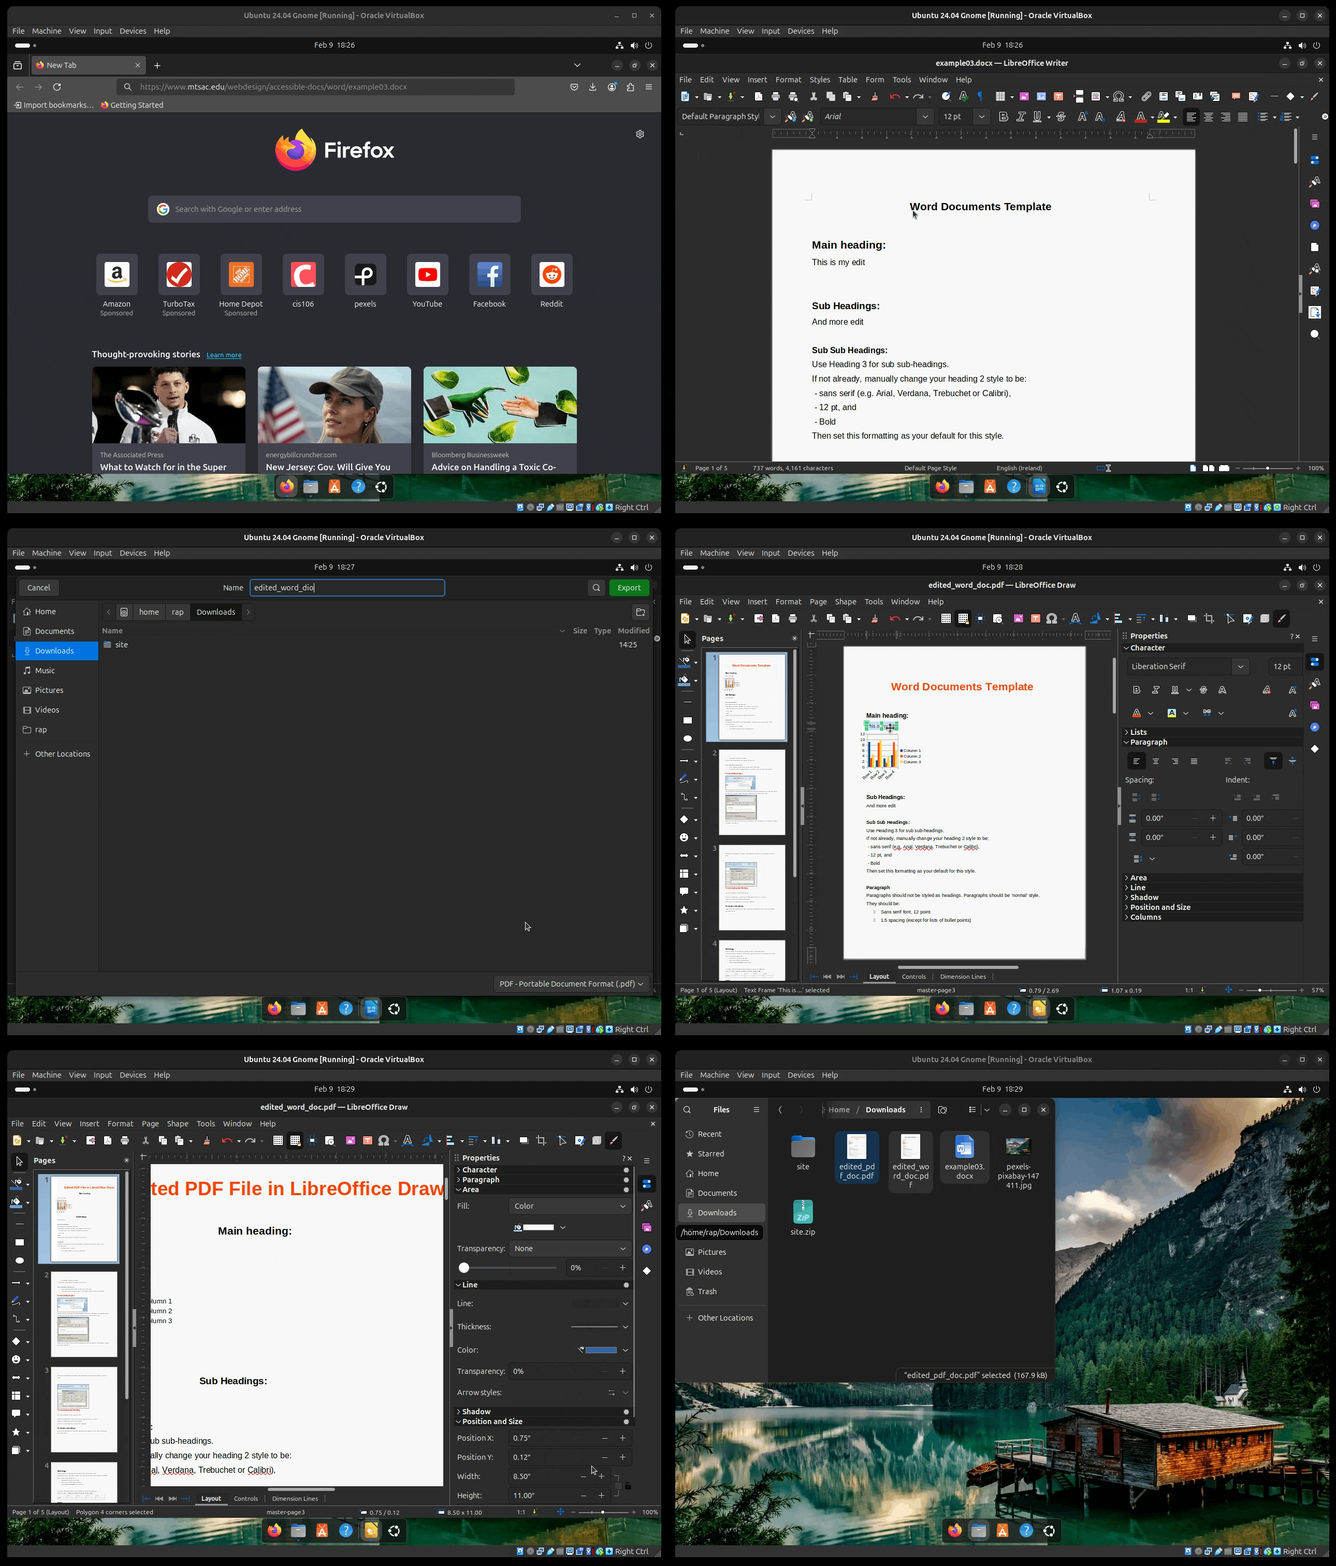
If you are doing this activity for the extra credit. Take a screenshot of the edited PDF document showing your edits. That will be the proof of submission for question 4
Question 5: Installing Gnome Extensions
GNOME extensions allow you to add additional functionality to the desktop environment. As part of the initial setup for the class, you installed the GNOME Extensions application that allows you to download extensions.
- Open the app “Extensions Manager”
- Search for the extension “Caffeine” and install it. This extension prevents your computer from going to sleep. To use the extension, open the system menu. You will see a new icon ( a cup of coffee ).
- Search for the extension “Apps Menu” by “Fmuelliner” and install it. This adds a Windows-style applications menu to the top-left corner of the screen.
- You can disable or uninstall any extension you want. Keep in mind that system updates may break some extensions. I recommend keeping the number of extensions to a minimum.
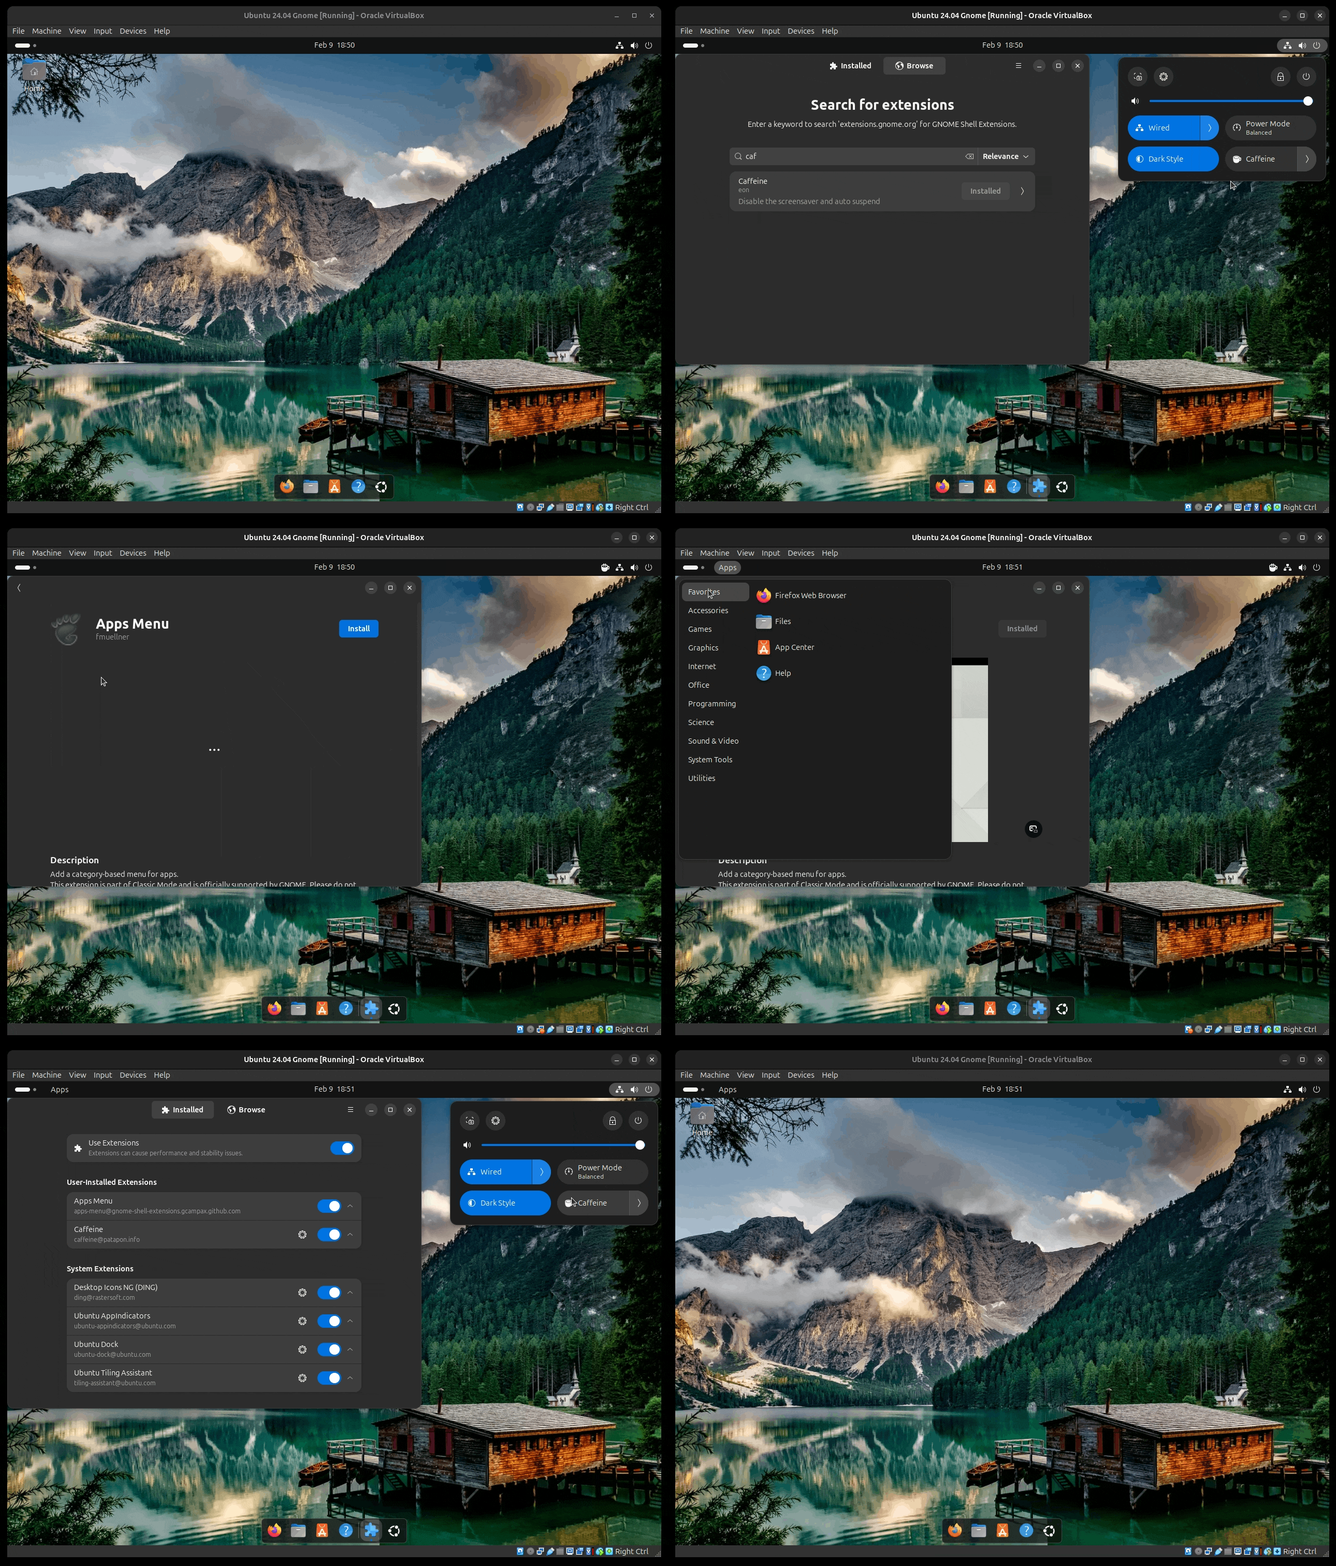
If you are doing this activity for the extra credit. Take a screenshot of your desktop showing the extensions. That will be the proof of submission for question 5
What will you submit for extra credit
If this is your first extra credit assignment, you will need to create the necessary parent directory. In your
cis106directory (local repository), create a new directory calledExtraCredit(Use one word with no spaces in directory names.)
- Inside
ExtraCredit, create a directory called:extra3 - Open your
cis106directory (local repository) in VS Code - Inside
extra3, create a Markdown file calledextra3.md - Add all the screenshots you took earlier to
extra3.mdusing proper Markdown syntax and labeling each screenshot using Heading 2 Markdown headings. Save the Markdown file. - Your Markdown document should begin with the following Heading 1:
# Extra Credit 3: Getting Comfortable with the GNOME Desktop Environment - Convert your file to PDF
- Run the following GitHub commands in the VS Code terminal to push your changes to GitHub:
git pullgit add .git commit -m "Completed Extra 3"git push
- In Blackboard, submit the following:
- The URL of
extra3.md - The PDF file
extra3.pdf
- The URL of