Lab 3 - The GNOME DE and The Bash Shell
Video here
- Lab 3 - The GNOME DE and The Bash Shell
- Video here
- Learning Outcomes
- Pre Work
- Question 1: Using The Gnome Desktop Environment
- Question 2: Working with the terminal emulator
- Question 3: Trying Out Some Basic Commands
- Question 4: Changing the desktop environment (Optional)
- Challenge Question
- Special Note 1 - Practice the man command!
- Special Note 2 - Git Command Quick Reference
- Special Note Regarding the Final Exam
Learning Outcomes
- Get comfortable with the GNOME Desktop Environment
- Learn how to use the terminal to run simple commands
- Learn how to use the man command to read the manual pages
Pre Work
Before starting this lab, complete the following setup steps:
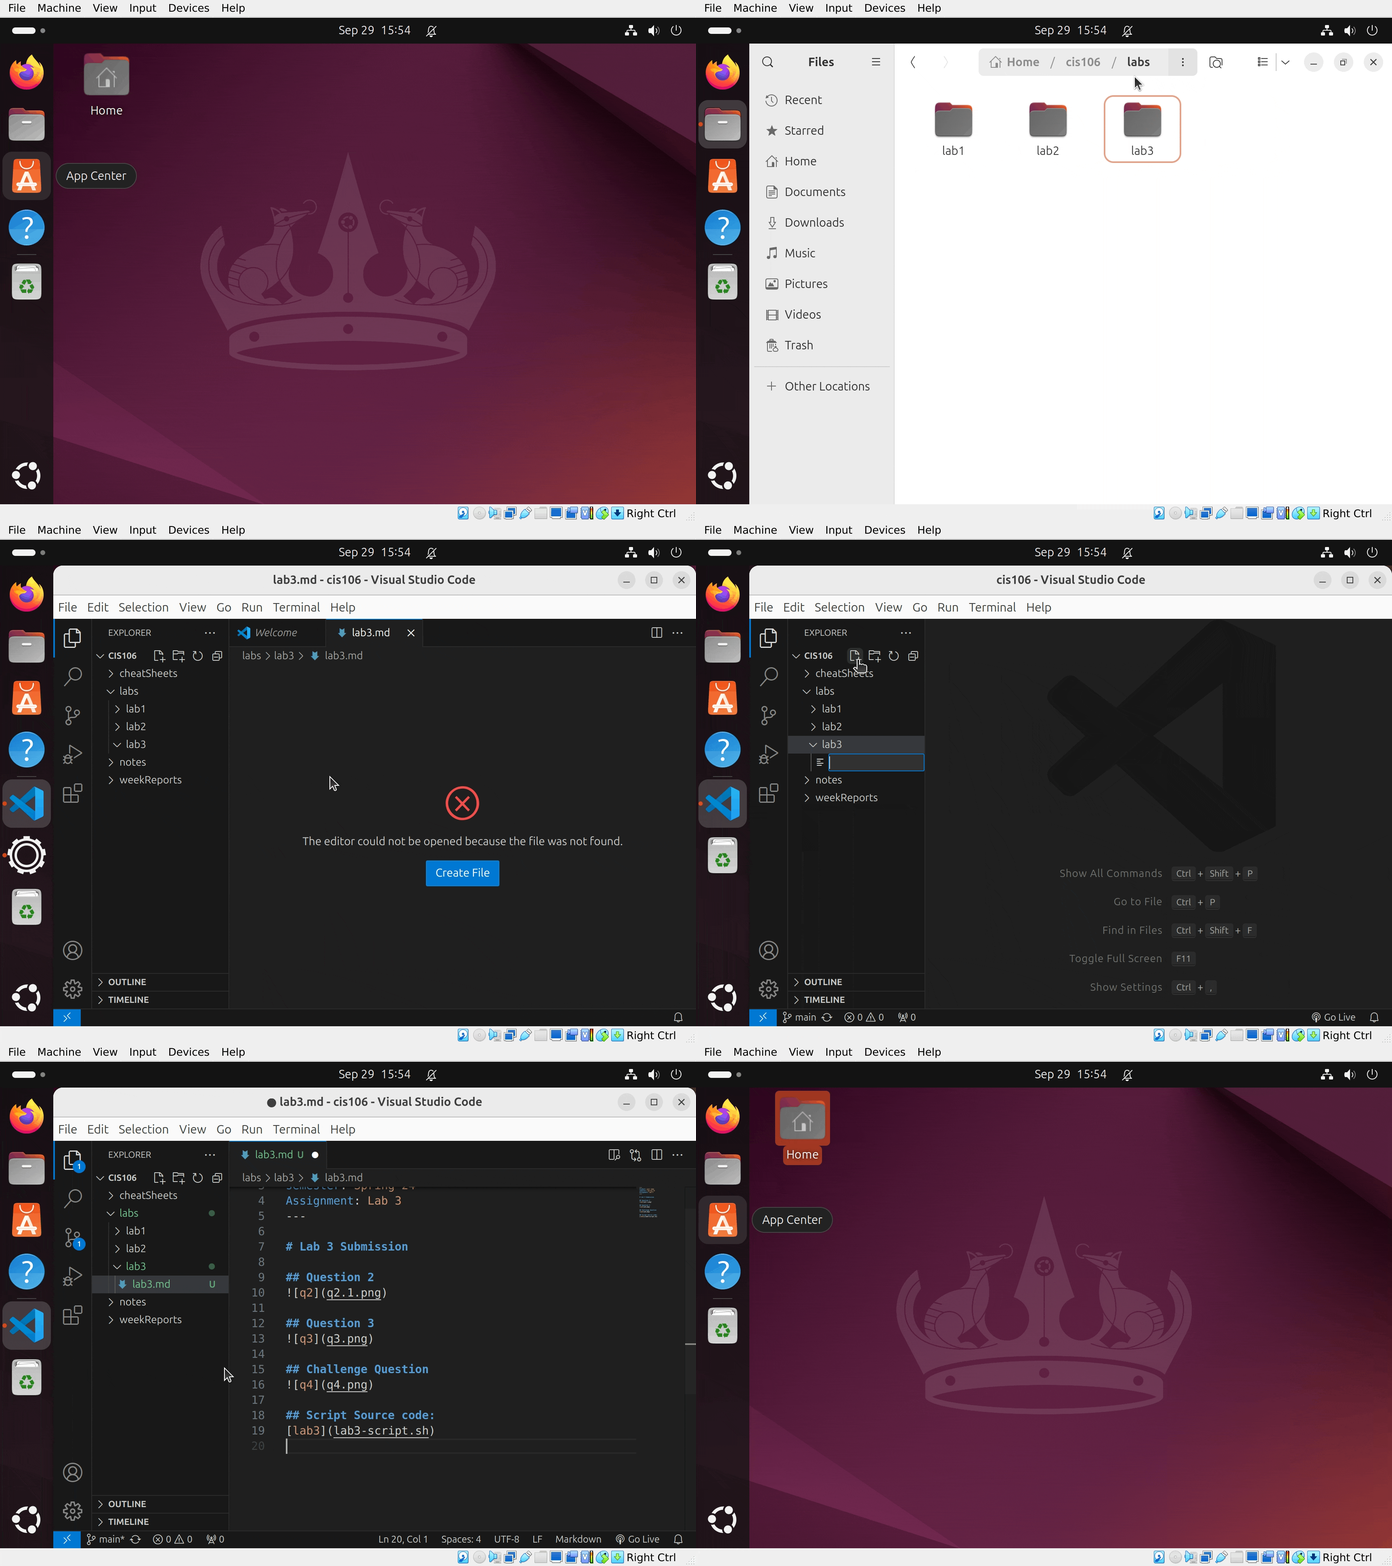
- Open the File Manager and navigate to the labs folder/directory inside your
cis106repository:~/cis106/labs/ - Create a new folder/directory named
lab3. - Open Visual Studio Code (VS Code) and open the
cis106folder/directory. - Inside the
lab3folder/directory, create a new file namedlab3.md. - Copy and paste the following markdown template into the file. Save your changes, close VS Code, and then begin your lab work.
Note: This template will be the standard format for all lab submissions moving forward. If you are ever unsure about how to structure your work, return to this lab as a reference.
# Lab 3 Submission
## Question 1

## Question 2

## Question 3

## Challenge Question

## Challenge Question Script Source code:
[lab3](lab3-script.sh)
Question 1: Using The Gnome Desktop Environment
In this section, you’ll get comfortable with GNOME by exploring its features, customizing your desktop, and learning how to manage basic settings.
Changing the wallpaper
- Download a wallpaper you like. (You can use Google Images or a dedicated site like wallhaven.cc and pexels.com).
- In your Pictures folder, create a new folder/directory called
wallpapers. - Save your downloaded image into this new folder. Rename the file to something descriptive.
- Right-click on the desktop -> choose Change Background -> select your new wallpaper.
Customizing the Dash
The dash is the favorites bar that appears on your desktop. You can add apps you use often and remove the ones you don’t need.
- To remove an app: Right-click -> Unpin from Dash
- To add an app: Search for the app -> Right-click -> Pin to Dash
Make the following changes:
Add:
- Tilix
- VS Code
- GNOME Screenshot
Remove:
- Help
- Calculator
- Software Center
Using GNOME Extensions
In Lab 2, you ran the essentials.sh script. This script installed several GNOME Extensions — small programs that add or change GNOME features.
To manage them, open the Extensions Manager app.
Extensions to Enable:
- Caffeine - Prevents the computer from going to sleep. (Look for the coffee cup icon in the system menu.)
- Dash to Panel - Moves the dash into a bottom panel, similar to Windows 10.
- System Monitor - Displays resource usage (helpful since our VM has limited resources).
- Tiling Assistant - Lets you snap apps to the left or right (like macOS/Windows).
Steps:
- Turn on these extensions one at a time. Wait until each one is fully enabled before turning on the next.
- Install one new extension: Frippery Applications Menu by Rmyorston.
- After enabling it, you’ll see a new Applications option in the panel.
Extensions can also be tweaked. For instance, let’s customize the Dash to Panel extension.
- Click on the gears icon in the Dash to Panel extension.
- In the Fine-Tune section, enable “Keep original gnome-shell top panel”. Notice that the top panel has been re-enabled. However, now we have duplicated items such as the date and system menu
- In the Position section, use the visible option to hide the system menu and the date
Exploring the File Manager (GNOME Files / Nautilus)
GNOME’s file manager is simple but works much like Windows Explorer. Let’s try some tasks to get familiar with it:
- Show hidden files -> Press Ctrl + H or use the menu button. In Linux/Unix, hidden files start with a dot (.).
- Create a hidden folder/directory in your Home folder named
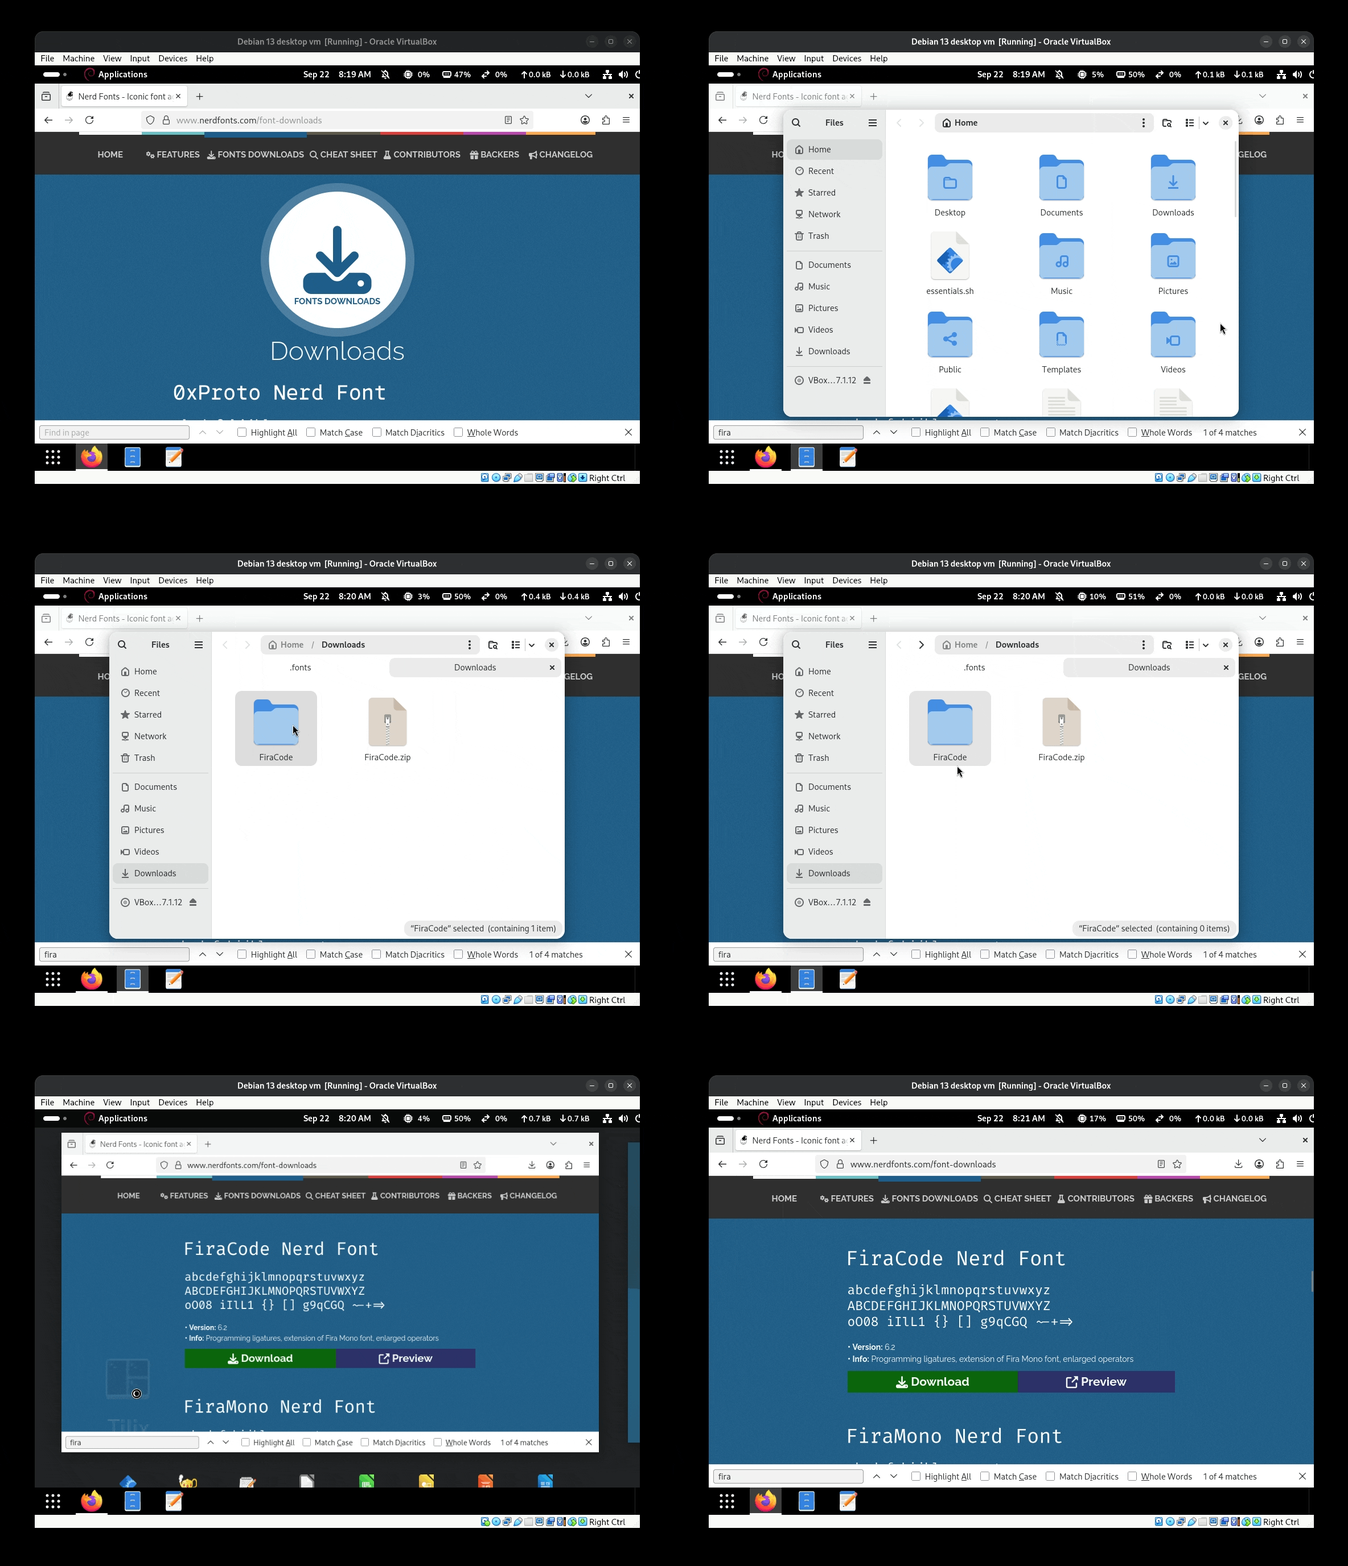
.fonts. - Download FiraCode Nerd Font from: nerdfonts.com/font-downloads.
- Open the zip file
FiraCode.zip. It will unzip into a folder calledFiraCode. - Open the
FiraCodefolder -> Select all files (Ctrl + A) -> Copy them. - Paste the files into the
.fontsfolder you created. - Delete the unnecessary files:
LICENSEandREADME.md. - Refresh the font cache:
- Option 1: Log out and log back in
- Option 2: Run this command in the terminal:
fc-cache -f -v
- Turn off hidden files (Ctrl + H) when finished.
Exploring Gnome Text
Another essential tool in any desktop environment is the text editor. Linux relies heavily on configuration files; so much so that in Linux/Unix, everything is considered a file (we’ll explore this idea in more detail later). As a Linux user, you’ll be working with configuration files frequently, which makes familiarity with a text editor indispensable.
GNOME provides a simple yet powerful text editor called Gnome Text. In earlier versions of GNOME, the default editor was Gedit. While Gedit can still be installed and used, it is no longer part of the core GNOME applications.
Follow these steps to get comfortable with Gnome Text:
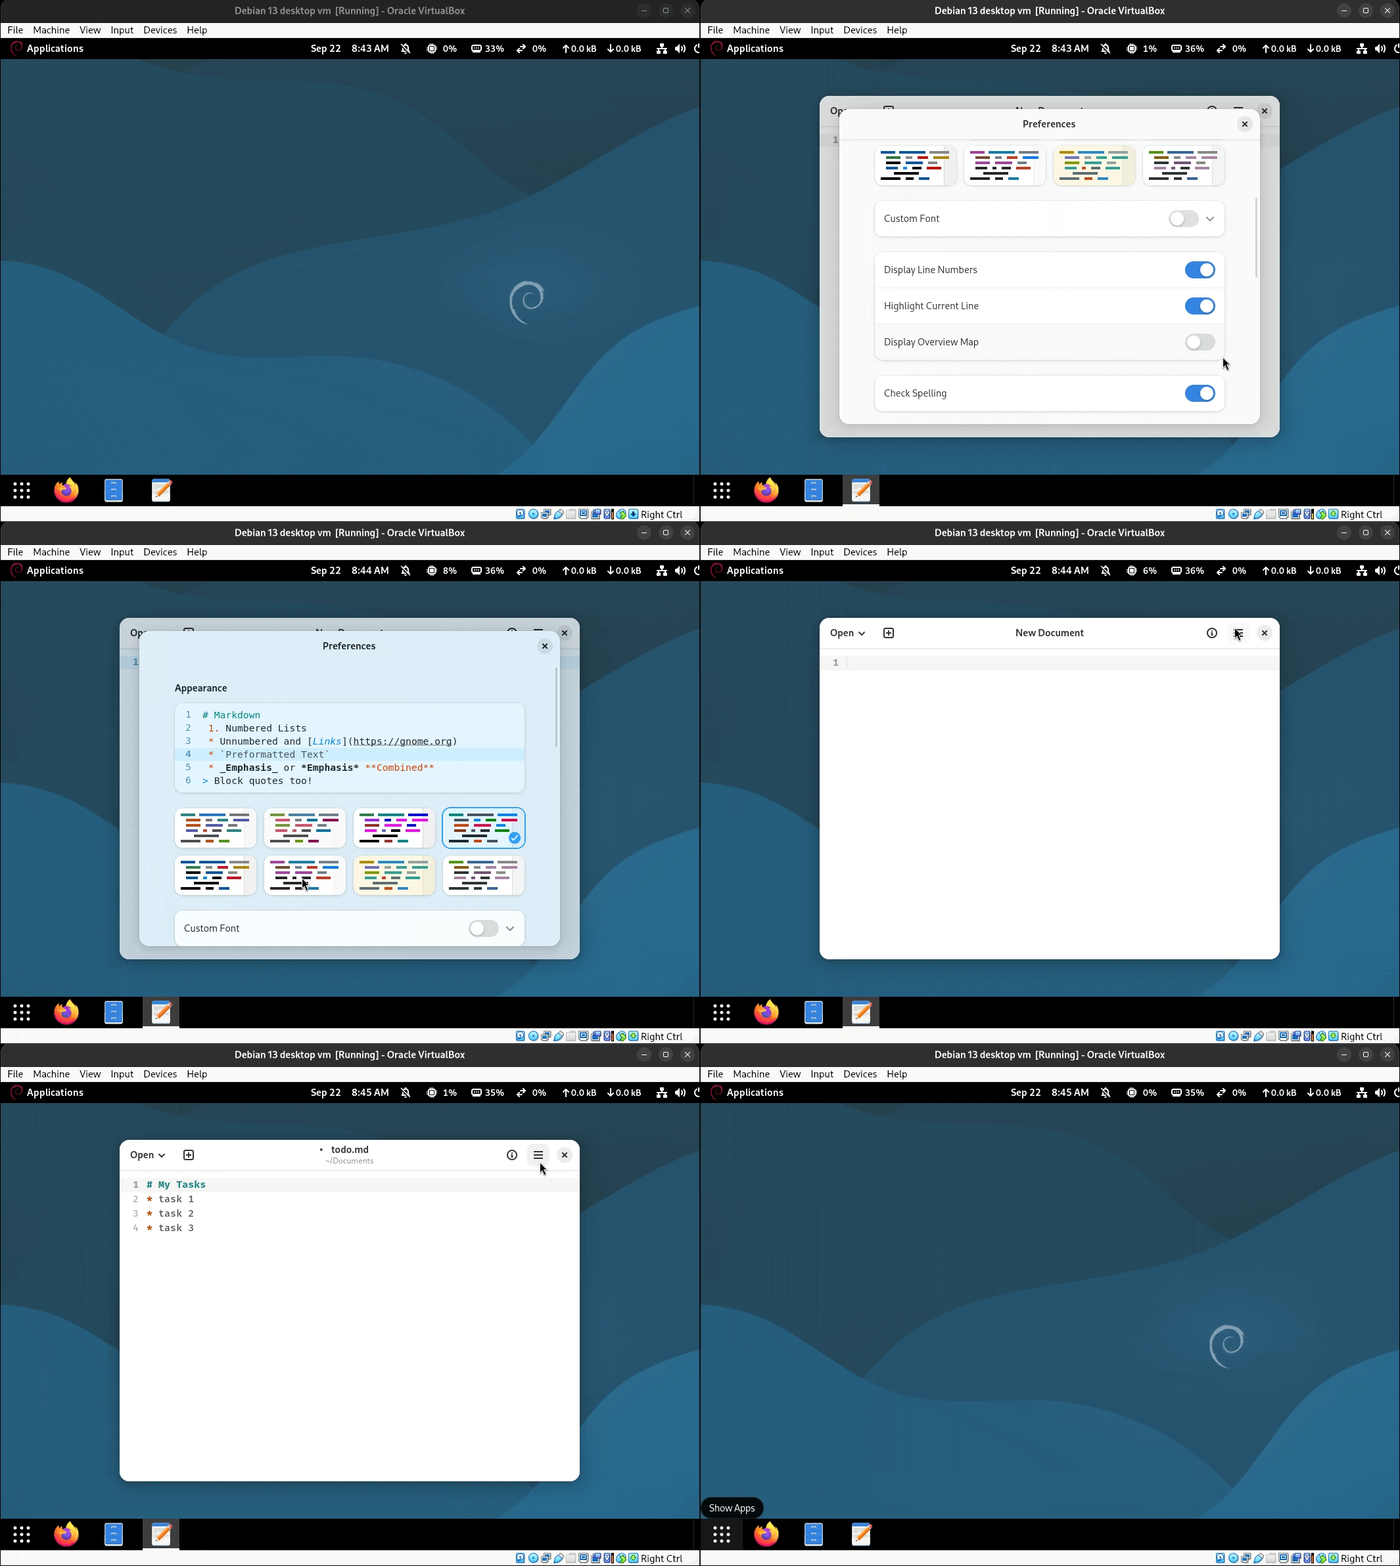
- Open the Text Editor app (Gnome Text).
- Click the hamburger menu (≡) and go to Properties:
- Enable “Show line numbers”
- Enable “Show right margin”
- Disable “Check spelling”
- Disable “Restore Session”
- Under Spaces Per Tab, set the value to 4
- Choose a theme you like
- Enable Custom font, then select the font you downloaded earlier. Adjust the font size to your preference
- Enable Highlight current line
- Create a new file and write a simple to-do list. Save the file as
Todo.md.- Add a bit of Markdown formatting and observe how the editor provides syntax highlighting.
- Reopen the file, make some edits, and try to close the editor without saving.
- Notice that Gnome Text gives you three options:
- Discard -> Closes the editor and loses all changes
- Save -> Prompts you to save your file in a location of your choice
- Cancel -> Cancels the action and returns you to the editor
- Save and close the editor.
- Finally, open two or more files in Gnome Text. Notice that each file opens in its own tab within a single window.
Exploring GNOME System Settings
GNOME provides two main apps for system configuration:
- Settings -> general options (appearance, apps, notifications, etc.)
- GNOME Tweaks -> advanced customization Tasks:
- Open the Settings app. Explore the available categories.
- Open GNOME Tweaks.
- Go to Windows -> Enable Titlebar Buttons -> add Minimize and Maximize.
- Notice the window border now shows Minimize, Maximize, and Close.
- Back in Settings:
- Switch between Dark Mode and Light Mode, and choose an accent color.
- Check Default Apps -> see which apps are set for each task.
- Go to Notifications -> Turn on Do Not Disturb, or manage app-specific notifications.
- Explore the Search section -> decide whether to include files in search results or just apps.
- Explore any other options you’re curious about.
Deliverable Question 1
Take a screenshot of your full virtual machine screen.
- Name the file:
q1.png- Save it in your
lab3folder/directory.
Question 2: Working with the terminal emulator
Before we start working with Bash, let’s first get comfortable with the terminal emulator itself. Since most people have little to no experience using a terminal, this step will help you understand the application before we dive into commands.
Currently, your system has two terminal emulators installed:
- GNOME Console
- Tilix
For this lab, we will use Tilix because it offers more features than GNOME Console. However, I encourage you to explore GNOME Console on your own time.
Step 1: Splitting the terminal
- Open Tilix. (If a warning or error message appears, you can safely ignore it.)
- Look in the top-left corner—you will see two icons that allow you to split the terminal.
- Use these buttons to split the terminal into four panes, so you end up with 4 terminal windows like this:
Note: It is common to use multiple terminals simultaneously. This is an essential skill for your final exam. Advanced users often use tools like Tmux to achieve similar workflows, but Tilix makes it easier for beginners.
Step 2: Creating sessions
- Tilix also allows you to create separate sessions, which work like workspaces.
- Click on “View session side bar (1/1)” and use the “+” button to add a new session.
Step 3: Exploring Tilix preferences
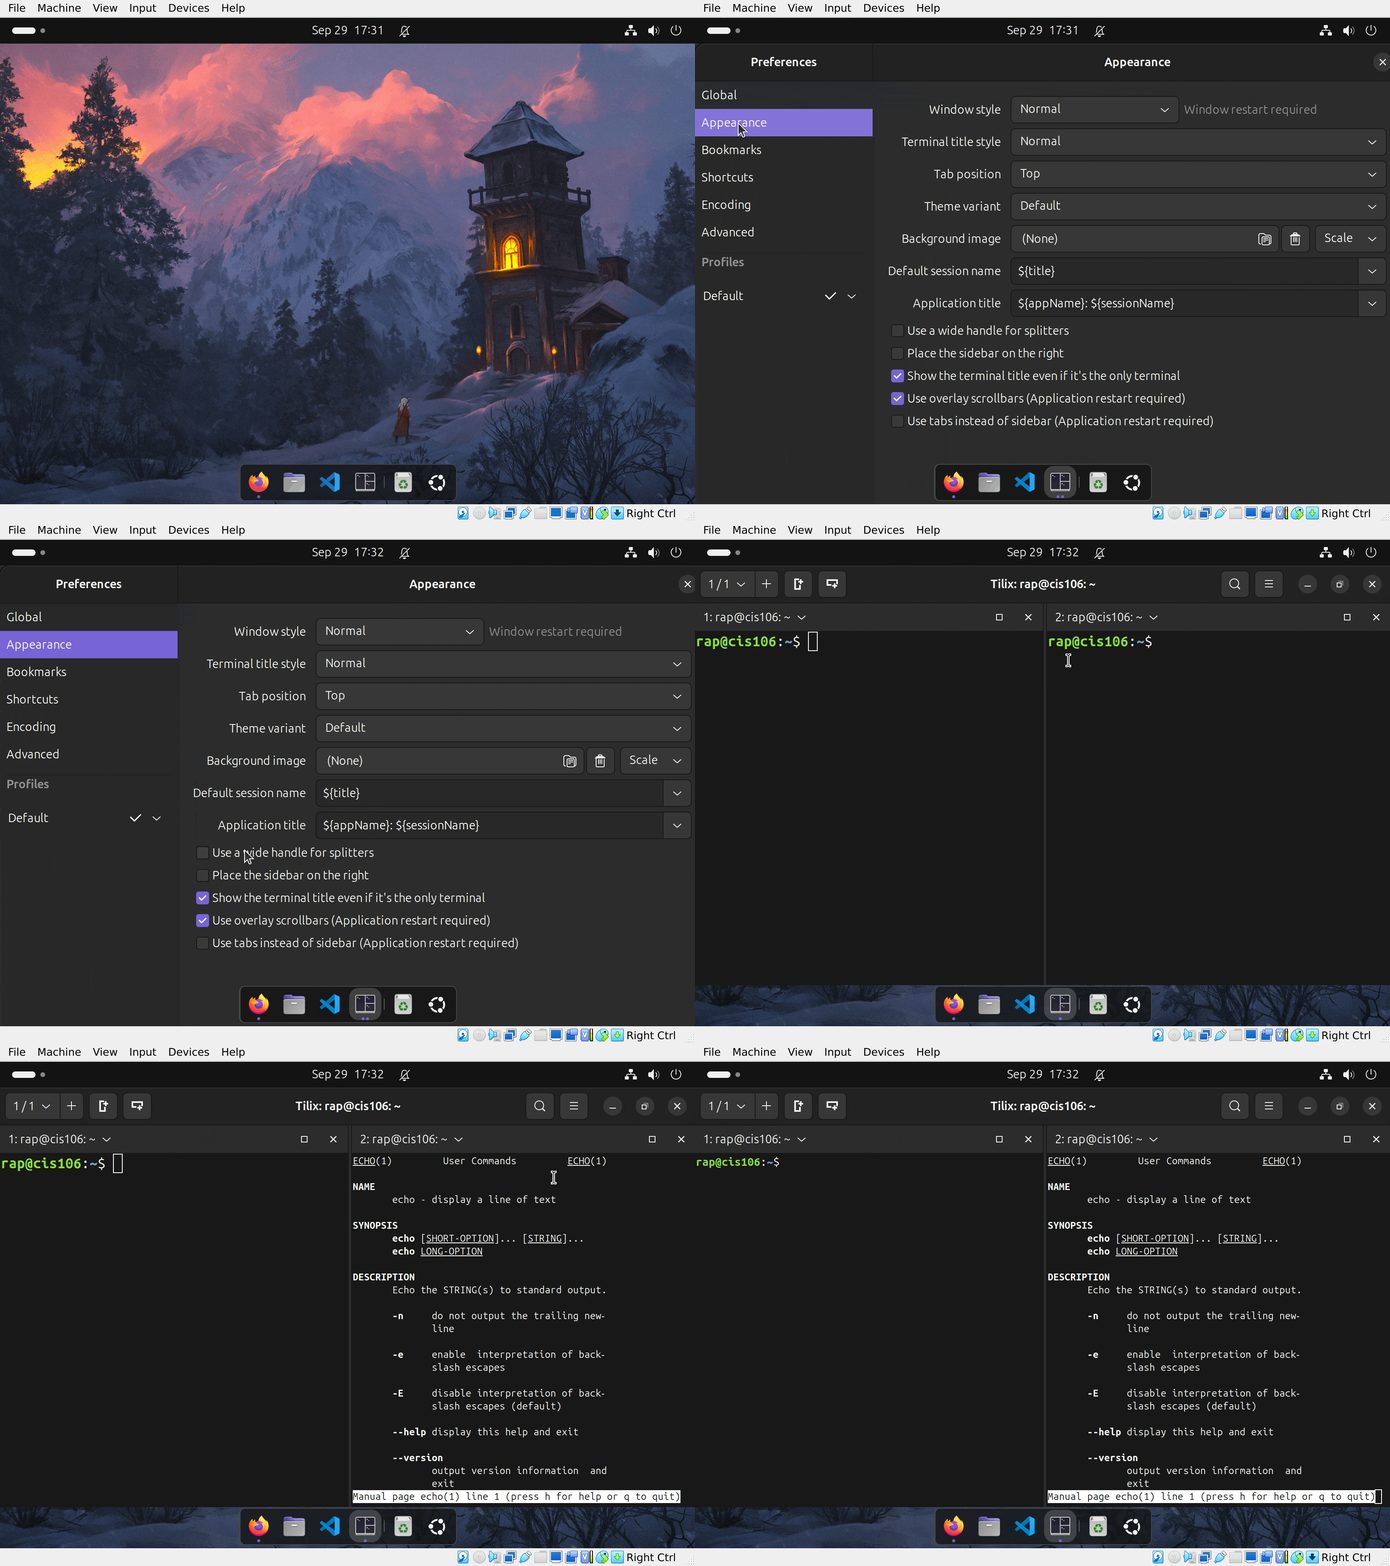
- Open the hamburger menu (≡) → select Preferences.
- Under Global:
- Enable: Strip first character of paste if comment or variable declaration
- Enable: Strip trailing whitespaces and new lines
- Under Appearance:
- Set the theme variant to match your system preference (dark or light).
- Optionally, you can set a background image (a dark wallpaper pairs well with white text).
- If you use a background image, you will need to adjust transparency later.
- Enable: Use wide handle for splitters (this makes resizing panes easier).
- Under Default Profile -> General tab:
- Enable Custom font and choose FiraCode Nerd Font (pick any variant you like).
- If you want something more modern, try the Dracula Theme for Tilix.
- Adjust transparency if you added a background image earlier.
Deliverable Question 2
Take a screenshot of Tilix.
- Name the screenshot:
q2.png- Save it in your
lab3folder/directory.
Question 3: Trying Out Some Basic Commands
In this question, we will learn how to read the manual (man) page of a command and how to work with two terminals at the same time. The command we will focus on is echo.
Step 1: Split the terminal
- Open Tilix.
- Split it vertically so you have two terminal panes.
Step 2: Open the manual page
- In the right terminal, open the manual page for echo using the command:
man echo - Navigate the manual page using:
- Arrow keys to scroll line by line
- Spacebar to scroll one page at a time
- To open the help page inside the manual reader (for additional commands and navigation tips), press h.
- To exit the manual page, press Q.
Step 3: Using the echo command
- The basic usage of echo is:
echo "string to print to the screen"- Tip: Quotes are optional but recommended, as they help avoid issues with special characters.
- Use the man page to learn how to perform the following tasks:
- Display a line of text without a new line
- Display a line of text that includes a horizontal tab
- Display two lines of text in a single echo command
- Display two lines of text in a single echo command, with the second line starting with a tab
- Display two lines of text, with the first line starting with a tab
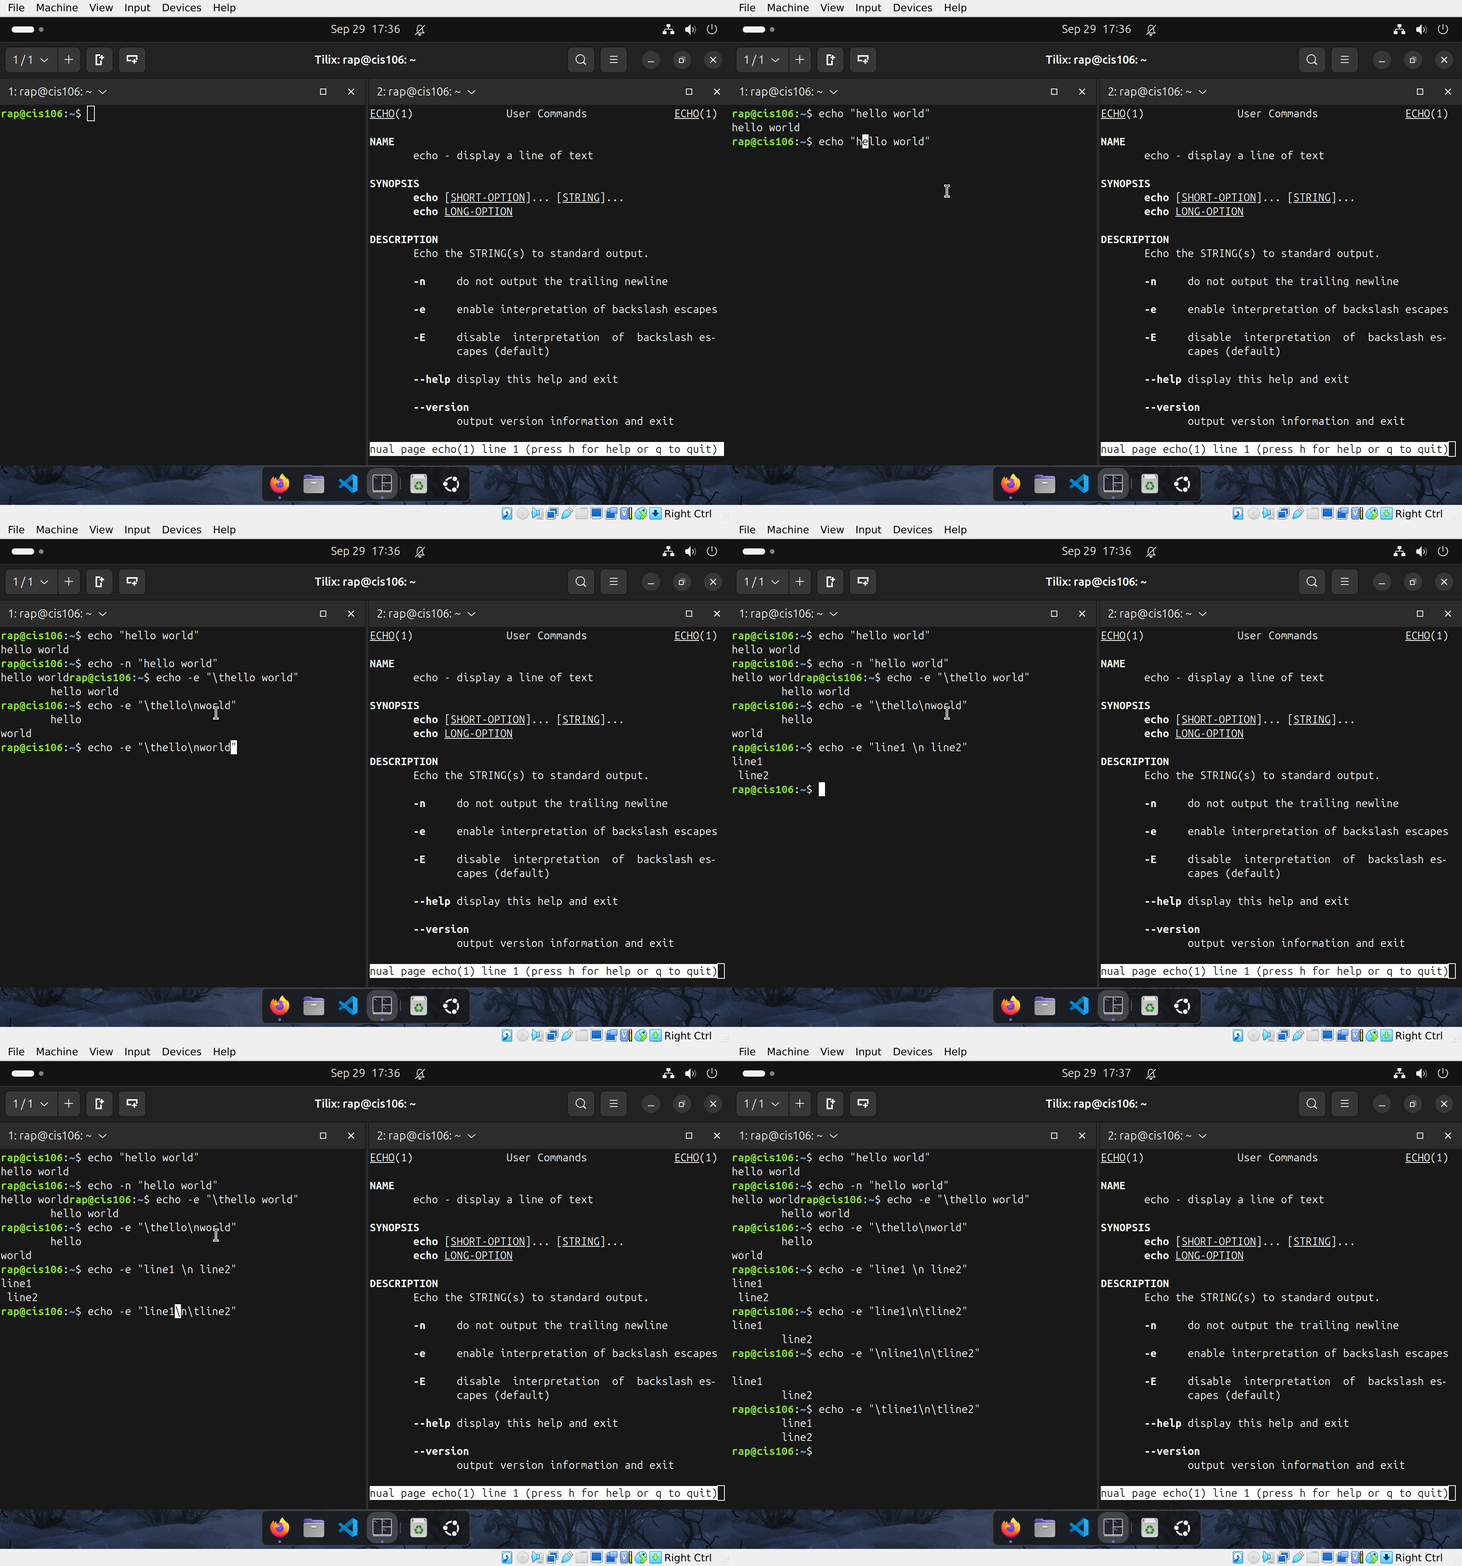
Deliverable Question 3
Take a screenshot of Tilix.
- Name the screenshot:
q3.png- Your screenshot should show all echo commands and the man page open
- If more than 1 screenshot is needed, use the following naming convention:
q3.1.png,q3.2.png- Save it in your
lab3folder/directory.
Question 4: Changing the desktop environment (Optional)
During the Debian installation we chose 2 desktop environments: Gnome and Gnome Classic. In Linux, we are not tied to a single desktop environment, we can install others we if want to. Since we have Gnome Classic already installed, lets take a look.
- Log out.
- In the display manager, type your password but do not press enter
- In the button right corner, you will notice a gear icon. Click it and choose Gnome Classic
- Sign in.
- Notice how different the desktop environment looks
- Sign out and switch back to the Default Gnome Session
Deliverable Question 4
This question has no deliverable
Challenge Question
Use the man page to find the answer to the following questions. Make sure to split your terminal in two so that you can use the man page in one and run commands on the other. The point of this question is to get you used to using multiple terminals and the man page. This is a skill that you will need for the final exam so please do not use the internet to find the answers. Make sure to take a screenshot of every command that answers each question. The screenshot needs to show the man page of the given command open in the location where you found the answer and it has to show the command and its output.
- John wants to see how much free memory he has in his system. He understands that the
freecommand is used for this however, he would like the output of the command to appear in a single line and with human readable format.- What is the complete command that John has to use here?
- Take a screenshot showing the man page showing the correct options and the command and its output. See the example for a reference.
- Kenny is a system administrator working on automation scripts. He is building a script where he needs to know the kernel name, kernel release, kernel version, and operating system of the computer. He knows that the
unamecommand can provide this information.- What is the complete command that Kenny has to use here?
- Take a screenshot showing the man page showing the correct options and the command and its output. See the example for a reference.
- Dave is working with an API that only accepts rfc-3339 time format for dates. For example,
2025-09-10 18:39:53.467197335-04:00is an acceptable format but anything else will return an error. He needs adatecommand that will allow him to convert the current time into rfc-3339 format.- What is the complete command that Dave has to use here?
- Take a screenshot showing the man page showing the correct options and the command and its output. See the example for a reference.
Here is an example question and solution so that you know what I am expecting of you:
Example question
- Julius has a homelab with tailscale. His homelab has several Linux containers and he wants a command that will display in JSON format the IP configuration for a machine when he signs in. He knows that the command
ip addr show dev <interface>can be used for displaying the specific interface configuration but the output is not in JSON format and it is also hard to read.- What is the complete command that Julius has to use here? (options for the ip command have to be placed after
ip) - Take a screenshot showing the man page showing the correct options and the command and its output.
- What is the complete command that Julius has to use here? (options for the ip command have to be placed after
Example solution
Warning: If your screenshot does not show where in the man page you found the answer, you will not be awarded a passing grade for this question. The example clearly shows the command options in the man page that solves the problem.
Deliverable for challenge question
Take a screenshot of Tilix for the answer of each question.
- Name the screenshots:
q5.1.png,q5.2.png,q5.3.png,q5.4.png- Your screenshot should show the command and the man page. Just like the example
- If more than 1 screenshot is needed, use the following naming convention:
q5.1.1.png,q3.1.2.png- Save it in your
lab3folder/directory.
Special Note 1 - Practice the man command!
The challenge question in this lab is similar to the type of questions you will see in your final exam. In the final exam, you will have access to your notes and the man pages but not to the internet or any LLM. This means that you should use the challenge question as practice playground. Learn how to use the man pages efficiently and practice the workflow of having 2 terminals open.
Special Note 2 - Git Command Quick Reference
You’ll be using Git frequently this semester. Here’s a quick reminder of the most common commands:
| Command | Purpose |
|---|---|
git clone repository/url/here | Download a GitHub repository to your computer. |
git pull | Synchronize your local repository with the latest changes from GitHub. Always run this before starting work in VS Code. |
git add . | Track all changes made to your files. |
git commit -m "description here" | Save a snapshot of your tracked changes with a short description. |
git push | Send your committed changes to GitHub. |
Command Order:
git pull
git add .
git commit -m "message"
git push
⚠️ Warning: ⚠️
Avoid making changes directly in the GitHub website unless you:
- Know exactly what you are doing, and
- Remember to run git pull before working locally.
Special Note Regarding the Final Exam
- The final exam will be in person.
- It is performance-based and requires access to a Linux Virtual Machine.
- If you do not have a laptop/computer you can bring to school:
- A Linux workstation will be available on campus.
- Request it early—available computers are limited.