Lab 2 - Installing Ubuntu For Underpower PCs and Intel Macs using Ubuntu Server
Video here
Lab 2 - Installing Ubuntu Using Ubuntu Server
Who is this lab for?
This lab is for students with underpowered PCs/Intel Macs that encountered issues with alternative 3. For example, the installer froze during the installation. We will be using Ubuntu Server.
Requirements:
| HARDWARE | SPEC |
|---|---|
| CPU | Dual Core 1.5 Or higher |
| RAM | 4 - 8 Gb DDR4 |
| STORAGE | 40 Gb Available |
Example PCs/Macs
Step 1: Download a Hypervisor
We will be using Virtualbox 7. Download the following:
- Ubuntu 22.04 Server ISO file
- Virtualbox Installer
- Virtualbox Extension Pack
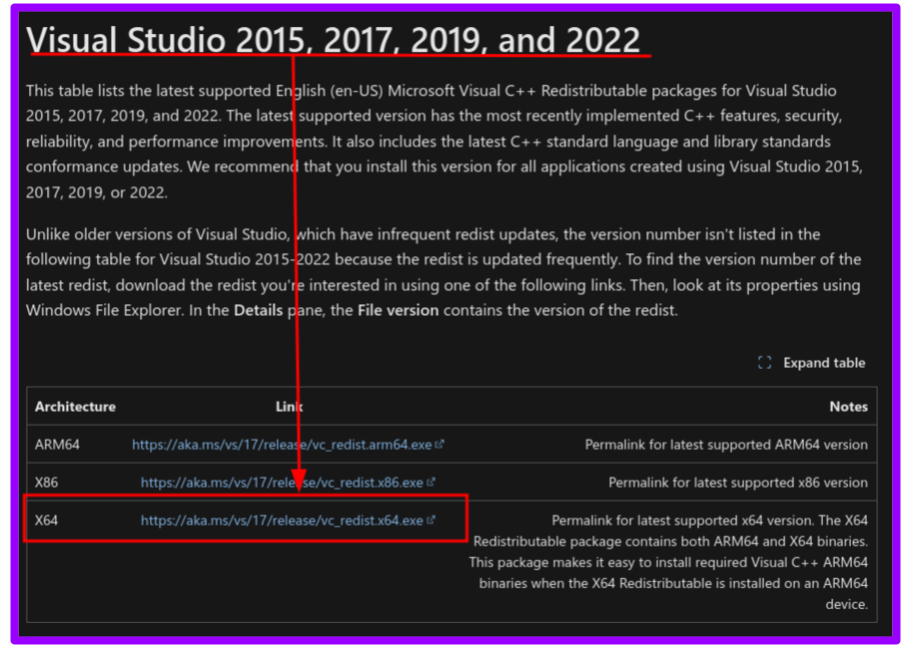
- For Windows Users:
- Install the Microsoft Visual C++ Redistributable x64
- Direct Link: here
- Install the Microsoft Visual C++ Redistributable x64
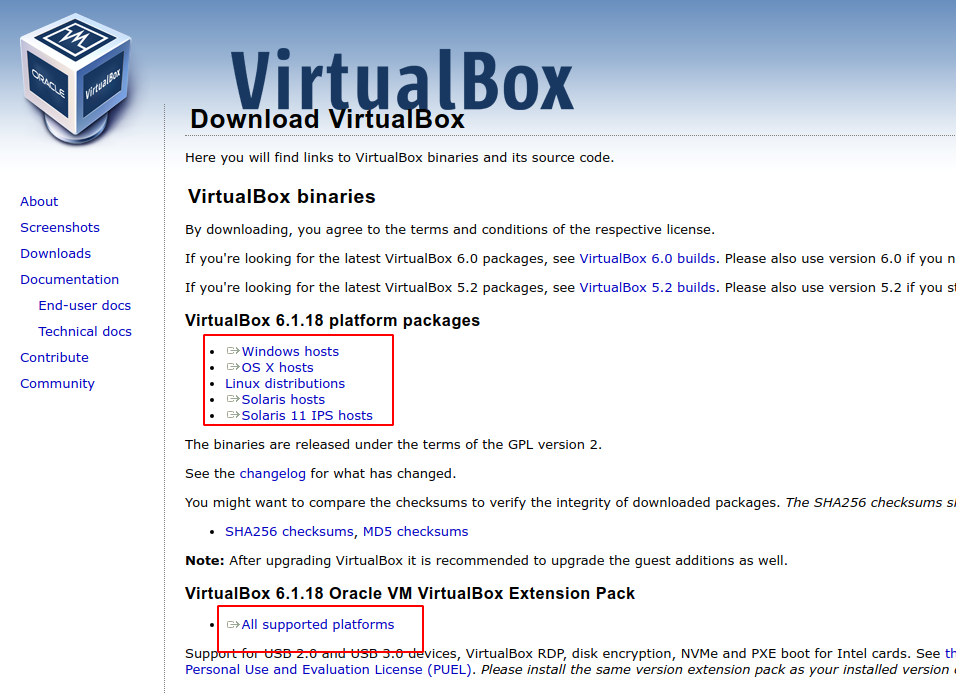
- Install Virtualbox
Make sure to select the right installer for your operating system:
Note: The videos are a little old but the steps are still the same.
Step 2: Create a Virtual Machine
create a virtual machine that meets these specifications:
- OS: Ubuntu 22.04 64Bits ISO URL
- HDD: 40 GB
- RAM: 2GB
- Video: 128 MB or Higher
- Audio Controller: Disabled (audio won’t be needed)
- CPU: 1 Cores
- Add this to description:
- Hostname: cis106vm
- User: student name (use your blackboard username)
- Password: pccc
- Shared Clipboard: Enabled - Bidirectional
- Drag n’ Drop: Enabled - Bidirectional
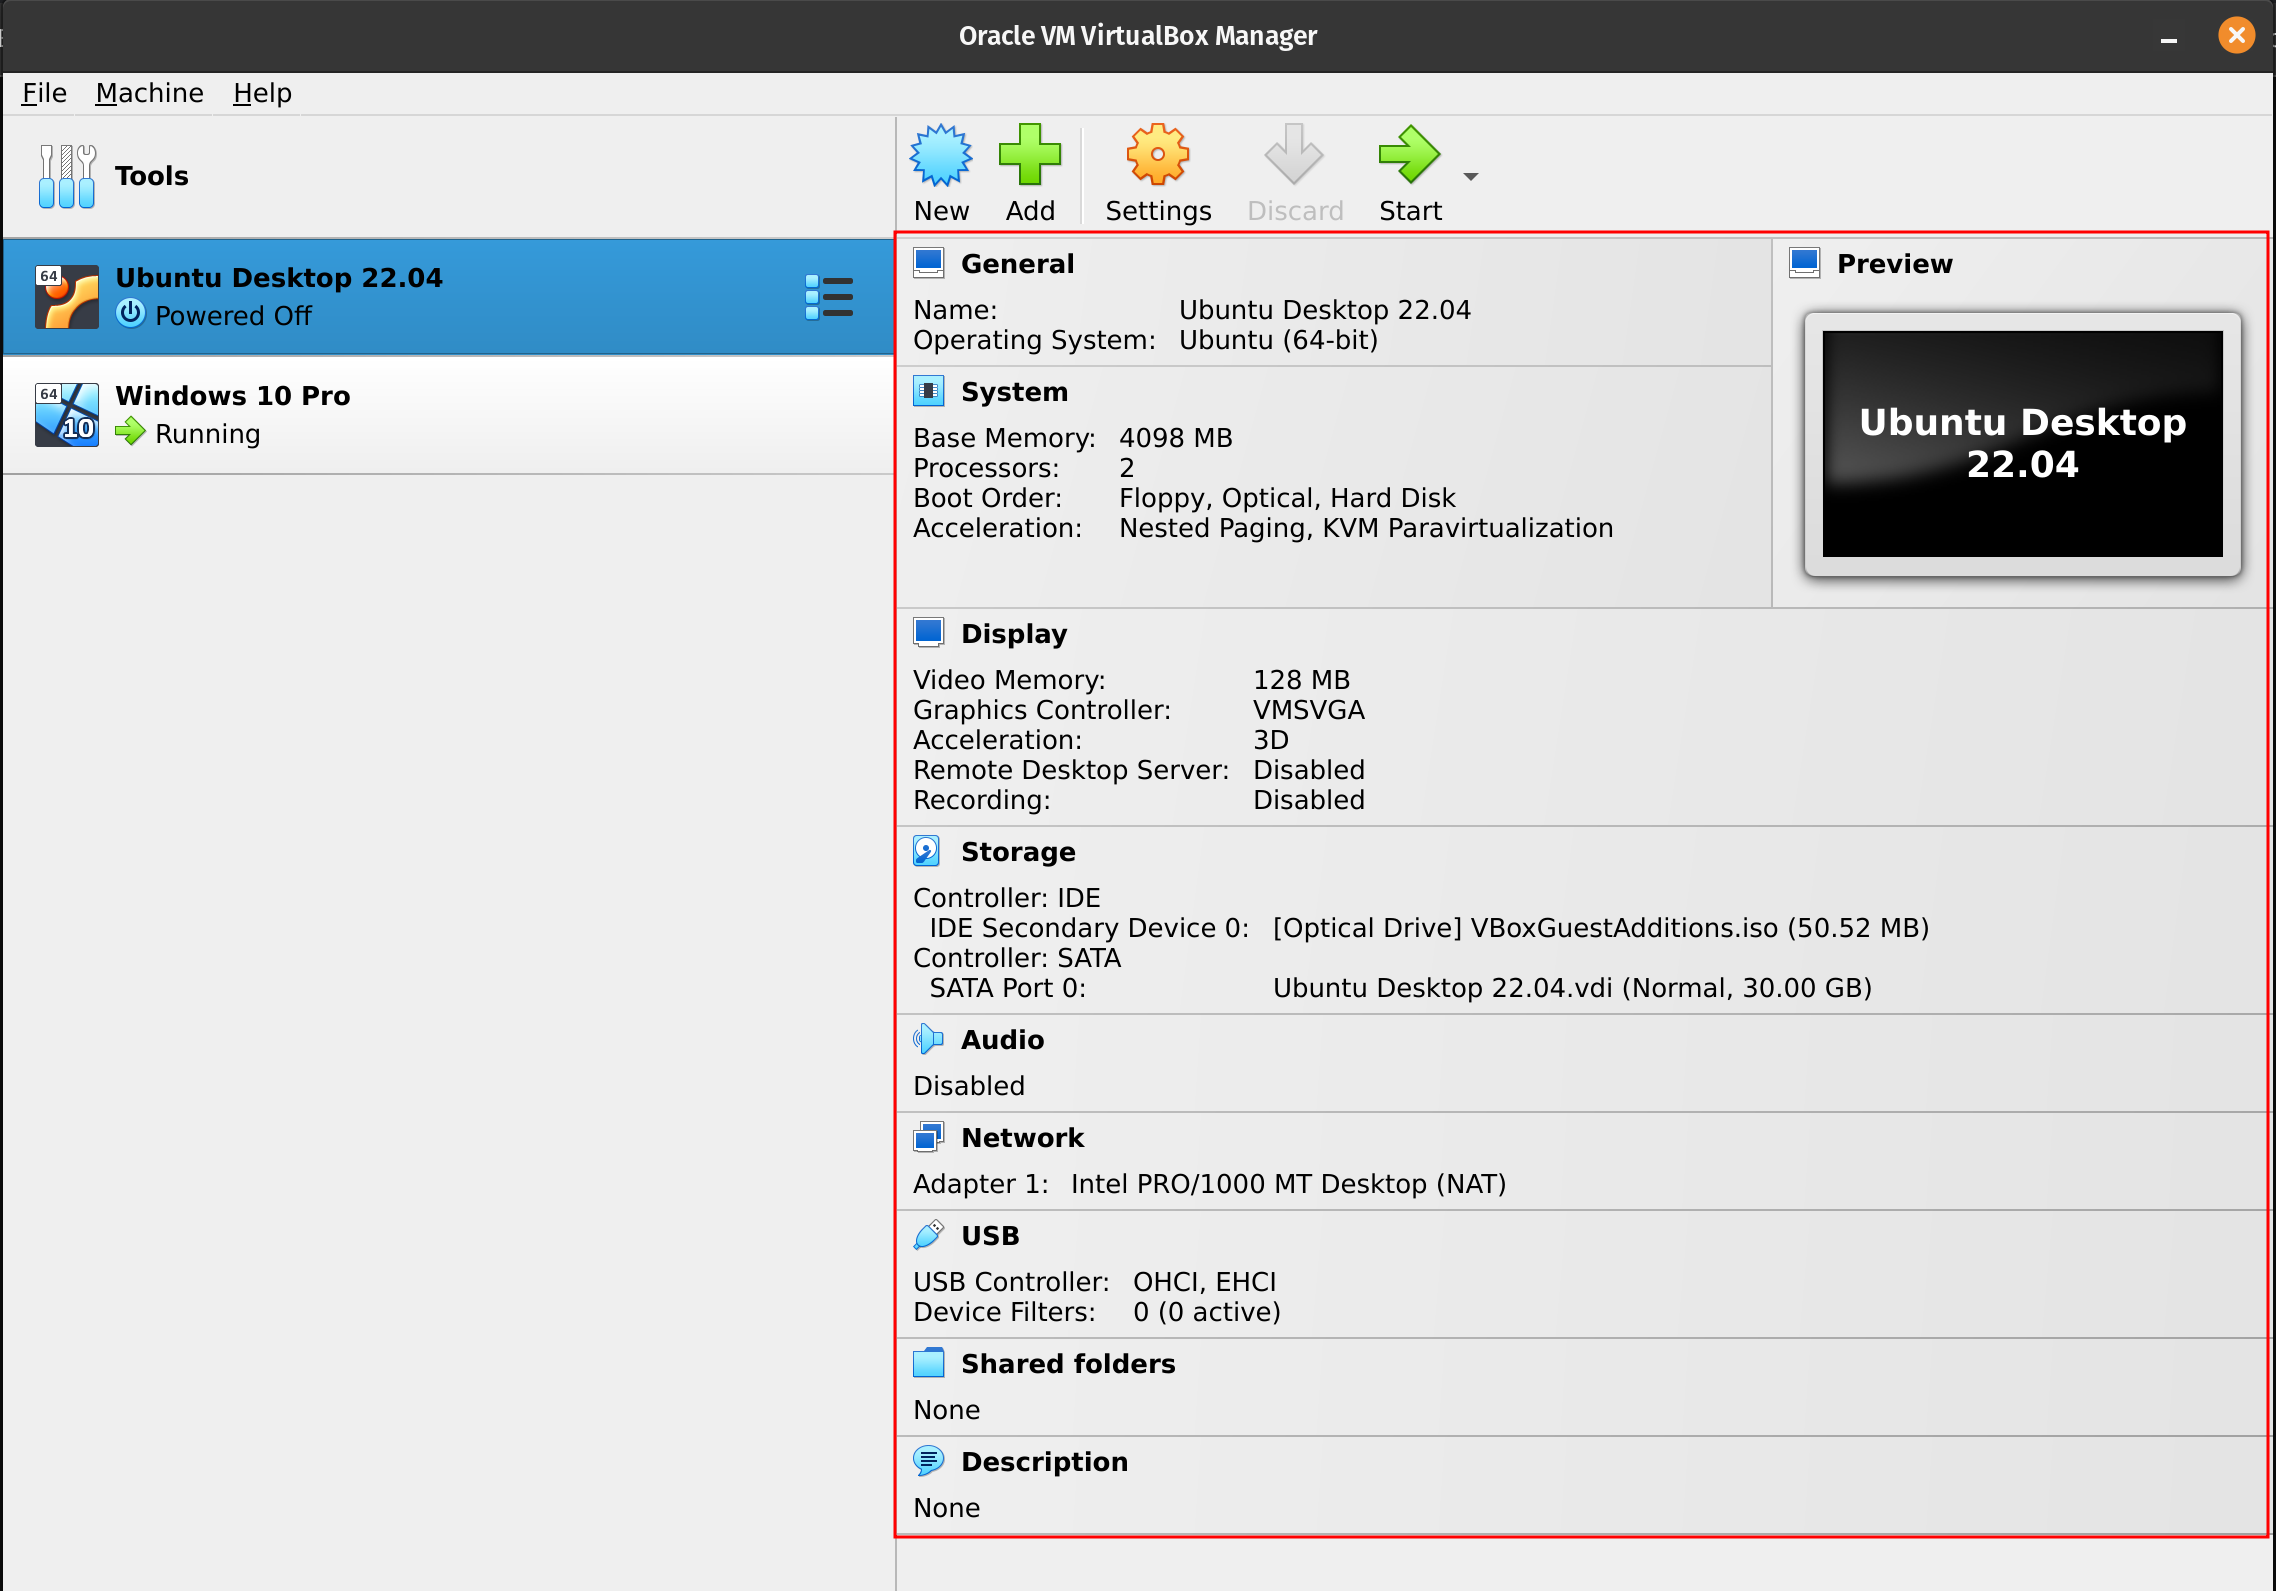
Example of how to create a virtual machine
This example was taken from the original lab so it will not match the settings specified above.

| virtual machine settings example |
|---|
 |
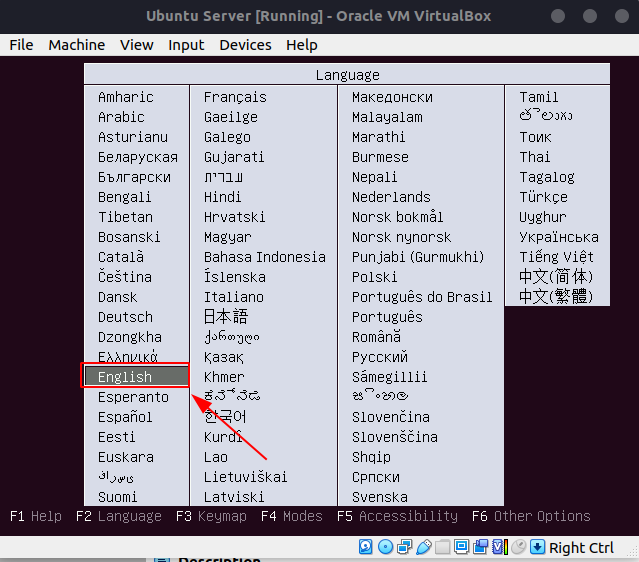
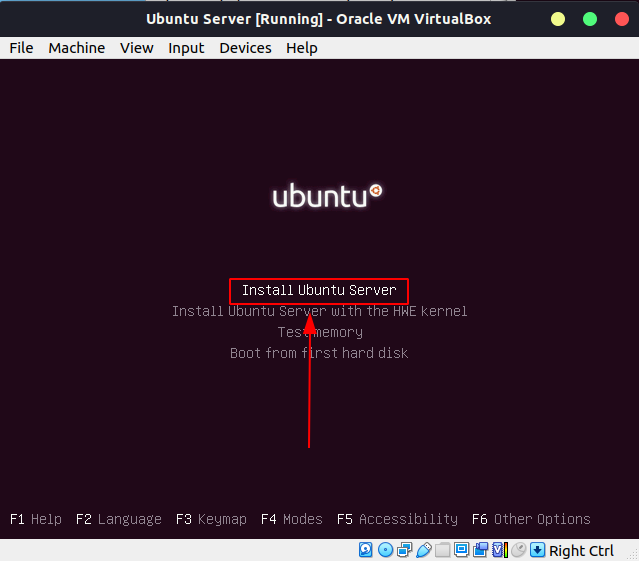
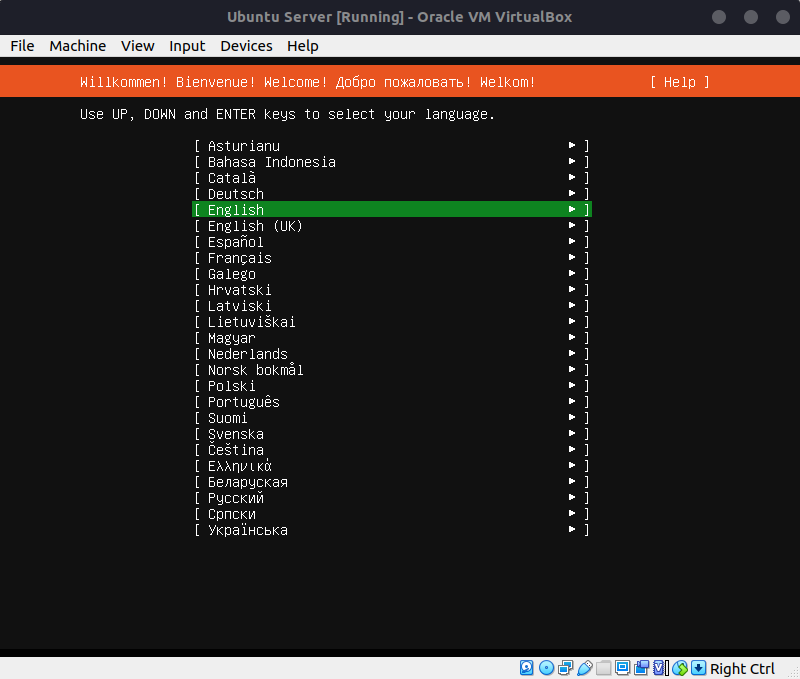
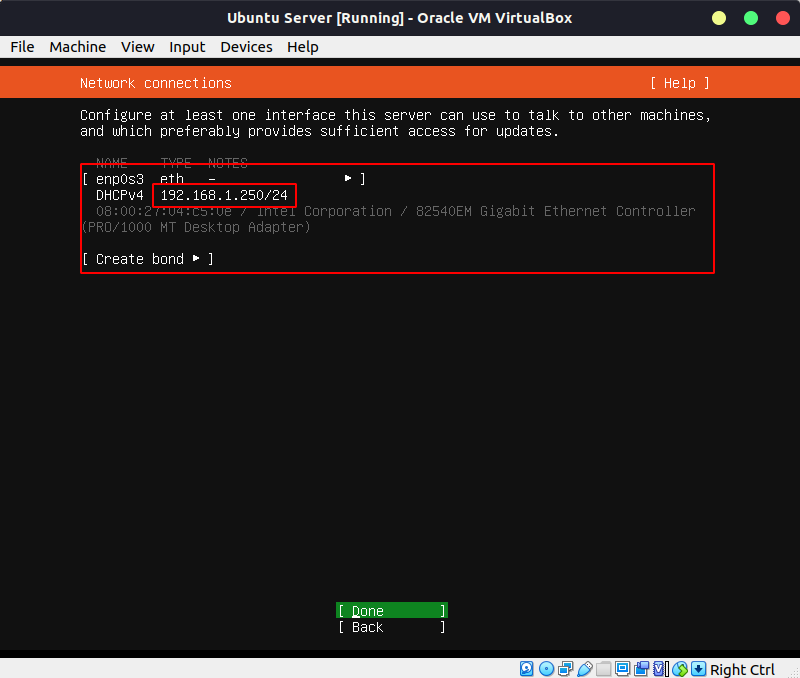
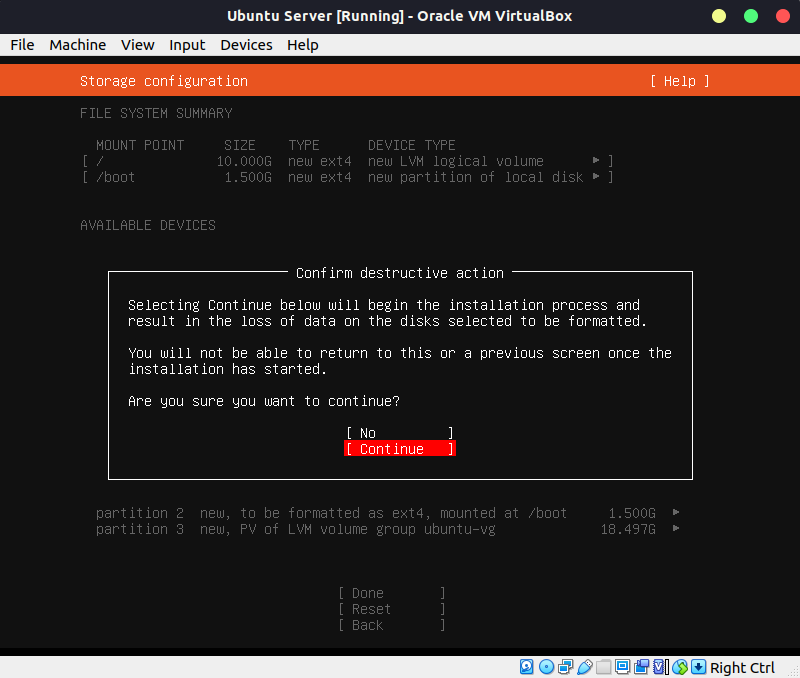
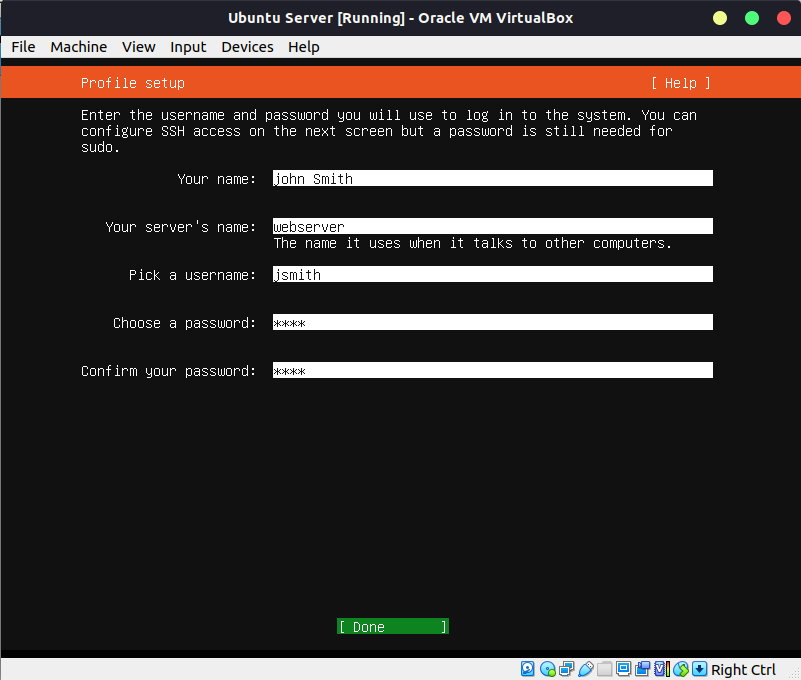
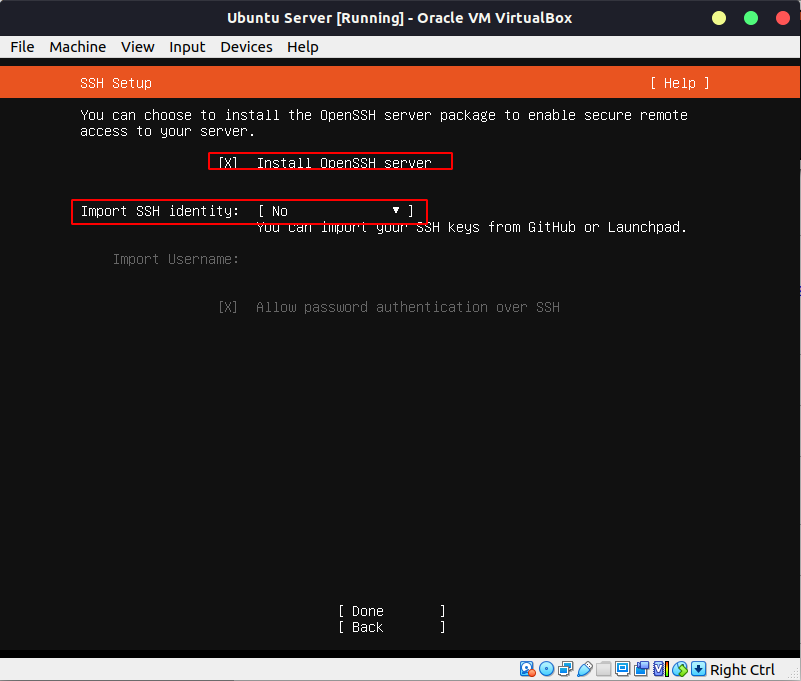
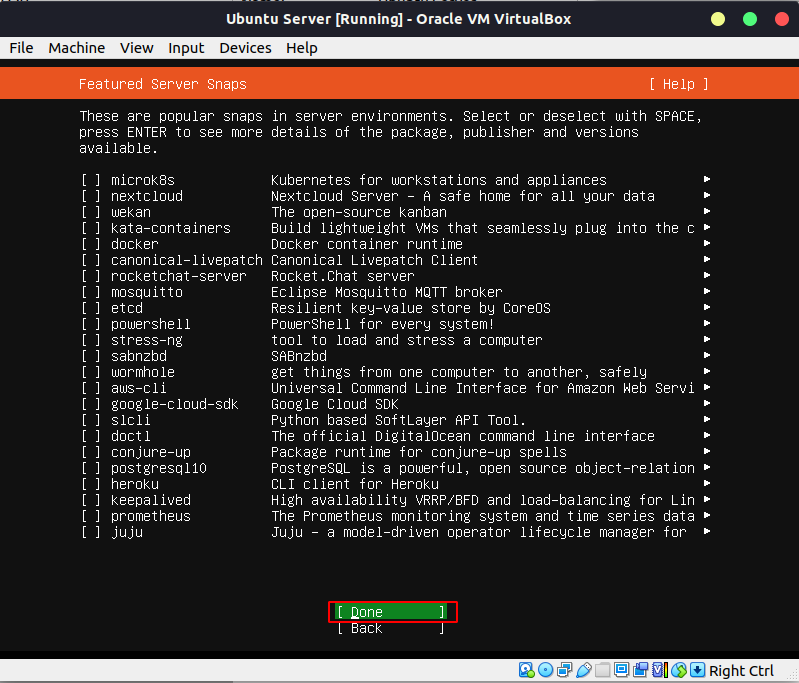
Step 3: Install Ubuntu
- Create a virtual machine that meets the requirements mentioned in the previous step. Here is an example (with different specs as it is an old gif)
- Turn on Virtual Machine
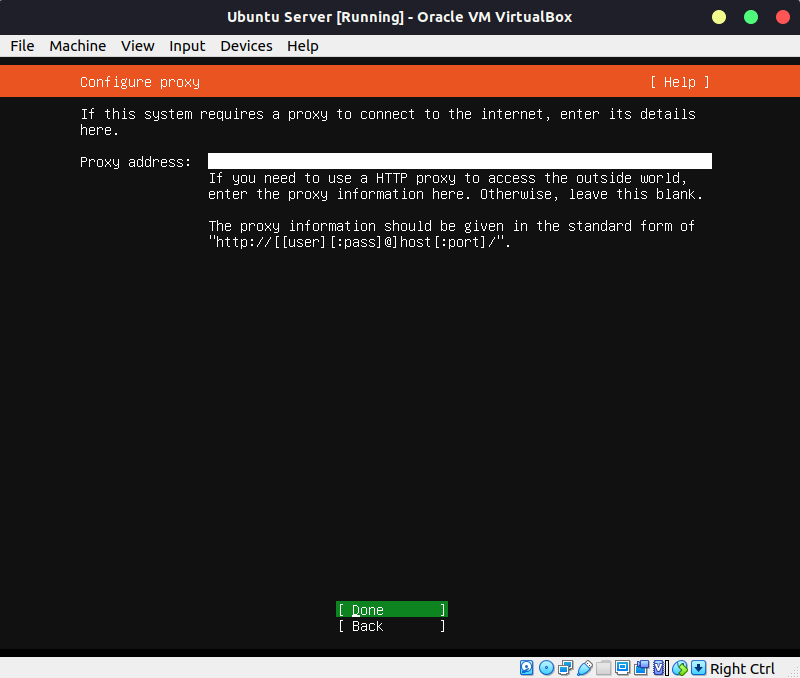
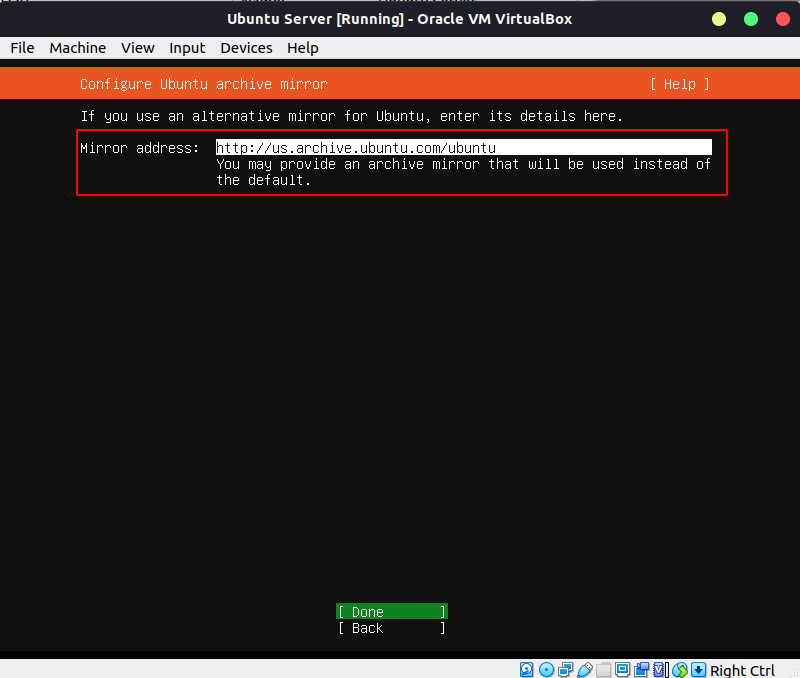
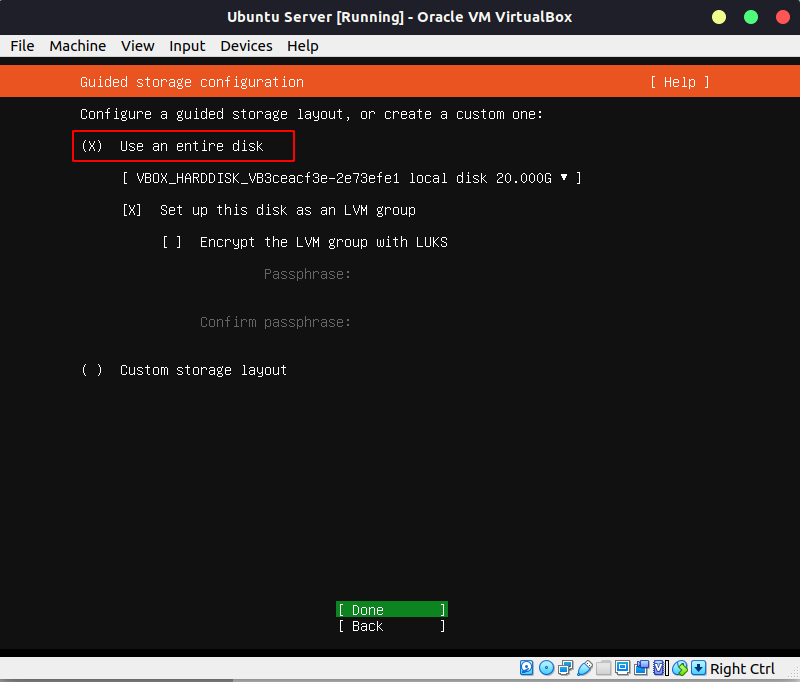
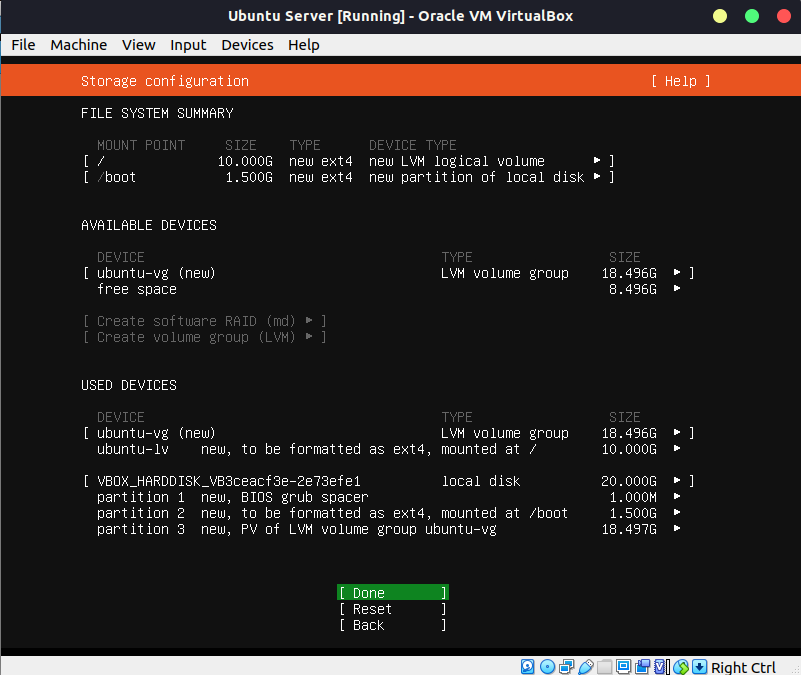
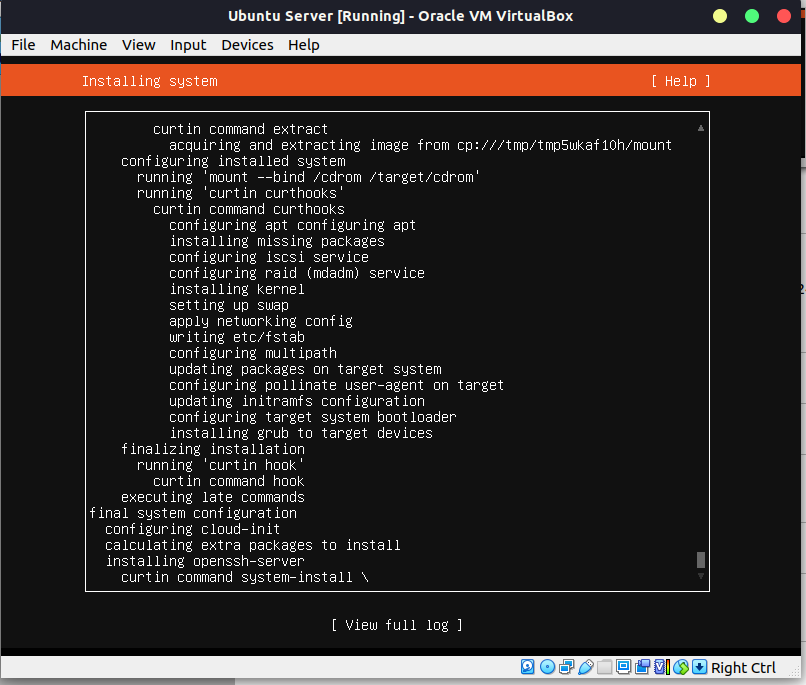
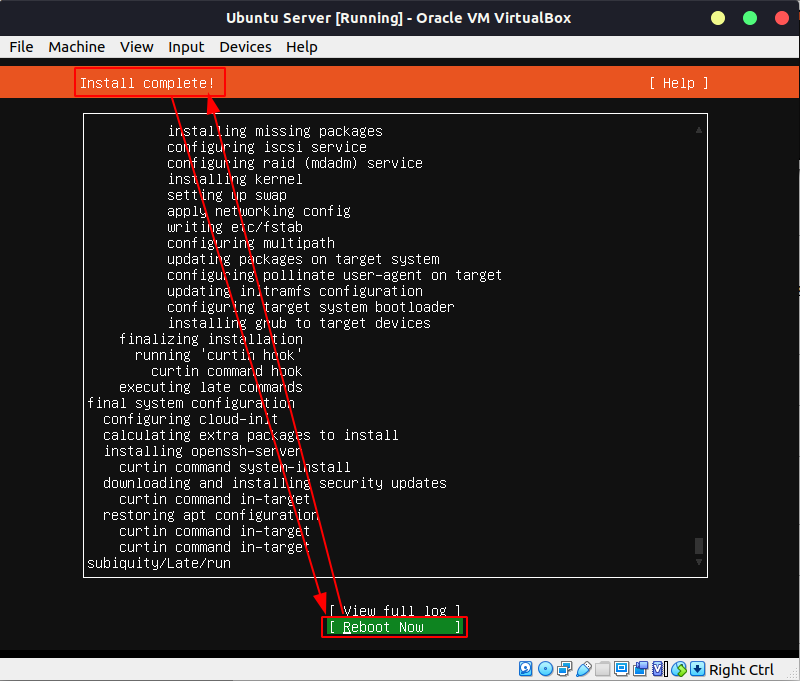
- Start the installer.
Step 4: Update and install Desktop environment:
Note: This step is long
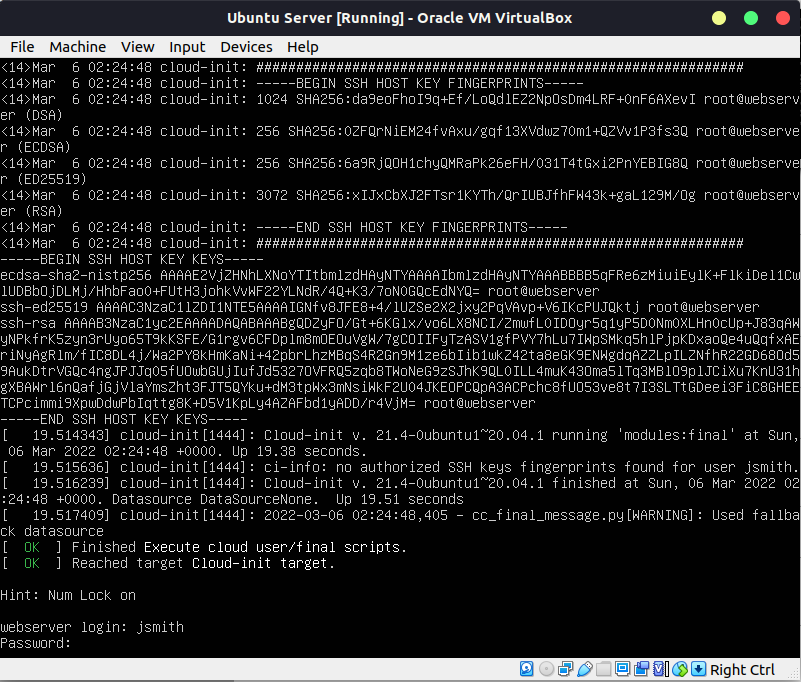
- Log in with your username and password
- Run the following command:
sudo apt update && sudo apt upgrade -y - The run this command:
sudo apt install ubuntu-desktop gnome-session-flashback lightdm -y - Reboot the vm. Use this command:
sudo reboot nowOnce the virtual machine boots up, type your password and click on the ‘Ubuntu’ icon. Select “GNOME Flashback(Metacity)” from the options and then sign in. Here is how to do it!
Step 5 Optimizing Ubuntu for the class
Install Guest Additions
Follow this video to install the guest additions:
Here are the steps:
- On the virtual machine window menu, click on “Devices” and then click on “Insert Guest Additions CD Image”
- Open the file manager (Home icon on the desktop) and then click on the disk
- Right click on an empty area of the file manager to open the menu and click on “Open in Terminal”
- Type the following command:
sudo ./VBoxLinuxAdditions.runRemember Linux is case sensitive so always double check your spelling
- Reboot your Virtual Machine and once you sign in, maximize the virtual machine window.
Here is how to do it:
Install and remove software
- Remove the following applications as they will not be needed. You can run these command on the terminal:
sudo apt purge apport aisleriot gnome-mahjongg gnome-sudoku gnome-mines  -y
sudo apt clean
sudo apt autoclean
- Install the following applications as we will use them through out the semester:
sudo apt install flameshot vlc deluge geany tilix -y
sudo apt install gcc make perl nemo git python3-pip -y
sudo apt install curl wget tree htop net-tools vim -y
sudo apt install neofetch neofetch caffeine samba smbclient gnome-tweaks -y
sudo apt install snapd flatpak gnome-software-plugin-flatpak gnome-software-plugin-snap -y
Note: You can run all the commands in one shot by creating a script and then executing the script. The gif below shows you how
Install Ubuntu restricted extras:
sudo apt install ubuntu-restricted-extras ubuntu-restricted-addons -y
When you see the screen below, use the tab key to select OK, the space key instead of enter, the arrow keys to select yes and the space bar again to agree to the terms and conditions:
Replace the current screenshot tool with flameshot
- Open the system settings
- Find the Keyboard settings
- Scroll down to keyboard shortcuts and click on “View and customize shortcuts”
- Scroll down to custom shortcuts
- Click the + icon to add a shortcut
- Name: flameshot
- command: flameshot gui
- key: print key in your keyboard
Step 6: Setup Git
- Sign in to your Github account.
- Open a terminal window and run the following commands:
- Set your username:
git config --global user.name 'your username here' - Set your email address:
git config --global user.email 'your email here' - Setup SSH authentication
- Generate an ssh key:
ssh-keygen -t ed25519 -C "your_email@example.com"
This creates a new SSH key, using the provided email as a label. When you’re prompted to:
"Enter a file in which to save the key,"
press Enter. This accepts the default file location. At the prompt, to type a secure passphrase, press enter for no passphrase. If you want to use a passphrase, go ahead as it provides an extra layer of security. However, for this course you do not need to add a passphrase. - Use the following command to see your public ssh key:
cat ~/.ssh/id_ed25519.pub
copy the entire output of this command to the clipboard. - In your github page, go to
settings>SSH and GPG KeysHere add your ssh key that you copied to the clipboard in the step prior. Typeyes(the whole word) and press enter and you are done - Test you ssh connection by using this command:
ssh -T git@github.com - Clone your github repository. Use these commands:
cd; git clone git@github.com:yourGithub-User-Name-Here/your-Repository-Name-Here


Step 7: Installing VS Code
- Download the .deb package
- Open the file
- Select the Software Center to install the package.
- Install the following extensions:
Time to submit this lab
- First, lets organize the repository
- Open the file manager
- Create the following folders:
labs,weekReports,finalExam,cheatSheets,notes - move all the files related to lab 1 to the
labsfolder - Inside the lab folder create 2 folders:
lab1andlab2. From this point on, every lab will have its own folder and so will every week report. - Move all the lab 1 files to the
lab1folder - Repeat the process for the week report 1
- Open the
cis106folder in VS Code - Inside the
lab2folder, create a file namedlab2.md - Add the following markdown to the file:
# Lab 2 Submission
## Virtual Machine settings


- Open a terminal and run the following command:
neofetch - Take a screenshot of the entire terminal window. Save the screenshot in the lab2 directory inside the cis106 directory. Name the screenshot
neofetch.png - Clear the terminal with the command:
clearand run the following command:curl -s https://cis106.com/assets/scripts/lab2_system_info.sh | bash - Take a screenshot of the entire terminal window. Save the screenshot in the lab2 directory inside the cis106 directory. Name the screenshot
script.png - Save and convert the file
lab2.mdfile to pdf - Open the vs code terminal and enter the following commands to commit and push your changes to github:
git pull git add . git commit -m 'lab2 finished' git push - In blackboard submit the following:
- The URL to the
lab2.mdfile in github - The
lab2.pdffile
- The URL to the
![]()
Special Note 1
This is a canonical lab for your learning. You will be making more virtual machines in the future. I suggest you create more virtual machines and then delete them. For example, find out what are the minimum requirements for installing windows 10 and then make a windows 10 virtual machine. Also, install other linux distributions as well. You do not need to keep these vms just use this lab to practice. Remember, when deleting virtual machines, make sure to select delete all files instead of just removing the vms. This will make sure that you recover your hard drive space.
Special Note 2
You are going to be using the git commands a lot. Here is a quick reference:
git clone repository/url/here: is the command to clone a repository where cloning means downloading a repository to your computergit pull: to pull/synchronize your repository from github to your local machine. Always run this command BEFORE you start working VS Codegit add .: to track all the changes made to your file.git commit -m "label for your changes here": this command will label all the changes you added with theaddcommandgit push: will send all your changes to your github repository
Always run the commands in this order:
pull=>add=>commit=>pushNever use the github website to make changes to your repository unless you know what you are doing and can remember to pull the changes before working on your local repository!