Lab 2 - Installing Ubuntu For Windows Users And Intel Macs
This is the default lab 2. There are other versions of this lab:
This version of Lab 2 is for Windows users (Windows 11 or 10) or Macbooks with capable Intel CPU. The alternative Lab 2 is for M series Macbooks because Virtualbox does not run well on M Series Mac.
Because your computer is not my computer, there can be issues that I have no way of accounting for. Other versions of this lab can be made upon request. I can also meet with you or work over zoom if you are having any issues. All I ask is that you are mindful of my time and yours.
Do not wait till the last minute!!
Video here
Lab 2 Installing Ubuntu 24.04 Windows Version
Note: If you are having too many issues with virtualbox, an alternative is to use VMware Workstation Player 17 Here is a video on how to complete this lab using VMWare workstation player:
Lab 2 - Installing Ubuntu Using VMWare Workstation Player
Table of Contents
- Lab 2 - Installing Ubuntu For Windows Users And Intel Macs
- Video here
- Table of Contents
- Presentations:
- Requirements
- Step 1: Enable Virtualization
- Step 2: Create a Virtual Machine
- Step 3: Install Ubuntu
- Step 4: Optimizing Ubuntu for the class
- Step 5: Setup Git
- Step 6: Install VS Code Extensions
- Step 7: Setting up Gnome Screenshot Tool
- Time to submit this lab
- Special Note Regarding the final exam:
Presentations:
Requirements
- Please go over the presentations before you do this lab. It will give you an idea of what we are trying to do here.
- Please go slow and take your time to do this lab. It is long but it is the core of this course.
- If you do not have a computer that meets the recommended criteria, please reach out to me and stop doing this lab.
NOTE!
- If your computer does not meet the required hardware, you will have a hard time completing all the work and the final project therefore be ready for some slow downs!
Step 1: Enable Virtualization
Before you can create virtual machines, you need to know if your computer can run virtual machines. There are a couple of steps you need to follow to find out the answer to this question:
- Find out what hardware your computer has:
- CPU and number of cores
- Amount of RAM
- Amount of Free Storage
- If your computer does not meet the criteria below, stop this lab and get in contact with me. We may be able to find an alternative for you but this can only be done on a 1 on 1 basis.
REQUIRED SPECIFICATIONS:
- CPU: Quad core CPU or higher
- RAM: 8GB or More
- Free Storage: 60GB or more
![]()
If you do not meet these requirements but your computer is close enough, you may be able to complete the course material. The downside is that your computer will be extremely slow.
If your computer meets or exceeds the above capabilities, then you need to check if virtualization is enabled. Follow this guide to know if your computer has virtualization enabled and if it does not, use the same guide to learn how to enable it. You can also use Speccy to find out if your computer has virtualization enabled.
If you are having troubles enabling virtualization, let me know immediately. DO NOT WAIT FOR THE LAST MINUTE! This part can take time!
Step 2: Create a Virtual Machine
Before you can create virtual machines, you need to install VirtualBox and VirtualBox Extension Pack. To download VirtualBox and the extension pack go to:
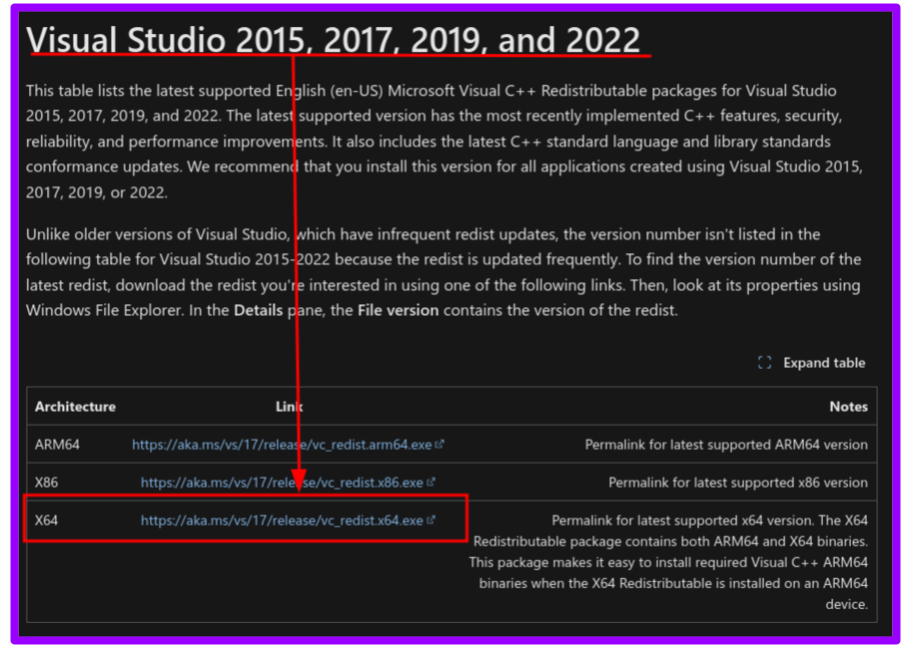
Make sure to select the right installer for your operating system:
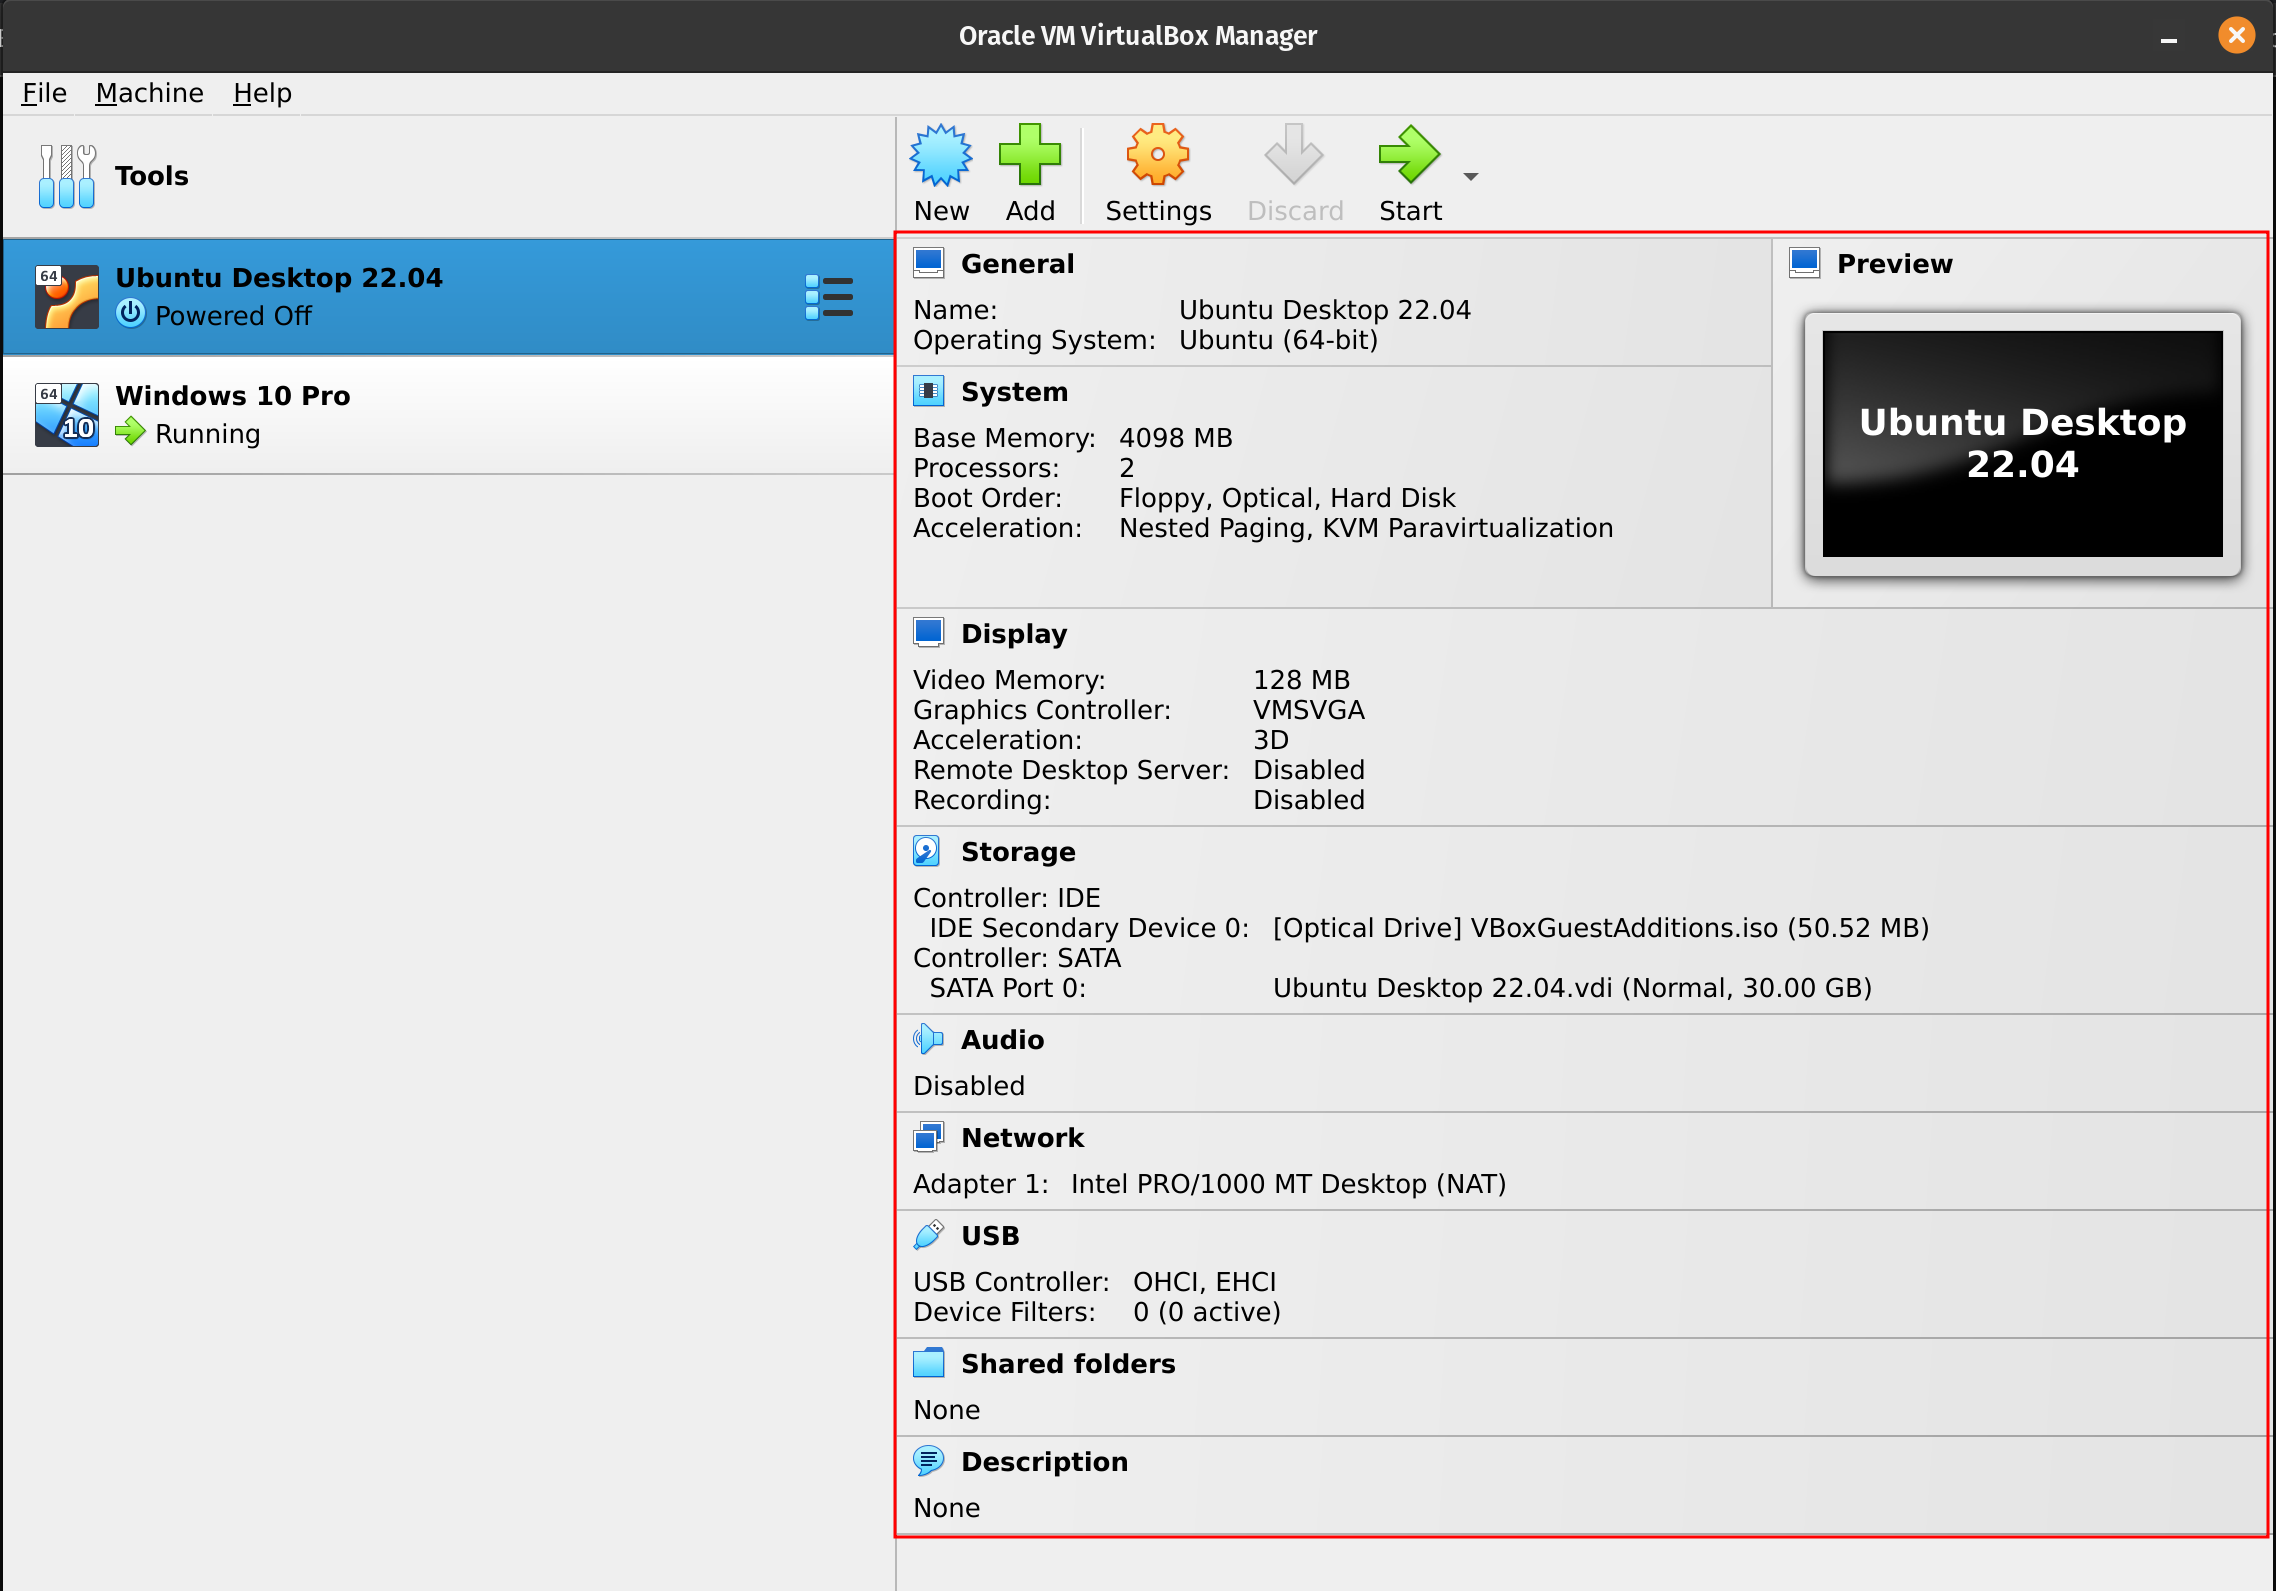
Make sure to install VirtualBox in your host computer. For Windows follow this video. For macOS follow this video. Once you have installed VirtualBox, create a virtual machine that meets these specifications:
- OS: Ubuntu 24.04 64Bits ISO URL
- HDD: 50 GB
- RAM: 4GB
- Video: 128 MB
- Audio Controller: Disabled (audio won’t be needed)
- CPU: 2 Cores
- Add this to description:
- Hostname: cis106vm
- User: student name (use your blackboard username or any other username of your choice)
- Password: pccc
- Shared Clipboard: Enabled - Bidirectional
- Drag n’ Drop: Enabled - Bidirectional

| virtual machine settings |
|---|
 |
Step 3: Install Ubuntu
Go over the presentation “Installing Ubuntu 24.04 in VirtualBox 7”. There, I have laid out every step with proper explanations. The presentation is using an earlier version of Virtualbox and Ubuntu but the differences are not very significant. I will do it in the video as well but it will benefit you to read the presentation.
Step 4: Optimizing Ubuntu for the class
Update and upgrade
- Open the terminal application and type the following command:
sudo apt update && sudo apt upgrade -y - The terminal will prompt you to type your password. Nothing will be shown to the screen as you type. That is expected!
- This may take some time depending on your internet connection and the number of available updates.
Install Essential packages:
- Install the curl command which will then be used to download a couple of script files.
sudo apt install curl -y - Use curl to download and run the following script:
essentials.sh
curl https://cis106.com/assets/scripts/essentials.sh -o essentials.sh
chmod +x essentials.sh
./essentials.sh
rm essentials.sh
- Install VS Code:
curl https://cis106.com/assets/scripts/vscode.sh -o vscode.sh
chmod +x vscode.sh
./vscode.sh
rm vscode.sh
- Install Librewolf and Brave Browser (optional):
curl https://cis106.com/assets/scripts/librewolf.sh -o libre.sh
curl https://cis106.com/assets/scripts/brave.sh -o brave.sh
chmod +x libre.sh
chmod +x brave.sh
./libre.sh
./brave.sh
rm libre.sh
rm brave.sh
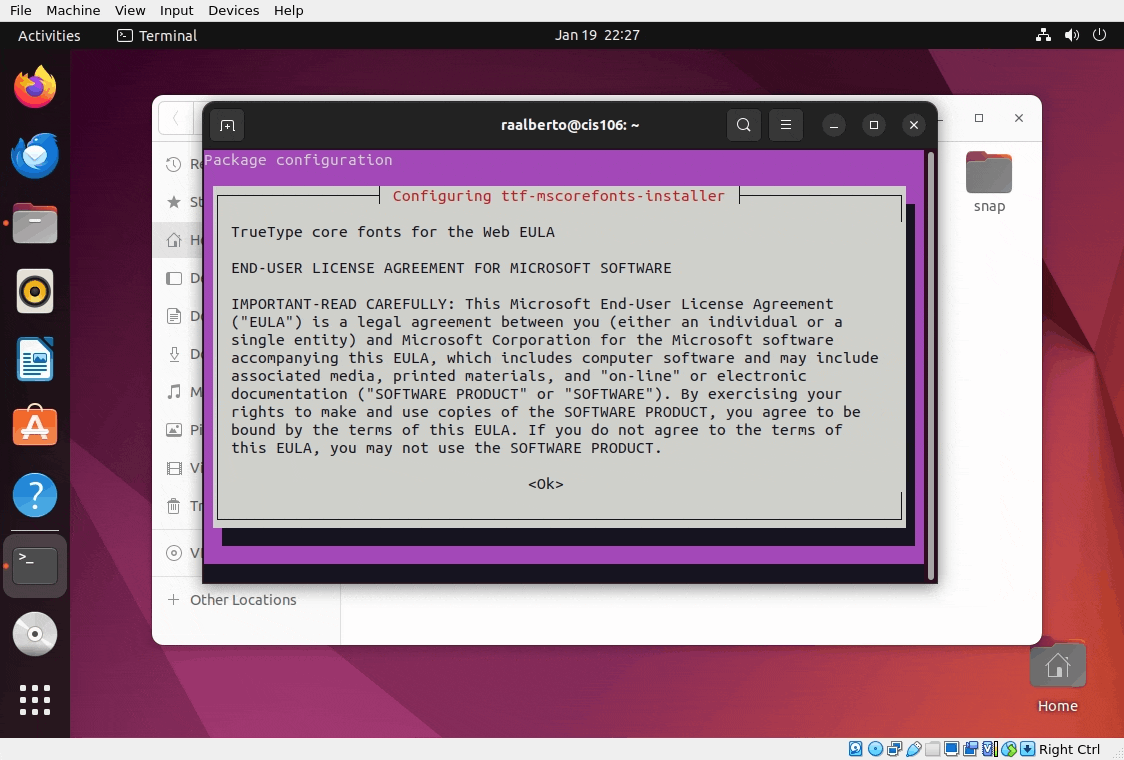
- Install Ubuntu Restricted Extras
sudo apt install ubuntu-restricted-extras ubuntu-restricted-addons -y
When you see the screen below, use the tab key to select OK, the space key instead of enter, the arrow keys to select yes and the space bar again to agree to the terms and conditions:
Install the guest additions for virtualbox - Option1 (easy)
- Insert the guess additions cd
- In the virtual machine menu at the top click on “Devices” then “Insert Guest Additions CD image”
- This will insert the installation disk and it will be accessible in Ubuntu’s Favorites bar
- Open the CD from the Favorites bar which will open it in the file manager.
- Click on the “Run Software” button located in the red banner. Click on “Run” in the message that will appear. Type your password and press enter. This will open a terminal to start the installation of the guest additions. Once the installation is complete, press enter in the terminal and reboot the virtual machine.

Now you can use full screen in your virtual machine. If you see any screen flickering or glitches. Enable or disable 3D acceleration in the virtual machine settings. You may need to enable Expert Settings in the virtual machine settings.
Install the guest additions for virtualbox - Option 2
Follow these instructions if for whateever reason the guest additions were not installed or the prompt to install it did not pop up when you clicked on “Run Software”.
- Insert the guess additions cd
- Open the cd in the file manager from the Favorites bar
- Right click on an empty area of the directory and click on open terminal
- Run these commands:
sudo apt install build-essential linux-headers-$(uname -r) -y
sudo ./VBoxLinuxAdditions.run
- Reboot the vm. You can use the command
sudo reboot now - Now your virtual machine can use the full screen and share the clipboard with your host machine

NOTE: If you are getting screen fliclering/glitches, you may need to enable 3D Acceleration. You will need to open the virtula machine settings, enable export mode and then toggle 3D acceleration ON
Step 5: Setup Git
- Sign in to your Github account.
- Open a terminal window and run the following commands:
- Set your username:
git config --global user.name 'your username here' - Set your email address:
git config --global user.email 'your email here' - Setup SSH authentication
- Generate an ssh key:
ssh-keygen -t ed25519 -C "your_email@example.com"
This creates a new SSH key, using the provided email as a label. When you’re prompted to:
"Enter a file in which to save the key,"
press Enter. This accepts the default file location. At the prompt, to type a secure passphrase, press enter for no passphrase. If you want to use a passphrase, go ahead as it provides an extra layer of security. However, for this course you do not need to add a passphase. - Use the following command to see your public ssh key:
cat ~/.ssh/id_ed25519.pub
copy the entire output of this command to the clipboard. - In your github page, go to
settings>SSH and GPG KeysHere add your ssh key that you copied to the clipboard in the step prior. Typeyes(the whole word) and press enter and you are done - Test you ssh connection by using this command:
ssh -T git@github.com - Clone your github repository. Use these commands:
cd; git clone git@github.com:yourGithub-User-Name-Here/your-Repository-Name-Here


Step 6: Install VS Code Extensions
- Install the following extensions:
Step 7: Setting up Gnome Screenshot Tool
Note: The default screenshot application does not work for us. However, gnome-screenshot gives us what we need. In the past, we used to use flameshot, however, it is still not supported under Wayland therefore we will move away from Flameshot for the time being. To setup Gnome-Screenshot, follow these steps:
- Install gnome screenshot: use the following command
sudo apt install gnome-screenshot -y - Open the keyboard settings in Ubuntu.
- Settings -> Keyboard -> View Customize shortcuts -> Custom Shortcuts -> Click the + icon to add a new shortcut
- In the dialog box add the following:
- Name:
gnome-screenshot - Command:
gnome-screenshot -i
- Name:
- Click the set screenshot button and press the print screen key in your keyboard or any other keyboard combination of your choosing.
- Click the replace button.
- Press the print screen key to test. Did it work? Chances are it did not.
- For some weird reason this does not work the first time we do it, therefore, repeat the process and make sure to spell the command correctly. See the gif for reference!
Time to submit this lab
- First, lets organize the repository
- Open the file manager
- Create the following folders:
labs,weekReports,finalExam,cheatSheets,notes - move all the files related to lab 1 to the
labsfolder - Inside the lab folder create 2 folders:
lab1andlab2. From this point on, every lab will have its own folder and so will every week report. - Move all the lab 1 files to the
lab1folder - Repeat the process for the week report 1
- Open the
cis106folder in VS Code - Inside the
lab2folder, create a file namedlab2.md - Add the following markdown to the file:
# Lab 2 Submission
## Virtual Machine settings


- Open a terminal and run the following command:
cpufetch | pv -qL 200or simplycpufetch - Take a screenshot of the entire terminal window. Save the screenshot in the lab2 directory inside the cis106 directory. Name the screenshot
cpufetch.png - Clear the terminal with the command:
clearand run the following command:curl -s https://cis106.com/assets/scripts/lab2_system_info.sh | bash - Take a screenshot of the entire terminal window. Save the screenshot in the lab2 directory inside the cis106 directory. Name the screenshot
script.png - Save and convert the file
lab2.mdfile to pdf - Open the vs code terminal and enter the following commands to commit and push your changes to github:
git pull
git add .
git commit -m 'lab2 finished'
git push
- In blackboard submit the following:
- The URL to the
lab2.mdfile in github - The
lab2.pdffile
- The URL to the
![]()
Special Note 1
This is a canonical lab for your learning. You will be making more virtual machines in the future. I suggest you create more virtual machines and then delete them. For example, find out what are the minimum requirements for installing windows 10 and then make a windows 10 virtual machine. Also, install other linux distributions as well. You do not need to keep these vms just use this lab to practice. Remember, when deleting virtual machines, make sure to select delete all files instead of just removing the vms. This will make sure that you recover your hard drive space.
Special Note 2
You are going to be using the git commands a lot. Here is a quick reference:
git clone repository/url/here: is the command to clone a repository where cloning means downloading a repository to your computergit pull: to pull/synchronize your repository from github to your local machine. Always run this command BEFORE you start working VS Codegit add .: to track all the changes made to your file.git commit -m "label for your changes here": this command will label all the changes you added with theaddcommandgit push: will send all your changes to your github repository
Always run the commands in this order:
pull=>add=>commit=>pushNever use the github website to make changes to your repository unless you know what you are doing and can remember to pull the changes before working on your local repository!
![]()
Special Note Regarding the final exam:
- The final exam is in person.
- The exam is performance based and will require access to a Linux Virtual Machine.
- If you do not have a laptop/computer you can bring to school, a Linux Computer will be made available to you but you need to request it early because the amount of PCs is limited